Cross stitch for beginners, explained by two stitchers with over 40 years between us. Start here for fabric, floss, needles, reading a chart and working out your first project.
The cloth you stitch on is possibly more important than the threads you use. In this post we’ll get slightly obsessive about Aida fabric (or Aida cloth), probably the most common fabric for cross stitch.
Known for its easy-to-count squares and clear structure, Aida fabric makes it much easier to keep track of your stitches. It’s often the first fabric people use for cross stitch, and many experienced stitchers still reach for it regularly. Once you’re comfortable using Aida you can move onto other fabrics like beautiful linens, and even cross stitching on clothing!
But to get started, in this guide we’ll explore what Aida fabric is, its history, and why it’s such a go-to choice for cross-stitch enthusiasts.
If you’re just getting started and want a clearer picture of how all the pieces of cross stitch fit together, start with our Beginner’s Guide to Cross Stitch, which includes tools, fabric, thread, and how to begin your first project.
What’s In This Post
What Is Aida Cloth?
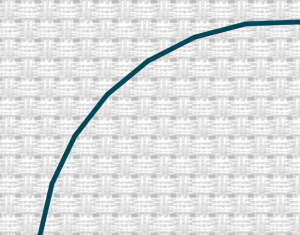
Aida fabric is a unique, open weave fabric, often stiffened with starch. It has evenly spaced holes and a grid-like structure that makes it incredibly easy to count stitches and see where your needle should go next.
The centre threads of each little square are raised, which helps to plump up the middle of each little cross.
Aida is not only ideal for cross-stitch, it was designed specifically for cross stitch!
Aida is almost always made from 100% cotton, which is part of why it’s so pleasant to work with. It holds its shape while you stitch, then softens up beautifully the first time you wash your finished piece. You’ll occasionally find blends (Fiddler’s Cloth, for instance, mixes in a little polyester and silk for that rustic oatmeal look), but plain cotton Aida is what you’ll meet most often.
Why was Aida Cloth Made?
It was first developed in the 1890s by Zweigart & Sawitzki, a well-known German textile company.
The goal was to make cross-stitch easier. Before Aida cloth was developed, stitchers often worked on linen and other evenweave fabrics, which didn’t always offer the clear, consistent structure that Aida provides. Aida cloth made cross-stitch more approachable, paving the way for today’s modern cross stitch intricate designs and detailed work.
Aida cloth’s invention was a significant turning point in the history of cross-stitch. It’s a much loved hobby that crosses generations of people all over the world, of any age, gender or culture.
Wikipedia says it’s sometimes called Java Canvas but we’ve only ever heard it called Aida cloth.
Why Is It Called Aida Cloth?
Ayda-what-now? Yep, no one can really agree on how to say this. Personally we say ay-da. We’ve heard other people say aye-ee-da, like the Verdi opera.
There’s some speculation that the name was changed from Java to Aida to take advantage of the buzz around the opera Aida that was popular when Aida cloth was invented, so you know – maybe?
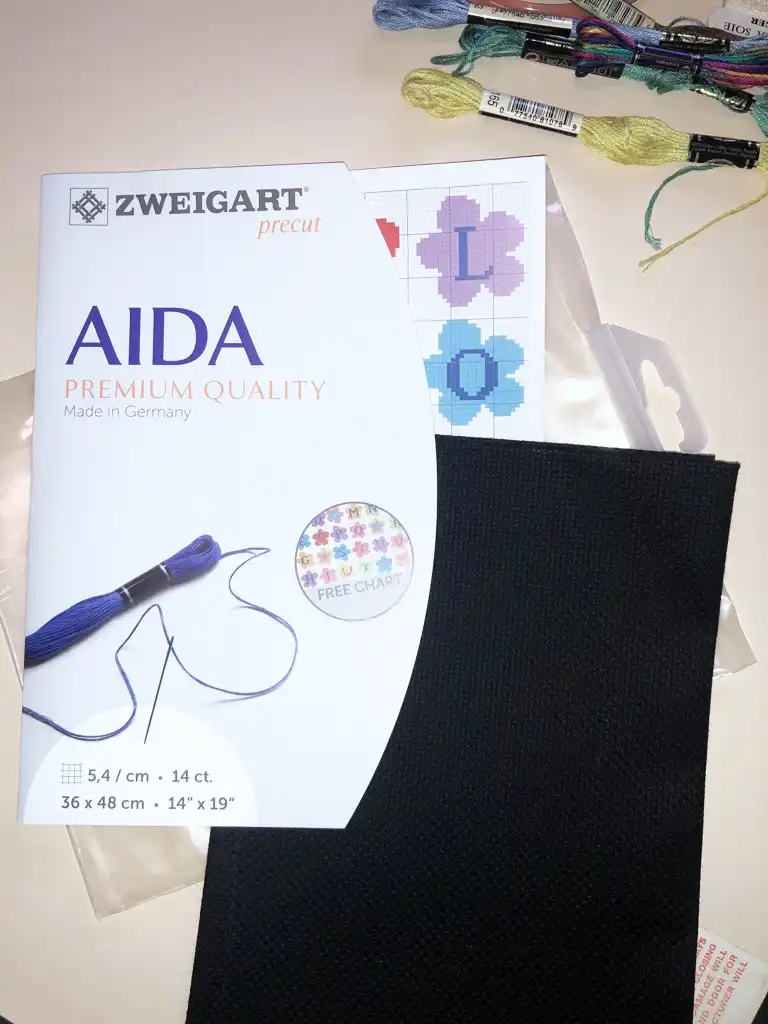
Though you can now buy other brands of Aida, we personally prefer the Zweigart brand. Some aida-style fabrics are so stiff they’re unpleasant to work with, and some are just too soft. But it’s not always easy to get, depending on your local craft supply stores, so use what you can find.
You can also often pick up pieces at your local charity/thrift store. It’s a great budget way to get started.
Stop Buying Duplicate DMC Floss
This printable mini-book is a pocket-sized DMC inventory you can carry in your project bag. Mark what you own and what you still need, then check it at a glance in the shop, no more scrolling through notes on your phone. Trusted by hundreds of stitchers (and counting!) Instant download, print as many copies as you like.
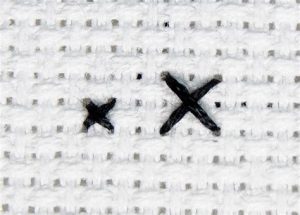
Aida fabric comes in various ‘counts,’ which refers to the number of squares per inch of fabric.
‘Count’ means the number of squares in an inch. So 11 count has 11 squares to an inch, which means 11 stitches to an inch. The lower the count, the bigger each stitch, and the bigger your finished piece. The higher the count, the smaller and finer the stitches, and (let’s be honest) the more likely you are to need a good light and possibly a magnifier.(Luckily there’s lots of options for these. )
Here’s how the common counts stack up:
Count
Stitches per inch
Best for
A 100 × 100 design comes out at
11 count
11
Beginners, children, big bold designs, anything you want larger
about 9 inches
14 count
14
The all-rounder. Most kits and patterns assume it
about 7 inches
16 count
16
A bit more detail without a big jump in difficulty
about 6¼ inches
18 count
18
Finer, more detailed work for confident stitchers
about 5½ inches
20 / 22 count
20–22
Small, intricate pieces, good eyesight or good magnification
about 4½–5 inches
11 count is wonderfully forgiving. The holes are big, the squares are easy to see, and it’s our go-to for teaching anyone new. There’s also a chunky 6 count called Herta that’s brilliant for very young children or quick “big stitch” projects.
14 count is the one to reach for if you’re not sure. It’s the default in most kits, it’s what most designers quote their thread and size estimates for, and it sits in that sweet spot of easy-to-see but still detailed enough to look lovely.
16 and 18 count are the natural next step once 14 feels comfortable. The jump from 14 to 16 is gentler than people expect; 18 is where you’ll want decent light.
20 and 22 count are for when you want something small and fine. Beautiful results, but go in knowing the holes are little. Or, you could stitch over 2 to get a much larger finish.
Not sure what count a mystery piece of fabric from your stash actually is? Our free printable Aida Ruler in our Cross Stitch Planning Starter Kit sorts that out in seconds. Just lay it against the fabric, match the squares to the lines and you’ll quickly see the size.
One thing worth knowing: the same design will finish at very different sizes depending on the count you choose, so it’s always worth a quick calculation before you cut. We walk through exactly how to do that in How to Calculate Cross Stitch Fabric Size.
Aida Cloth Colours
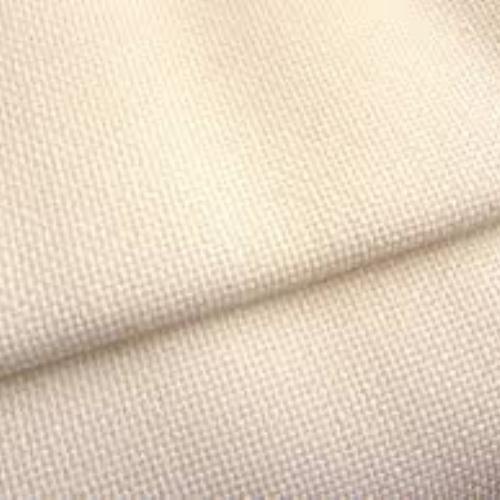
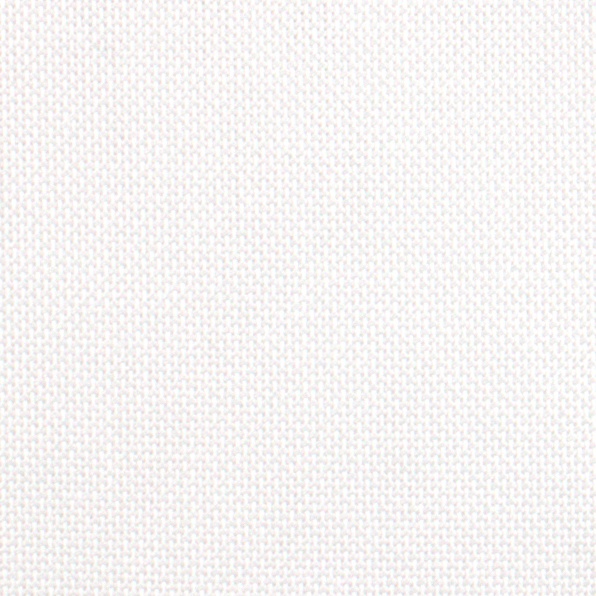
Aida is most common in ecru/cream and white, and there’s a good reason almost everyone starts there: a neutral background makes your thread colours pop, and nearly every design looks great on one or the other. As a rule, white suits bright, crisp designs, while ecru gives a softer, warmer, slightly vintage feel.
But you’re not at all limited to neutrals. Aida comes in:
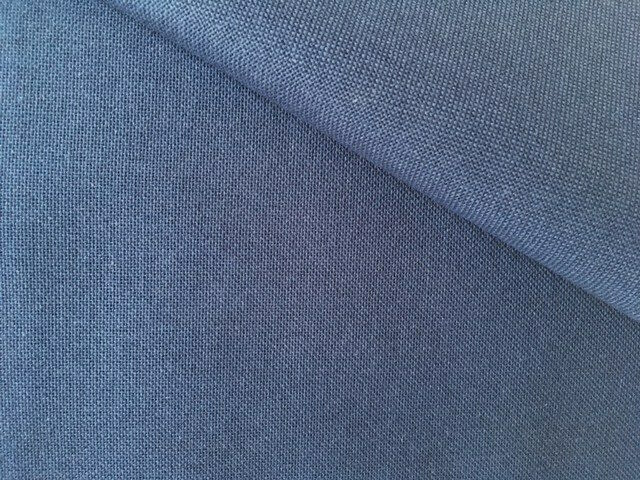
Classic colours: white, cream, and black. Black is dramatic and makes bright threads glow, though it’s harder on the eyes to stitch on, so save it for when you’re feeling patient.
Bright and mid-tone colours: reds, blues, greens, pinks and more, for when the fabric itself is part of the design. A coloured background can save you stitching a sky or a sea.
Hand-dyed and variegated Aida: mottled, multi-toned pieces that add gentle variation behind your work. Gorgeous for samplers and anything you want to look a little special.
Patterned and textured Aida: themed prints and novelty weaves for specific projects.
Different sizes and colors of Aida cloth
You can also buy hand-died Aida (or even dye it yourself) for those special projects. Really, your only limit with Aida is your imagination. But for your first few projects, you probably want to stick to white or ecru, which are usually the easiest to buy.
A Word on Brands
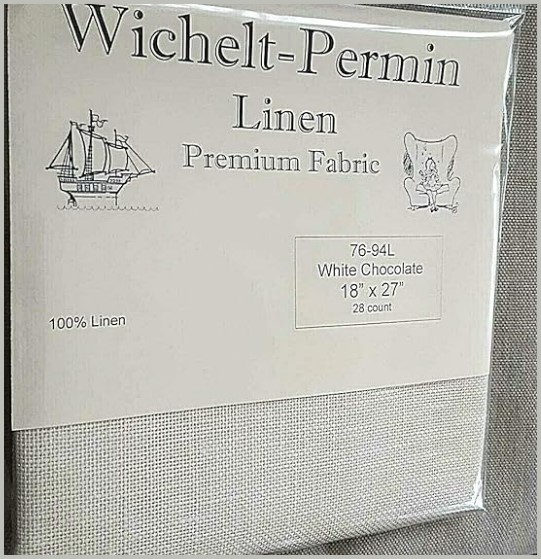
We personally prefer Zweigart Aida. They’re the original designers and makers, and the quality is reliably good. But they’re not the only option. You’ll also come across Wichelt (sometimes sold as Permin), Charles Craft, and Fiddler’s Cloth (that rustic oatmeal-coloured blend), along with plenty of unbranded Aida.
It’s worth trying a couple to find what your hands like. But don’t agonise: if the only Aida you can find is unbranded, it’ll almost certainly do the job just fine.
How to Use Aida Cloth
Aida is such a kind place to start cross stitching for a beginner. On Aida, you stitch over one. That is, each little block of the weave holds one cross stitch. One square, one X. You bring your needle up through the hole at one corner, down through the diagonal, and the grid does much of the work of shaping those perfect little crosses for you.
That’s the whole reason Aida exists, and it’s why it’s so much gentler for beginners than evenweave or linen, where you count threads and stitch over two.
Because the holes are large and clearly defined, you may not even need a hoop. Aida’s natural stiffness holds things steady on its own.
If you’d like to see how those compare, we’ve got a guide to even-weave fabrics too, but there’s absolutely no rush to leave Aida behind. Plenty of stitchers happily stay here for life. Here at Lost In Cross Stitch, we happily still stitch on Aida more than half the time, though we do love our linen!
Choosing the Right Aida for Your Project
Decide how big you want your finished project to be. We stitch on all sizes, depending on how we want to use the finished piece. If you want it larger, use 11 count, if you want it smaller use 16 or 18.
Beginner Projects: Stick to 11 or 14 count for an easier stitching experience.
Intermediate and Advanced Projects: Opt for 16 or 18 count for intricate designs and finer details.
The color of your Aida can dramatically affect your project’s look. Choose one that contrasts well with your threads so that your design ‘pops’ on the fabric.
Aida Cloth FAQ
Can you cut Aida cloth?
Yes. Use sharp fabric scissors and cut along a straight row of holes so your edges stay square. Leave at least 5 cm (2 inches) of spare fabric around the design for framing or finishing, and more if it’s going into a frame with a mat. Aida frays as you handle it, so tape or overcast the edges, or run a line of Fray Check along them.
Do you need to wash Aida before stitching?
No. Aida is stiffened with starch so the squares stay crisp and easy to count, and washing it first softens that away. Stitch on it straight from the packet, then gently wash your finished piece when you’re done. That’s when it softens up.
Can you embroider on Aida?
You can, as long as the stitches suit the grid. Backstitch, blackwork and simple satin stitch all work well. Freer surface embroidery is harder, because the holes push your needle into set positions and the open weave shows between stitches. For that kind of work, a closely woven fabric such as quilting cotton, calico or linen is easier.
What’s the difference between fiddler’s cloth and Aida?
Fiddler’s cloth is a type of Aida. It has the same square weave and counts, but it’s woven from a flecked blend that gives it a rustic, oatmeal look. It suits samplers, country and primitive designs, where bright white Aida can look a bit stark.
What to Look at Next
Now that you understand what Aida fabric is and how to choose the right one for your project, the next step is deciding what else you’ll need to get started.
Knowing how to calculate cross stitch fabric size before you cut saves fabric, money, and frustration. This guide walks through the formula, explains why margins matter more than you might think, and includes a quick reference table for different finishing methods.
We also review the most popular free online calculators so whether you prefer to do the maths yourself or let a tool handle it, you’ll know exactly how much fabric to cut.
The Quick Answer
This is the formula:
Divide your stitch count by your fabric count to get your finished design size in inches. Then add 2–4 inches on each side for finishing margins. If you’re stitching over two on linen or evenweave, halve the fabric count first.
The rest of this post explains why it works, what happens when you skip steps, and how to choose the right margin for your finishing method. Plus we give you a handy reference table to keep in your stitching kit.
The Simple Formula (Step by Step)
Calculating fabric size comes down to four steps, and you need to complete all four before you put your scissors near your fabric:
Step 1: Know how you’ll finish the piece
Your finishing method determines how much margin you need—so it’s worth deciding before you cut. Hoop finishing needs less extra fabric than professional framing. A pillow needs seam allowance. If you’re not sure yet, plan for the most fabric-hungry option you might choose, so you don’t close off possibilities later.
Not sure what your options are? Our guide to finishing methods covers over 20 ways to finish cross stitch, from hoops to cushions to professional framing and more.
If you like to have all your project details in one place before you start, our Cross Stitch Organizing Bundle helps you plan, track, and finish your stitching projects.
Step 2: Find your stitch count
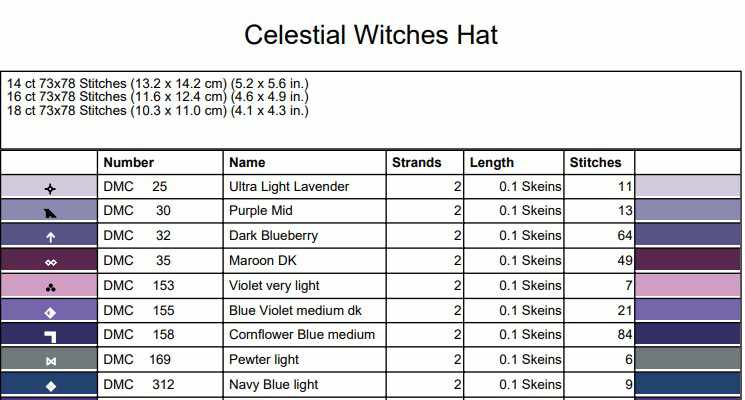
Your pattern should list the design dimensions in stitches—something like “140w × 200h” or “140 × 200 stitches.”
Example cross stitch fabric size details – most patterns have similar
Step 3: Divide by fabric count
Fabric count tells you how many stitches fit in one inch of your fabric. Divide your stitch count by your fabric count to get the finished design size in inches.
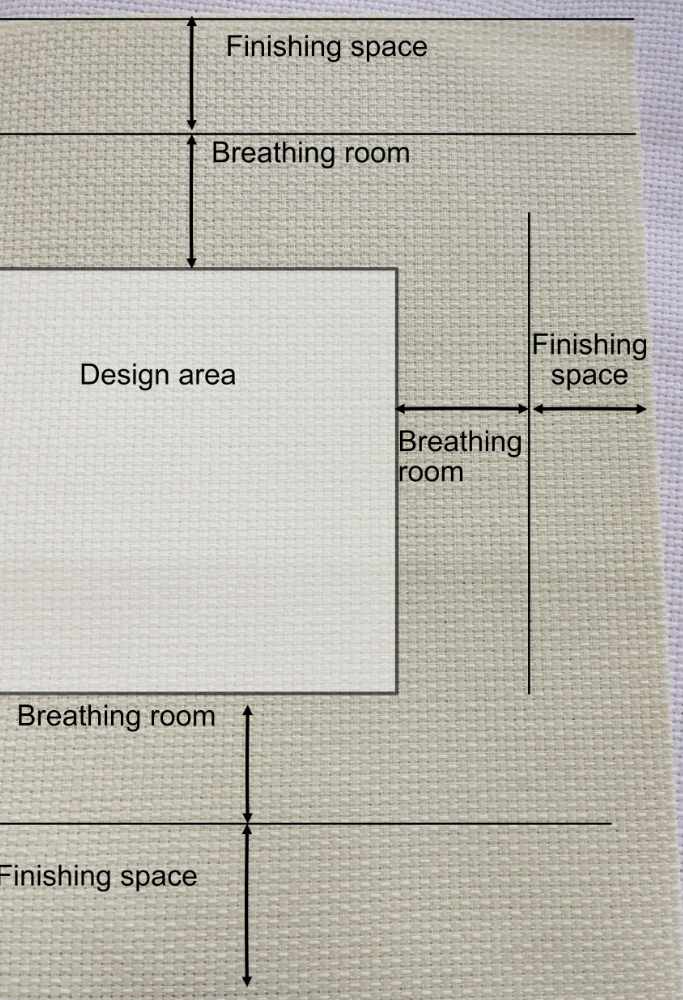
This is the step people skip and regret. You need extra fabric both for visual breathing room and for the practical business of finishing. How much depends on your preferences and your finishing method.
4a. Breathing room around the design
This is the empty fabric you’ll see between your stitching and the edge of the hoop or frame, the visual border. How much is completely your personal preference, but 1–2 inches on each side is common. If you prefer your design right to the edge, or you’re doing a full-coverage piece, skip this.
Continuing our example using 2″ each side of the design:
Width: 10″ for design + 4″ (2″ left and 2″ right) for breathing room = 14″ wide Height: 14.3″ for design + 4″ (2″ top and 2″ bottom) for breathing room = 18.3″
4b. Margins for your finishing method
This is the fabric you won’t see. It’s what gets wrapped, tucked, or laced behind the frame or hoop. How much you need depends on how you’re finishing the piece (see the table below).
Continuing our example: Adding 2″ finishing margins per side for professional framing:
Margins aren’t just “nice to have.” They’re functional. Without enough fabric around your design:
Hooping becomes impossible. Your hoop needs something to grip. If the design runs to the edge, there’s nothing to hold. Then you’re
Framing gets difficult or expensive. Framers need fabric to wrap around the backing board and create tension. Too little margin means your options shrink or disappear.
You limit your future choices. Maybe you’re planning to hoop-finish this piece, but what if you change your mind later and want to frame, or do a wall hanging? Cutting generous margins now keeps your options open.
And here’s the thing: you can’t add Aida fabric back. Once it’s cut, it’s cut. Wasting a bit of fabric (even the pricey stuff) is so much better than discovering halfway through a project that you’ve run out of room. I promise you, you’ll never finish that stitch. It’s heart-breaking.
Not sure which finishing method you’ll use? Our guide to finishing methods covers over 20 options, from hoops to pillows to professional framing.
Quick Reference: Margins by Finishing Method
Different finishing methods need different amounts of margin. Remember to first add optional breathing room of 1–2″ each side, 2–4″ total visible space around your design.
Finishing Method
Margin Per Side
Total Added
Notes
Display hoop
2” (5 cm)
4” (10 cm)
Enough to tuck and secure behind the hoop
Standard frame
3” (7.5 cm)
6” (15 cm)
Room for stretching and mounting
Professional lacing
4” (10 cm)
8” (20 cm)
Framers need extra for tensioning
Self-framing (foam board)
3” (7.5 cm)
6” (15 cm)
Similar to standard framing
Pillow or ornament
1–2” (2.5–5 cm) (more if it’s a small design going onto a large pillow)
2–4” (5–10 cm)
Seam allowance plus handling room
Not sure yet
3–4” (7.5–10 cm)
6–8” (15–20 cm)
When in doubt, go bigger
For more on pillows, ornaments, and other finishing options, see our posts on cross stitch decor.
Worked out your fabric size? The next job is preparing it properly. Here’s how to set up your fabric for stitching, including finishing the edges so they don’t fray while you work.
Common Mistakes That Waste Fabric (or Ruin Projects)
Forgetting to halve the count for over-two stitching
This is the one that catches people out. When you stitch over two threads on linen or evenweave, your effective stitch count is half the thread count.
28-count linen stitched over two = 14 stitches per inch (not 28).
Miss this, and your finished design will be twice the size you expected. That’s either a very expensive mistake or a very different project than you planned.
(If “over two” is new to you, our cross stitch glossary explains all the terminology.)
Not accounting for the finishing method
You calculated the stitched size perfectly—but forgot you need 4” margins for professional framing. Now you’re short. This is especially painful when the stitching is already done.
Trusting “it’ll fit” without doing the maths
Eyeballing is not a strategy—especially when you’re working with specialty fabric that costs real money. Thirty seconds with a calculator beats thirty hours of re-stitching.
Assuming the pattern’s listed size applies to your fabric
Many patterns list finished size for one specific fabric count (often 14-count Aida). If you’re using a different count, that number doesn’t apply to you. Always recalculate for your actual fabric.
Free Fabric Calculators
If maths isn’t your thing, these free online calculators do the work for you. They all do something slightly different so have a look at them all and choose the one that does what you need.
Important note: Most calculators give you design size plus a generic finishing margin. They don’t account for breathing room. So if you want visible space around your design, add that to your total margin before using the calculator.
Thread-Bare.com We really like this one. It shows results for multiple fabric counts side by side, which is useful if you’re still deciding which count to use. It starts with example measurements, very helpful.
Lord Libidan Enter your numbers, get your answer in inches and centimetres. Very handy feature to also add your finishing dimension. Also gives you needle and floss size recommendations.
123Stitch.com Separate calculators for Aida and linen/evenweave, and allows for extra finishing size.
Needlework Tips & Techniques Includes a toggle for over-one vs over-two stitching, plus margin guidance built in. Good if you’re working on evenweave and want to double-check your thinking.
Yarn TreeAlso very comprehensive – actually suggests needle size, strands of floss etc.
Our free printable Aida Ruler helps you identify your fabric size quickly and accurately. It’s part of our free Cross Stitch Planning Starter Kit.
FAQ
How much extra fabric do I need for cross stitch?
Add 2–4 inches per side depending on your finishing method. Hoops need less (2”); professional framing needs more (4”). When in doubt, add 3–4 inches and keep your options open.
What if I’m stitching over two on linen?
Halve the thread count first. 28-count linen stitched over two gives you 14 stitches per inch, the same as 14-count Aida. Use that number in your calculations.
What happens if I cut my fabric too small?
You may not have enough margin to finish the piece properly, or at all. It’s one of the most frustrating mistakes in cross stitch because there’s often no fix. For damage control options, see our post on dealing with cross stitch mistakes
Do I measure the fabric count or the stitch count?
Both matter. Fabric count is how many holes (or threads) per inch. Stitch count is how many stitches in your design. Divide stitch count by fabric count to get finished size in inches.
Can I use a calculator instead of doing the maths?
Absolutely. The free calculators listed above handle everything, including the over-two adjustment for linen. Just double-check that you’ve entered the right numbers.
What to Read Next
Now that you know what size to cut, here’s where to go next:
When you start a cross stitch project, the pattern usually includes a chart and, in most cases, a color and symbol key or legend. At first glance these pages can look complicated, especially if you have never stitched from a chart before.
This post explains how to read cross stitch charts and color keys work, what information they provide, and how stitchers commonly keep track of their progress while stitching.
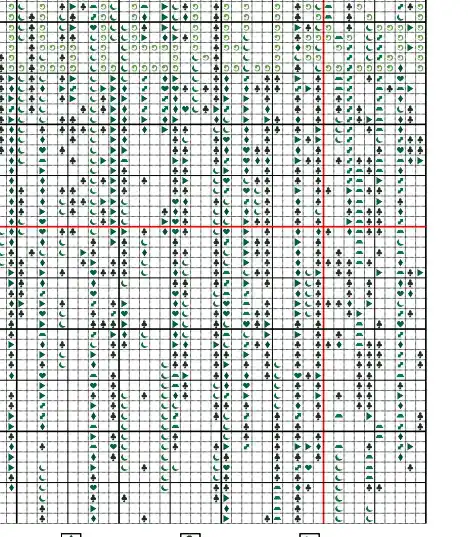
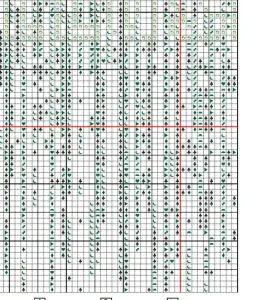
A cross stitch chart is a grid that represents the finished design.
Each square on the chart equals one stitch on the fabric.
Depending on the pattern, charts may use symbols, colors, or a combination of both to represent the floss color and show where each stitch goes.
Many charts use symbols rather than blocks of color. This makes them easier to read and print, especially for detailed designs or black-and-white patterns. In these cases, the symbols correspond to floss colors listed in the key.
Other charts may use color shading, particularly in digital patterns. Even then, there is usually a key or legend that confirms the exact floss colors to use.
A chart shows you:
where each stitch goes
which symbol or color belongs in each position
how the design fits together overall
Once you understand the layout, the chart becomes a reference as you stitch, rather than something you need to study constantly.
Alphabets are just another kind of chart. Once you can read one, you can add names, dates, or a short quote to almost any design. Our guide to using cross stitch alphabets walks through spacing, centring, and getting lettering to sit neatly.
What the Color Key tells you
This is the section of the pattern you’ll refer to when choosing and preparing your threads.
A typical color key includes:
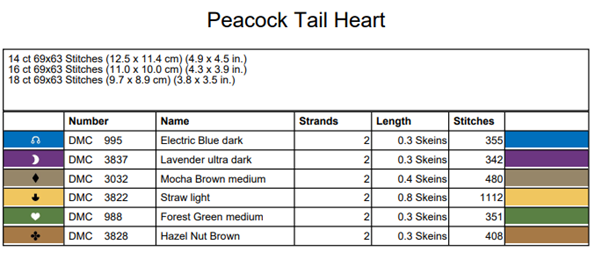
Floss color and number The specific color chosen by the designer, often listed by brand and number, such as DMC 995 Electric Dark Blue.
Chart symbol or color The symbol or color you’ll see on the chart grid.
Number of strands to use How many strands of floss to stitch with for that color.
Stitch count How many stitches of that color appear in the design.
Finished design size The expected size of the finished piece on different fabric counts, such as 14 count or 16 count Aida.
Reading through the key before you start helps you prepare your materials and avoid surprises once stitching is underway.
Reading a simple 10×10 block
Goal: match a symbol on the chart to the key, stitch it, and mark it off.
Pick a small area to start with (a 10×10 block is ideal).
Choose one symbol that repeats a few times in that block.
Find it in the key and note the floss number (and strand count, if listed).
Count from a clear reference point (center lines, bold 10-grid line, or a stitched area).
Stitch that symbol wherever it appears in the block.
Mark it complete (highlight, pencil, or app) before switching to the next symbol.
Tiny tip: If two symbols look similar, double-check the key every time you swap colors — it’s faster than unpicking.
Following the designer’s color choices
For early projects, it’s usually best to follow the designer’s color choices exactly.
Designers select colors so that shades work together and details remain clear at the intended size. Substituting colors before you are comfortable reading charts and keys can make the pattern harder to follow.
Once you have more experience, experimenting with color substitutions becomes much easier and more predictable.
Using the chart when buying floss
Most digital patterns include a separate page showing the color key. This can be printed or saved on your phone and used as a shopping reference.
When buying floss:
take the key with you – it usually indicates how many skeins of floss you need
check your existing stash first
buy only the colors listed for the project
If a listed color is unavailable, choose a close match deliberately rather than guessing later.
Keeping track as you stitch
As you stitch, you’ll need a way to keep track of which parts of the chart you’ve already completed. Stitchers use a range of simple methods, and there is no single correct approach.
Common ways people track progress include:
Marking the chart as you go Using a pencil, pen, or highlighter to mark completed stitches, rows, or sections.
Using a working copy of the chart Print or photocopy an extra copy so the original stays clean, or so the design can be stitched again later.
Using a digital chart or app Some stitchers prefer marking stitches on a tablet or device instead of on paper.
Any of these ways can help you keep track of where you’re up to, avoid losing your place, or re-counting stitches unnecessarily.
Backstitch: how to read the lines on a chart
Backstitch usually shows as thin lines drawn over the grid. It’s used for outlines, faces, letters, and crisp details.
Backstitch is usually done after the cross stitches.
The line often runs between holes, not “inside squares.”
On many charts, backstitch lines connect grid intersections (the fabric holes), so focus on where the line starts and ends.
If backstitch looks messy at first, that’s normal until the full outline is in place. The clean look comes from the whole set of lines working together.
Half stitches and quarter stitches (fractional stitches)
Some patterns use partial stitches for smoother edges and curves.
Half stitch: one diagonal (like half of an X).
Quarter stitch: one diagonal from the center of a square to a corner.
Three-quarter stitch: a half stitch plus a quarter stitch in the same square.
Patterns usually show these with special symbols or a note. If you’re new, it helps to stitch these slowly and treat them as “detail work” rather than the main stitch.
Common beginner mistakes with charts and keys
These are some of the issues beginners often run into when learning to read charts.
Mixing up similar symbols Some symbols look alike at a glance. Double-check the key when changing colors.
Ignoring strand counts Stitching with the wrong number of strands can change coverage and overall appearance.
Assuming color names are interchangeable Similar-sounding colors may look very different once stitched. Use the exact color numbers listed when possible.
Forgetting to check finished size Finished size depends on fabric count. Always confirm that the design will fit your fabric.
Spending a little time with the chart and key before you start saves time and frustration later.
What To Look At Next
Once you’re comfortable reading charts and keys, you might like to:
This guide covers the essentials of setting up fabric for cross stitch, including cutting fabric to size, finishing the edges, finding the center of the design, and hooping the fabric so it is ready to stitch.
Before you start stitching, it pays to set your fabric up properly. A few basic steps at the beginning can prevent fraying, help you place the design accurately, and avoid running out of space partway through a project.
It really is as simple as taking it out of the package and stabbing it with your threaded needle. After you’ve checked off the following.
Common Beginner Fabric Setup Mistakes
A few setup mistakes can make cross stitch harder than it needs to be. You’ll find solutions to these mistakes in the post, below.
Cutting fabric too small Leaving no margin around the design can make finishing impossible and may force you to abandon the project.
Skipping edge finishing Unfinished edges fray over time and reduce the usable fabric area.
Starting without finding the center This increases the risk of the design drifting off one side of the fabric.
Overstretching the fabric in the hoop This can distort the fabric holes and affect stitch tension.
Assuming setup does not matter Small setup steps have a big impact on how smoothly the project goes.
Prepare Your Fabric
Cut to size and allow for margins.
Cross stitch designs are not meant to sit right at the edge of the fabric. You need extra fabric on all sides for handling, hooping, framing, or other finishing later. Once stitching is underway, that space cannot be added back.
As a general rule, allow at least 2 to 3 inches (5 to 7 cm) of extra fabric on each side of the design. If you’re not sure, go larger.
Wasting a bit of fabric (even though it’s pricey) is much, much, much better than having too little. Believe me, the pain of that is never worth saving a few inches of fabric.
Most patterns list the finished stitch size of the design. Use that measurement as your starting point, then add your margin on all sides. If the design technically fits on the fabric but leaves very little space around the edges, always use a larger piece.
Running out of fabric late in a project usually means the hours already stitched are lost. Planning fabric size carefully at the start avoids that risk.
Prevent Fraying
You need to hem the edge of the fabric somehow because you’ll be handling it a lot! Threads start to come out and then you’ve got pokies that will catch on your embroidery floss. That’s just annoying.
And, the longer you take to finish your project, the more the edges will fray and you’ll end up with a smaller useable piece. That’s a problem if your design is only just fitting on to the fabric – no edges to wrap around a backing board or hoop.
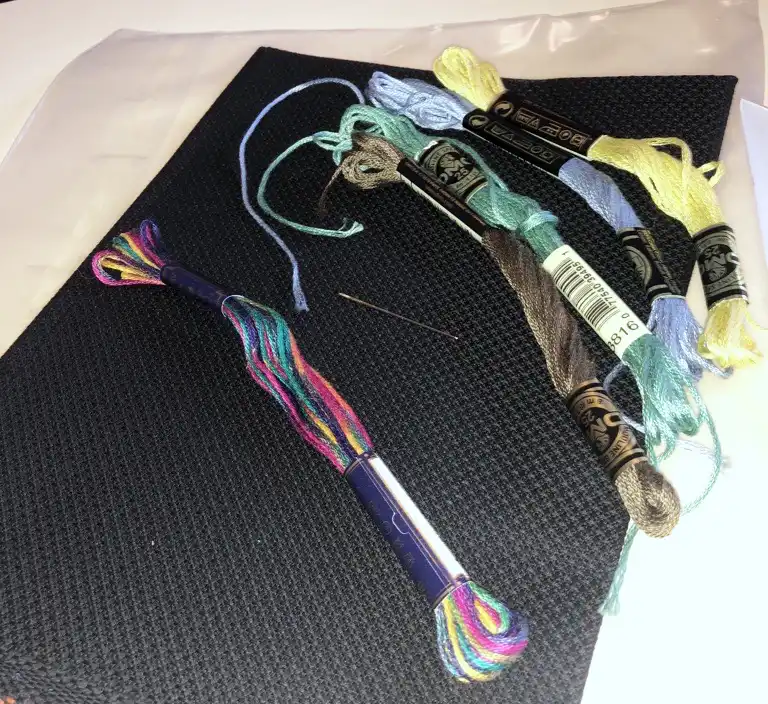
Black Aida with a serged/overlocked edge.
We overlock (serge) the edges because that’s easy for us. A running stitch hem is fine too, or zig zag. Or even a hand-stitched hem or overlock.
Some people use masking tape and that works for them. Personally I’m always worried that the glue will stay on the fabric and cause issues (no idea what kind of issues 😊) so overlocking it is for me!
Pre-Wash (Optional)
Some stitchers prefer to pre-wash their fabric to prevent color bleeding and to soften it.
We usually skip this step and do a gentle hand wash after stitching instead, to remove any body oils that could stain the fabric over time.
Setting Up Fabric for Your Project
Find The Right Side
Technically there is a right side and a wrong side to Aida cloth, but it’s very subtle.
Run your fingers across the fabric – one side will feel a little scratchy. That’s the wrong side. So the slightly smoother side is the ‘right’ side.
Honestly there’s not that much difference, so pick a side and get started.
Just keep using the same side as the ‘right’ side, and you’ll be fine!
Find the Center
Fold your fabric to find the center point for your first stitch. Most patterns recommend you start in the middle so that you don’t run out of space on one side. No one wants to frog all their stitches!
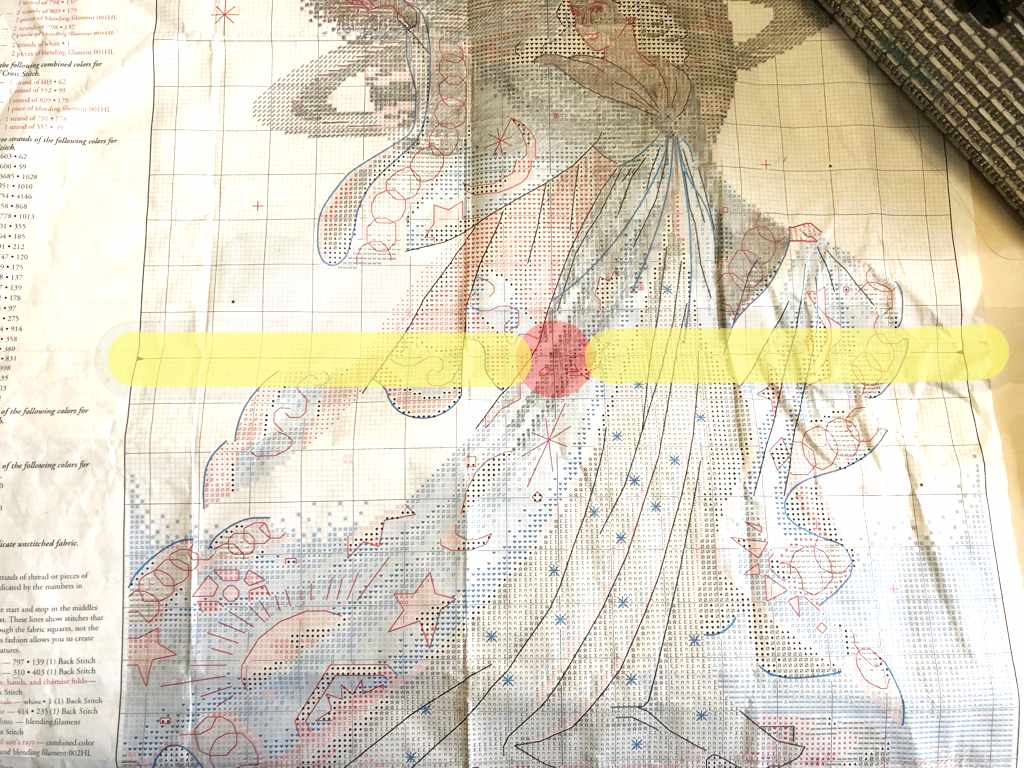
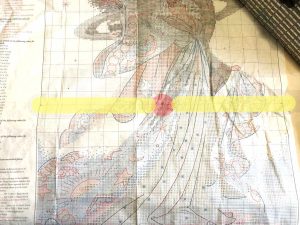
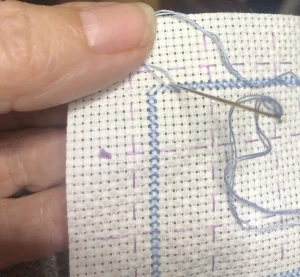
Most patterns have lines that show where the middle is. I’ve marked the pattern below with a yellow dot – yours won’t have a yellow dot but it will have the intersecting lines.
A work-in-progress chart of mine, above. I’ve highlighted the center marks added by the designer.
Some people prefer to start at the top left of the design. It’s really your choice.
Like everything in cross stitch, there’s no one right way to do anything.
Hooping Up
If you’re using an embroidery hoop or frame, attach your fabric to it. Make sure the center of the fabric is close to the center of the hoop or frame (if you’re starting in the center).
Tighten the hoop enough to keep the fabric taut while stitching, but avoid pulling it so tight that the holes distort.
Then – you’ll be ready to start that first stitch!
Taking a few minutes to prepare the fabric properly prevents many of these problems.
What to Look at Next
Now that your fabric is prepared and ready to stitch, you might like to:
Choosing the right needle makes cross stitch easier and helps protect both your fabric and your thread. For beginners, the goal is simple: a needle that’s easy to thread and slides smoothly through the fabric.
Embroidery Needles vs Cross Stitch Needles
Cross stitch is a type of embroidery, but it doesn’t use the same needles as most other embroidery techniques.
Many embroidery projects use tightly woven fabrics where the needle needs to pierce the fabric threads. Those projects often use sharp embroidery needles, called sharps, crewel or embroidery needles.
Why Tapestry Needles Are Best for Cross Stitch
Cross stitch is different. It’s worked on fabric with clearly spaced holes, like Aida or other evenweave fabrics. Because the holes already exist, you don’t want a sharp point.
You want a needle that slides easily through the holes in the fabric and has a large eye that is easy to thread because you’re often using multiple strands of floss. A tapestry needle has a rounded point and a large eye. It slides into the holes without splitting the fabric threads.
For cross stitch, tapestry needles are the better choice.
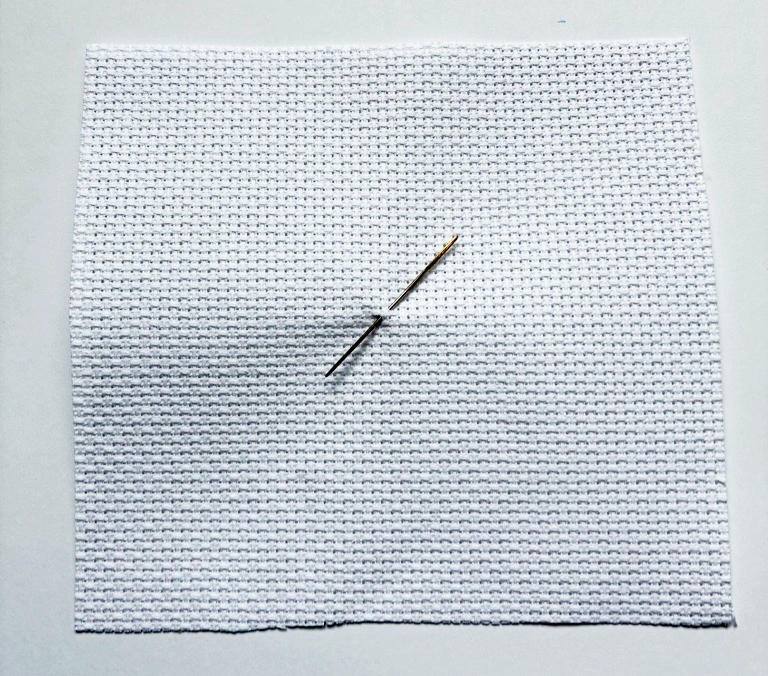
Tapestry needle on black Aida cloth
Sharp pointed needles could slide through the threads of the Aida fabric instead of the holes, which will make your crosses wonky and make your floss fray faster as you sew.
You’ll find tapestry needles in the sewing needles section of most craft stores.
Common Beginner Needle Mistakes
A few small needle-related mistakes can make cross stitch feel more difficult than it needs to be.
Using a sharp needle instead of a tapestry needle This can split the fabric threads and lead to uneven stitches.
Using a needle that’s too small for the fabric If the needle struggles to pass through the holes, it’s probably too fine for your fabric count.
Using a needle that’s too large An oversized needle can stretch the holes and distort the fabric over time.
Assuming “any embroidery needle will do” Cross stitch is specific. Matching the needle to the fabric makes a noticeable difference to how smoothly you stitch.
Getting the needle right early on removes a lot of unnecessary frustration.
Buy an Assorted Pack First
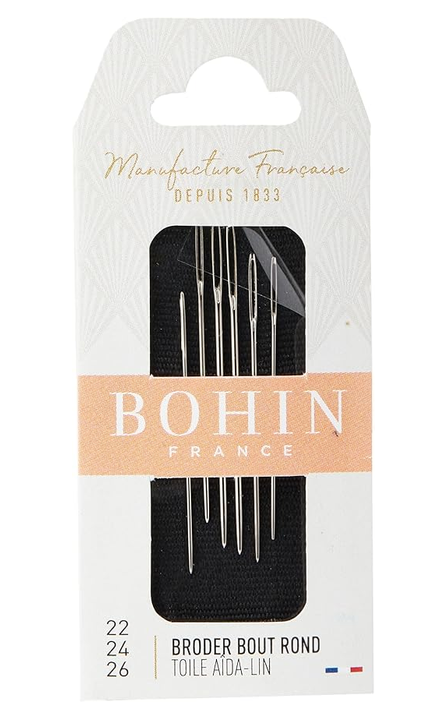
If you’re just starting out, skip the single needles and buy an assorted pack of tapestry needles. Most packs cover a spread of sizes, usually somewhere between 22 and 26, which is exactly the range beginner fabrics call for.
A multi-size pack of Bohin tapestry needles. Most needle brands sell assorted packs like this.
Then stitch with each of them. A size chart can tell you which needle fits through the holes in your fabric, but it can’t tell you which one feels right in your hand. Some stitchers like a longer, slightly heavier needle they can really grip.
Others (me) want the finest thing that will still take the floss. You only find that out by stitching, and an assorted pack lets you try without buying five separate packets.
Does the Needle Brand Matter?
Less than you might expect. Bohin, DMC, John James, Clover, Pony and the other established names all make good, consistent needles, and any of them will serve you well. Pick whichever your local shop stocks.
What you’re really paying for with a known brand is quality control. Very cheap unbranded needles, the kind that come in bulk bags from marketplace sellers, can have rough spots inside the eye that shred your floss as you stitch, and plating that wears through quickly.
If your floss keeps fraying at the needle and you’ve ruled out everything else, the eye of a cheap needle is a prime suspect.
Cross Stitch Needle Sizes by Fabric Count
Needles have a number size.
Tapestry needles start at #13 and go up to #28.
With Aida, low numbers mean big squares. It’s the same with needles – low numbers mean bigger needles: thicker and longer. The needles get thinner and shorter as the numbers go up. Again, that size thing.
So use needle #24 for lower Aida counts like 11 or 14, and #26 or 28 for higher counts.
If you like having a quick reference on hand, our Needle Chart and Inventory can help you match needle sizes to different fabric counts and keep track of the needles you have in stock.
Gold-Plated and Titanium Needles: Worth It?
For your first projects, ordinary nickel-plated tapestry needles are fine. A quality brand buys you a quality needle.
But if you stitch a lot, or your needles seem to go dark and rough while you work, there are other options. Gold-plated needles glide through fabric with barely any friction, and titanium-coated ones shrug off the skin oils that corrode standard plating.
They cost more per needle, but if you’re throwing out tarnished needles every few weeks, they can work out cheaper over a year.
We wrote more about needle plating (and the 45,000-year history of the needle itself, which is a much more interesting story than you’d think) in our Hari Kuyo post.
When to Replace Your Needle, and Where to Keep Them
Needles are consumables. When one goes dark, feels rough against the fabric, or starts snagging your floss, retire it. A worn needle makes every stitch harder and frays your thread faster, and a new one costs less than a coffee. And honestly, it makes stitching less fun.
Between projects, keep your needles somewhere dry. A felt-lined needle case or needle book is the traditional needle holder for good reason: the felt wicks moisture away from the metal, so your needles don’t tarnish as quickly while they wait. If you’d like to make your own, our needle case pattern is a beginner-friendly finishing project you can stitch in an afternoon.
(And if you’re wondering what to do with the worn-out ones, the Japanese have a whole ceremony for that.)
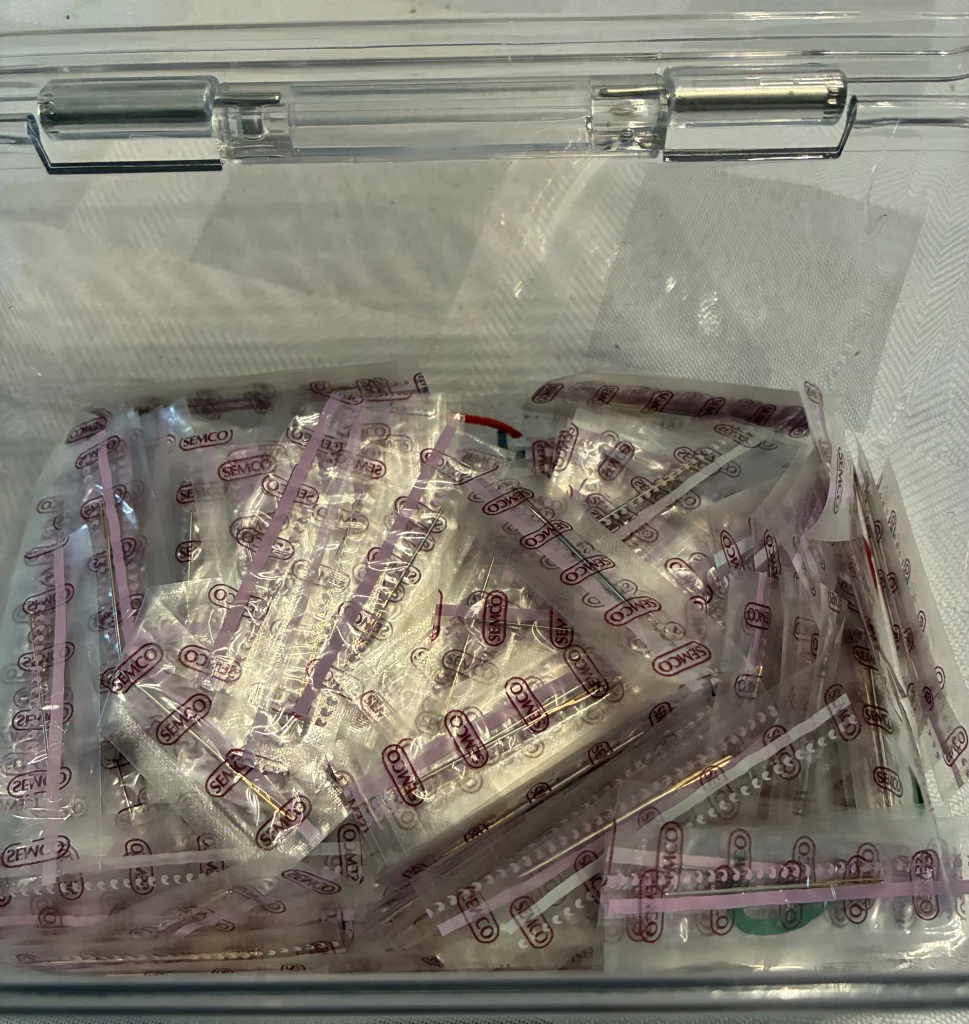
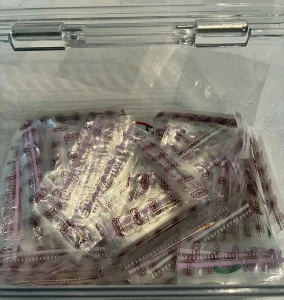
For scale: here’s my needle stash. I used to make cross stitch kits, so bought size 24 tapestry needles by the thousand, individually wrapped. The kit-making days are behind us but the needles aren’t.
Part of my stash of individually wrapped size 24 tapestry needles, left over from my kit-making days
I’m down to a few hundred now, and since I swap out a needle roughly every 30 or 40 hours of stitching, this box isn’t running out any time soon. (I unwrap about 10 at a time and they live in my needle case. The box is just the warehouse.)
Frequently Asked Questions
What size needle for 14 count Aida?
A size 24 tapestry needle is the standard choice for 14 count Aida. It slips through the holes without stretching them and its eye takes two or three strands of floss comfortably. If it feels chunky in your hand, a 26 works too.
Can I use an embroidery needle for cross stitch?
You can, but it will fight you. Embroidery needles (sharps and crewels) have pointed tips designed to pierce fabric. On Aida the point catches the fabric threads instead of sliding through the holes, which makes wonky crosses and frayed floss. A blunt-tipped tapestry needle is the right tool.
Are tapestry needles sharp?
No. Tapestry needles have a rounded, blunt tip. They’re designed to slide through the existing holes in Aida and evenweave fabrics rather than pierce the threads. That’s what makes them right for cross stitch, and it also makes them harder to prick yourself with.
What’s the difference between a darning needle and a tapestry needle?
They’re close cousins. Both have blunt tips and large eyes. Darning needles are generally longer and thicker, made for mending with yarn. For cross stitch floss and fabric counts, a tapestry needle is the better fit, though in a pinch a fine darning needle will do the same job.
When should I replace my cross stitch needle?
When it goes dark or rough, when it snags your floss, or when stitching starts to feel like more effort than it used to. Skin oils gradually corrode the plating on standard needles, so how long one lasts varies a lot from stitcher to stitcher.
Do gold-plated needles make a difference?
Yes, especially if your skin tarnishes ordinary needles quickly. Gold plating reduces friction so the needle glides through fabric, and it resists corrosion far better than nickel. Titanium-coated needles last even longer. Neither is essential for beginners, but both make stitching noticeably smoother.
What to Look at Next
Now that you’ve got more information on the right needle for your fabric, you might like to:
Cross stitch has its own language. If you’re new to the craft, the terms and abbreviations in patterns and stitching groups can sound like a secret code.
This glossary breaks down common cross stitch terms and terminology, techniques, acronyms, tools, and stitching methods you’ll see in patterns, tutorials, and stitching communities, especially if you’re new to cross stitch.
Terms are listed alphabetically below, or use Ctrl+F (Cmd+F on Mac) to search the page.
Jump to:A · B · C · D · E · F · G · H · I · J · K · L · M · N · O · P · Q · R · S · T · U · V · W · X · Z
A narrow strip of Aida with finished, decorative edges, so there’s no hemming to do. Popular for bookmarks, jar bands, towel trims and birthday banners. More in our Aida cloth beginner’s guide.
Anchor
Another long-established embroidery thread brand. Many patterns give Anchor numbers as well as DMC, and conversion charts help you swap between them. See our guide to embroidery floss alternatives to DMC.
Aperture Card
A greetings card with a window cut in the front. You mount a small piece of stitching behind the window, and the card frames it. A quick way to turn a small finish into a gift, along with these small cross stitch projects and gifts.
Backstitch
A line of stitches used to outline shapes, add detail, or define lettering in a design. People either love it (me!) or hate it. Backstitch alphabets are popular for lettering.
BAP / MCBAP (Big Project / Multi-Coloured Big Project)
A very large design, usually full coverage, that will keep you company for months or years. The “A” stands for a cheekier word than “Awesome”, which is the version we’ll print. MCBAP is the same beast with a huge colour count and confetti to match. We’re firmly on the side of small and finishable here (the joy is in finishing, after all), but there’s real satisfaction in a BAP if you’ve got the patience. The author, having once lived in Aberdeen in Scotland, maintains that a bap is also a very good bread roll and a far quicker thing to finish.
Basting / Tacking
Temporary stitches used to hold fabric in place or mark guidelines before you start stitching. Basting stitches are usually long and loose, making them easy to remove later. Some stitchers use basting to mark the centre lines of their fabric or to secure fabric to a frame.
Beading Needle
A very long, very fine needle with a tiny eye, thin enough to pass through seed beads. You’ll need one when a pattern asks you to attach beads.
Binca
A very open, Aida-style fabric with large holes, usually 6 count. It’s mostly used for teaching children to stitch and for quick, bold projects. Compare it with standard Aida cloth.
Biscornu
A small, eight-sided stuffed cushion made from two squares of stitching. The squares are joined at an angle, so each corner of one meets the middle of a side on the other, and a button or bead pulled tight through the centre gives it that dimpled, slightly squashed shape. The name comes from a French word for quirky or lopsided. Biscornus make lovely pincushions, ornaments and gifts, and you’ll find more ideas in our small cross stitch projects and gifts.
Blackwork
A style of counted embroidery worked in backstitch-type lines, traditionally in black thread, forming geometric fill patterns. It dates back to Tudor England and pairs nicely with cross stitch.
Blended Threads
A stitching technique where two different floss colours are threaded in the needle at the same time. Blended threads are used to create subtle shading, smoother colour transitions, or depth in a design.
Bobbin
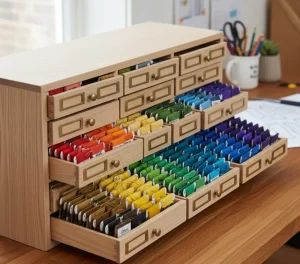
A small card or plastic spool that you wind floss onto to keep it tidy and tangle-free. Bobbins slot into storage boxes and get labelled with the floss number, which makes a big stash far easier to live with. Winding them is either the most relaxing or the most tedious part of the hobby, depending on who you ask. Hand-dyed and specialty threads sometimes come as hanks that need winding before use. If you’d rather skip bobbins altogether, our floss organizer cards are another tangle-free option.
Carrying Thread
Moving floss across the back of the fabric between stitches instead of ending and restarting.
Center Start / Starting in the Middle
A common method of beginning a project by finding the center of the fabric and matching it to the center of the pattern.
Colonial Knot
A raised knot used for eyes, flower centres and texture, like a French knot. The difference is how you wrap it: instead of twisting the thread around the needle, you wrap it in a figure-eight. That makes a knot that sits a little higher, keeps a neat round shape and is less likely to pull through to the back. Many stitchers find colonial knots easier to get consistent than French knots.
Confetti Stitches
Single stitches or small clusters of stitches scattered throughout a design, often in many different colors. Confetti-heavy sections are where mistakes often hide.
Confetti-Heavy Design
A pattern with many single stitches in different colors, often time-consuming but detailed.
Counted Cross Stitch
Cross stitch worked on plain fabric by counting squares from a chart. It’s what most people mean by cross stitch, as opposed to stamped cross stitch where the design is printed on the fabric.
Count (Fabric Count)
Refers to how many stitches fit into one inch of fabric, for example 14-count Aida or 28-count linen. The count affects stitch size and finished project dimensions. Our guide to calculating cross stitch fabric size shows how the count changes the size of your finished piece. Not sure what count your fabric is? Our free printable Aida ruler lets you check it in seconds.
Coverage
How well the stitches fill the fabric, often discussed when choosing thread count, strand number, or fabric type.
Cross-Country Method
A stitching approach where you complete one colour across an area of the design before moving on to the next colour. Some stitchers prefer this method because it reduces thread starts and stops.
Cross-Stitch Chart/Pattern
The guide that shows where to stitch and which colors to use. Charts usually use symbols to represent different floss colors. If you’re new to reading charts, our guide to cross stitch patterns for beginners walks you through it.
Cross Stitch Journal (Stitching Planner)
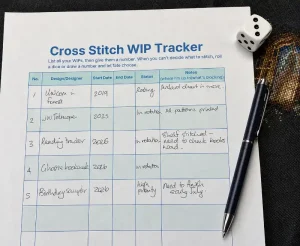
A notebook or printable planner where you keep track of your stitching. You can list your WIPs, note start and finish dates, record the floss and fabric for each project, keep progress photos and jot down what you’d do differently next time. It sounds like extra admin, but it pays off: it’s easier to pick up a project you haven’t touched for months, you stop buying floss you already own, and seeing your finishes add up is surprisingly motivating. It also becomes a lovely record of everything you’ve made. We explain more in how a cross stitch planner can help you enjoy stitching more, and our printable cross stitch planners have the pages ready to go.
CXC
A Chinese embroidery floss brand numbered to match DMC colours and usually sold in big, inexpensive full sets. Stitchers are divided on it: the price is great, but colour matching and quality can vary from batch to batch. More in our guide to floss alternatives to DMC.
Danish Method
A stitching method where you work a row of half stitches in one direction, then return to complete the crosses. This method is commonly used for large areas of the same color. Compare with the English method.
Discontinued Thread (Discontinued Colour)
A floss shade the manufacturer has stopped making. DMC retires colours from time to time and adds new ones, which is why an old chart can call for a number you can’t buy any more or why you can sometimes still buy a discontinued colour, because shops sell through older stock for a while. Our floss inventories include a discontinued-thread chart with suggested replacements, so you can match an old number to a current one.
DMC
The French thread company whose stranded cotton is the most widely used floss in cross stitch. Most patterns list colours by DMC number.
Embroidery Hoop
A tool used to keep the fabric taut while working on cross-stitch projects. Our guide to setting up fabric for cross stitch covers getting your fabric ready to stitch.
Embroidery Scissors
Small, sharp scissors with fine points for snipping threads close to the fabric. Keep them for thread only, because cutting paper or fabric soon blunts them.
Embroidery vs Cross Stitch
Cross stitch is a type of embroidery. Embroidery is the broader term for any decorative stitching on fabric, including techniques like crewel, Sashiko, and Suzhou silk work. Cross stitch uses X-shaped stitches on an even-weave fabric, usually following a counted pattern. So all cross stitch is embroidery, but not all embroidery is cross stitch. The Bayeux Tapestry, for example, is embroidery but not cross stitch.
English Method
A stitching method where you complete each cross before moving on to the next one. It’s handy for confetti stitches and areas with lots of colour changes. Compare with the Danish method, where you stitch a row of half stitches first and cross them on the way back.
Evenweave
A way of describing a fabric that’s great for cross stitching, and a type of fabric where the threads of the fabric itself are of even thickness and spacing, so that when you stitch on it, you get perfect little crosses.
Aida is one type of even weave. You’ll also hear about linen, Lugana, Jobelin, and others. And you’ll hear about other things to stitch on, like plastic canvas or novelty materials like drilled wood.
New to cross stitch? Save this for later.
Fat Quarter
A piece of fabric measuring approximately 18 × 22 inches (or 50 × 55 cm), created by cutting a half metre of fabric in half again. Fat quarters are popular because they give you a more usable square shape than a regular quarter metre cut.
You’ll see this term more often in quilting, but cross stitchers buying speciality or hand-dyed fabrics may encounter it too.
FFO (Fully Finished Object)
A project that isn’t just stitched but actually finished into something: framed, made into a cushion, an ornament, a hanging, a bag. The step beyond an FO. A finished cross is a lovely thing, but an FFO is a thing you can hang on the wall or give away, which is where we reckon half the joy lives.
Finishing
The process of turning your completed stitching into something usable or displayable, whether that’s framing, mounting in a hoop, making a cushion, or sewing it into a bag. Finishing is often the step that turns a “done” project into a “really done” project.
A stand that sits on the floor in front of your chair and holds your hoop or frame at a comfortable height, leaving both hands free to stitch. Good for big projects and for anyone whose hands or wrists get tired.
The cross stitch corner of YouTube, where stitchers post videos sharing their progress, stash, new patterns, finishes and hauls. Flosstube is where a lot of the community lives and where many of these terms get passed around, so if you’ve heard a word here you didn’t recognise, there’s a good chance it came from someone’s Flosstube channel. You’ll find the same thing on other platforms too, sometimes called StitchTok on TikTok, and a thriving stitching community on Instagram under hashtags like #crossstitchersofinstagram. Equal parts inspiration and enabler of SABLE (see below).
FO (Finished Object)
A completed cross-stitch project.
Fractional Stitches
A partial stitch, such as a quarter, half, or three-quarter stitch. Fractional stitches are often used to create curves, soft edges, or fine detail that full crosses can’t show.
Fray Check
The brand name of a liquid seam sealant, now used for any product that stops cut edges from fraying. A thin line along the edge of your fabric keeps it neat while you stitch. Test it on a scrap first, because some brands can stiffen or darken the fabric.
French Knot
A small, raised knot created by wrapping the thread around the needle. It is often used for eyes, dots, or textured details.
Frogging
The process of ripping out stitches in your project after making a mistake. It’s a term used across many handcrafts where you might have to “rip-it rip-it” (ribbit ribbit – like a frog – geddit? :)) like knitting, crochet, embroidery and sewing.
A design where stitches cover the entire fabric, leaving no background visible.
Grain (Fabric Grain)
The direction of the fabric threads. Stitching with the grain helps keep projects square and prevents distortion.
Gridding (Gridlines)
Gridlines are the heavier lines printed on cross stitch patterns that help you count and align your stitches accurately. Gridding also means marking the same grid on your fabric, with a removable pen or thread, so your stitching lines up with the pattern. Our guide to gridding cross stitch fabric explains how to do it and whether it’s worth it.
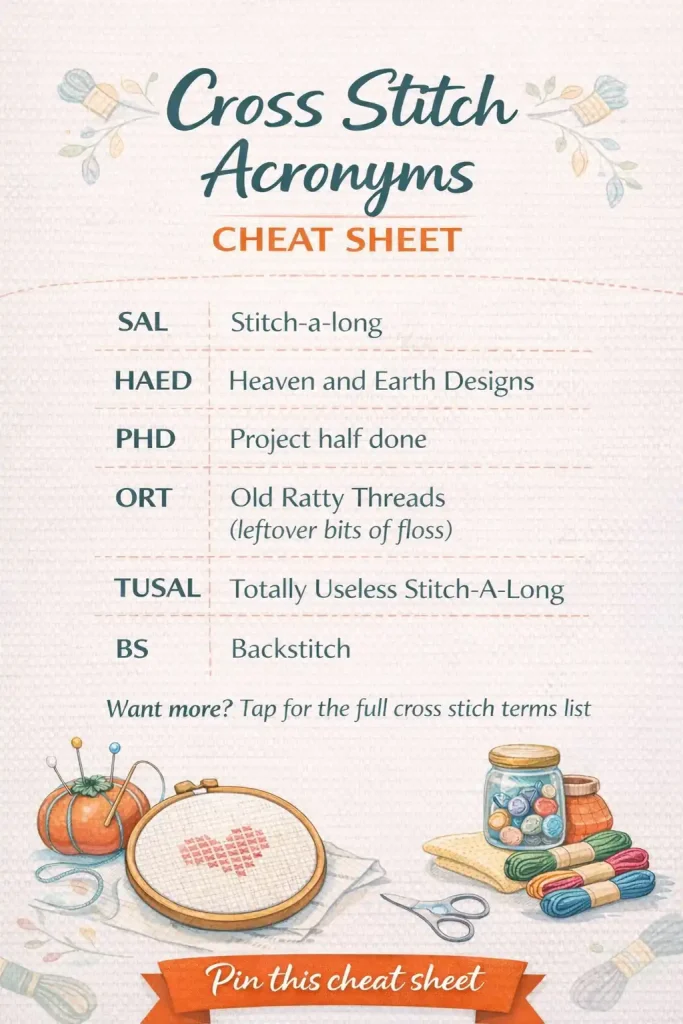
Heaven and Earth Designs – a pattern company known for high quality detailed designs.
Half Stitch
One diagonal leg of a cross stitch, worked on its own. Patterns use half stitches for shading or softer backgrounds, and they’re also the first step of every full cross stitch.
Hand-Dyed Thread
Floss dyed in small batches, often with gentle colour changes along the strand, a little like variegated thread. Each batch can vary, so it’s wise to buy enough for the whole project at once.
Hank
A way of packaging embroidery thread, where the thread is wound into a loose loop or coil rather than the familiar DMC skein shape. Hanks are more common with specialty threads, hand-dyed threads, or silk. They usually need to be wound onto a bobbin or card before use to prevent tangling.
Hardanger
A Norwegian whitework technique that combines blocks of satin stitch with cut and drawn threads to create lacy, open patterns. It’s usually worked on special Hardanger fabric.
Hoop Finish
Displaying a finished piece in its embroidery hoop, with the excess fabric gathered or glued at the back. It’s one of the quickest and cheapest finishes, and one of our 20 ways to finish cross stitch.
In Hand (Stitching in Hand)
Stitching without a hoop or frame, holding the fabric in your hand as you work. Some stitchers prefer this for portability or comfort, while others find it harder to maintain even tension.
Jobelan
A soft evenweave fabric made from a cotton blend, often in 28 count. It has a lovely drape and comes in lots of colours. See our guide to choosing evenweave fabrics.
Kitting/Kitting Up
Preparing all the materials for a project before you start stitching—gathering the fabric, cutting and organising your threads, printing the chart, and getting everything together so it’s ready to go. Kitting up in advance means you can sit down and stitch without hunting for supplies.
A way of mounting finished stitching over card or board by running long stitches across the back from side to side and top to bottom. It holds the work taut without glue, which is why framers and heirloom stitchers like it.
Lap Stand
A smaller stand that rests on your lap or slides under your leg while you sit, holding your hoop or frame steady so both hands are free.
Linen
A type of evenweave fabric made from flax fibres, popular with more experienced stitchers. Linen has a slightly irregular texture that gives finished pieces a softer, more traditional look. It’s typically stitched over two threads (so 28-count linen produces the same stitch size as 14-count Aida). Linen is more expensive than Aida and requires a bit more care when stitching, but many stitchers love the drape and feel of the finished result. More on linen and other evenweave fabrics here.
LNS / ONS (Local Needlework Shop / Online Needlework Shop)
Your local bricks-and-mortar stitching shop, or its online equivalent. You’ll see both in conversation when stitchers talk about where they buy fabric, floss and patterns. A good LNS is a treasured thing and sadly a rarer one these days, which is part of why so much stash-building has moved to the ONS.
Long Stitch
A single straight stitch that crosses several squares, often used for whiskers, flower stems or straight lines in a design.
Loop Start (Knotless Method)
A way of starting your thread without using a knot. It helps keep the back of your work neat.
Lugana
A popular evenweave fabric made from a cotton-rayon blend. Lugana is smoother and more uniform than linen, but still has that soft drape that evenweave stitchers love. It’s often recommended as a stepping stone for stitchers moving from Aida to evenweave fabrics. Like linen, it’s usually stitched over two threads. More on Lugana and other evenweave fabrics here.
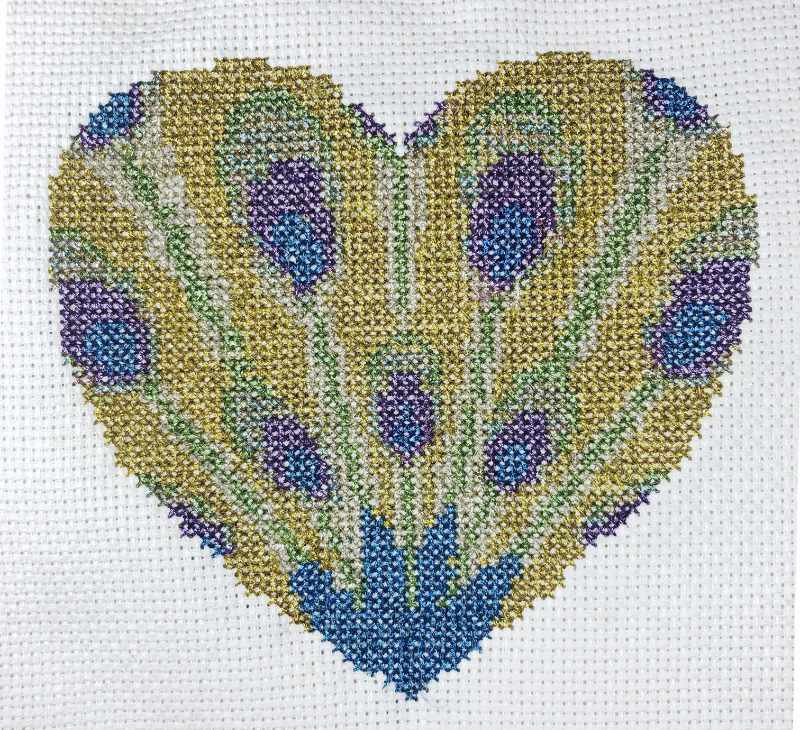
Metallic Thread
Shiny thread with a metallic finish, used for sparkle and highlights. It can fray and tangle, so shorter lengths and a needle with a larger eye help.
Motif
A small stand-alone design, or one element within a larger pattern, such as a flower, heart or animal. Samplers are often built from lots of motifs.
Mouliné Étoile
A DMC thread with a subtle sparkle effect that adds a gentle shimmer to stitches.
Murano
A smooth evenweave from Zweigart, a cotton and viscose blend usually sold in 32 count. A favourite for fine detail stitched over two. See our guide to choosing evenweave fabrics.
Needle Case (Needle Book)
A small fabric folder with felt pages for keeping your needles safe, so they don’t end up lost in the couch cushions. A stitched cover makes it a quick and useful finish, and ours is also where the Snag Nab-It lives. Our needle case pattern shows you how to sew an Aida needle book in an afternoon, and there are more ideas in our small projects post.
Needle Minder
A magnetic accessory used to hold needles while you stitch. You can turn anything into a needle minder with a good magnet, or buy a huuuge range of them in your LNS or ONS.
Needle Threader
A small tool with a fine wire loop that you push through the eye of the needle to pull the thread back through. A lifesaver for small needle eyes and tired eyes.
OAP (Orphaned Adopted Project)
Someone else’s unfinished project that you’ve taken in, often picked up secondhand or handed on by a stitcher who ran out of love (or time) for it. You’re giving it a home and seeing it through. Noble work, though it does mean inheriting their thread choices and their tension.
ORT (Old Ratty Threads / Odd Random Threads)
The little leftover bits of floss that multiply faster than bunnies under your stitching lamp. Too short to re-thread your needle, too pretty to throw away. Many stitchers collect them in an ORT jar, a sparkly time capsule of projects past.
Some even take part in the TUSAL—the Totally Useless Stitch-A-Long—where everyone proudly shows off their jar of thread confetti each month. Proof that even your scraps can be part of the art.
Over 1 / Over 2
Describes how many fabric threads each cross stitch covers, usually when stitching on even-weave fabrics like linen or Lugana.
When you stitch over two threads, each cross spans two threads of fabric in each direction. This is the most common method for evenweave and linen, and it produces the same stitch size as Aida with the same count number—so 28-count linen stitched over two gives you the same finished size as 14-count Aida.
Stitching over one means each stitch spans just one thread, producing much smaller stitches (sometimes called petite stitching) and a smaller finished piece—half the size of over two on the same fabric.
Most patterns designed for evenweave assume over-two stitching unless they specify otherwise.
Parking
A method often used for complex, multi-color designs. You leave threads in place, or “park” them, so they are ready to pick up again later.
Pattern Keeper App
A popular app that helps stitchers track progress on digital patterns. It is especially useful for large or complex designs.
PDF Pattern
A digital pattern file that can be used on computers, tablets, or phones. PDF patterns work across most devices and operating systems. Buying PDFs online? Here’s how to spot a fake cross stitch pattern before you pay.
Perforated Paper
Stiff paper punched with a grid of holes that you can cross stitch on. Popular for bookmarks, cards and ornaments because it doesn’t fray and can be cut to any shape.
Perle Cotton
A twisted, shiny cotton thread that isn’t separated into strands. It comes in sizes such as 3, 5, 8 and 12, where a higher number means a finer thread. Used for edging, finishing, Hardanger and adding texture.
Petite Stitch
A tiny cross stitch worked over one thread of evenweave or linen when the rest of the design is stitched over two. It’s used for fine detail like faces and lettering.
Petit Point (Tent Stitch)
Tent stitch looks like a half stitch from the front, but on the back the thread travels diagonally too, so it covers more of the back and makes a firmer, hard-wearing stitch. Petit point is tent stitch worked on very fine canvas or fabric for tiny, detailed designs, and is common in needlepoint. Not to be confused with a petite stitch.
PHD
Project Half Done. Enough said :)
Pin Stitch
A way of securing thread at the start or end of stitching without knots, often used for confetti stitches.
Plastic Canvas
A rigid plastic mesh used for three-dimensional projects like boxes, magnets and ornaments. It’s stitched like cross stitch or needlepoint and holds its shape.
Pre-Gridded Aida
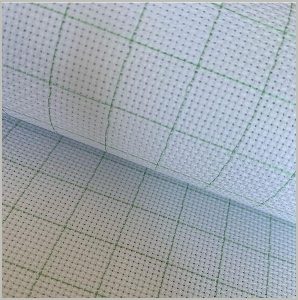
Aida with a grid already marked on it, usually in blocks of ten to match the gridlines on your pattern. The lines wash out when you’ve finished. The best-known versions are DMC Magic Guide Aida (red lines) and Zweigart Easy Count Aida (grey lines). Our guide to gridding cross stitch fabric compares it with gridding your own.
Project Bag
A bag used to store a cross-stitch project, including fabric, floss, pattern, and tools. We’ve got a full guide to choosing a project bag.
Q-Snap
A plastic frame used to hold fabric taut while stitching. Q-Snaps use PVC pipes and clips rather than the screw mechanism of a traditional wooden hoop.
Many stitchers prefer them because they don’t leave hoop marks on the fabric, they’re lightweight, and they come in various sizes that can be combined for larger projects.
Quarter Stitch
A short diagonal stitch from one corner of a square to its centre. It’s the smallest of the fractional stitches and usually sits next to a three-quarter stitch to smooth curves.
Railroading
A technique where you guide the needle between the strands of floss as you stitch, helping the threads lie flat and smooth instead of twisting.
Railroading Tool or Laying Tool
A small tool used to help guide the strands of floss so they lie flat and smooth on the fabric. It is often used alongside the railroading technique to improve stitch appearance and coverage. (Or you can just use your needle, as I do in the pic above.)
Railroaded vs Twisted Stitches
Railroaded stitches lie flat and smooth on the fabric, with the strands sitting neatly side by side. Twisted stitches occur when the floss twists as you stitch, which can make the crosses look slightly uneven or rope-like.
RAK (Random Act of Kindness)
A small surprise gift sent between stitchers for no reason at all: a bit of fabric, a skein or two, a pattern, a needleminder, a kit, sometimes a little finished piece. A lovely tradition in stitching groups, and proof the craft attracts good people (not just obsessed ones :)).
SABLE (Stash Acquired Beyond Life Expectancy)
The fond and faintly guilty term for owning more fabric, floss and patterns than you could realistically stitch in a lifetime. Worn as a badge of honour rather than confessed. If your stash has outgrown its storage and started colonising a second cupboard, you may already be here. Bravo! Welcome!
SAL (Stitch-A-Long)
A group event where lots of stitchers work the same design at the same time, usually released in parts over several weeks or months so everyone progresses together. SALs are a lovely way to stay motivated and feel part of something, especially on a bigger piece. The reveal at the end, usually in a group in person or online, when everyone shares their finished version in their own colours and fabric, is half the fun.
Sampler
A piece of stitching made to record or practise different stitches, motifs, or patterns.
Scroll Frame
A rectangular frame with two horizontal rods (or scroll bars) that hold the fabric. You roll the fabric around the rods to expose the section you’re working on, which makes scroll frames ideal for larger projects that won’t fit in a hoop. They keep the fabric taut without distorting it, and you don’t need to move the frame as often as with a hoop. There are many brands and sizes.
Seam Ripper
A small tool with a sharp, curved hook for cutting stitches. Handy for frogging large areas, used carefully from the back so you don’t nick the fabric.
SEX (Stash Enhancement eXpedition)
A stash-shopping trip, plain and simple, dressed up in an acronym to make you look twice. All it means is a happy outing (or browser session) to stock up on fabric, floss and patterns you absolutely do not need and will buy anyway. See also: SABLE (above), the inevitable destination.
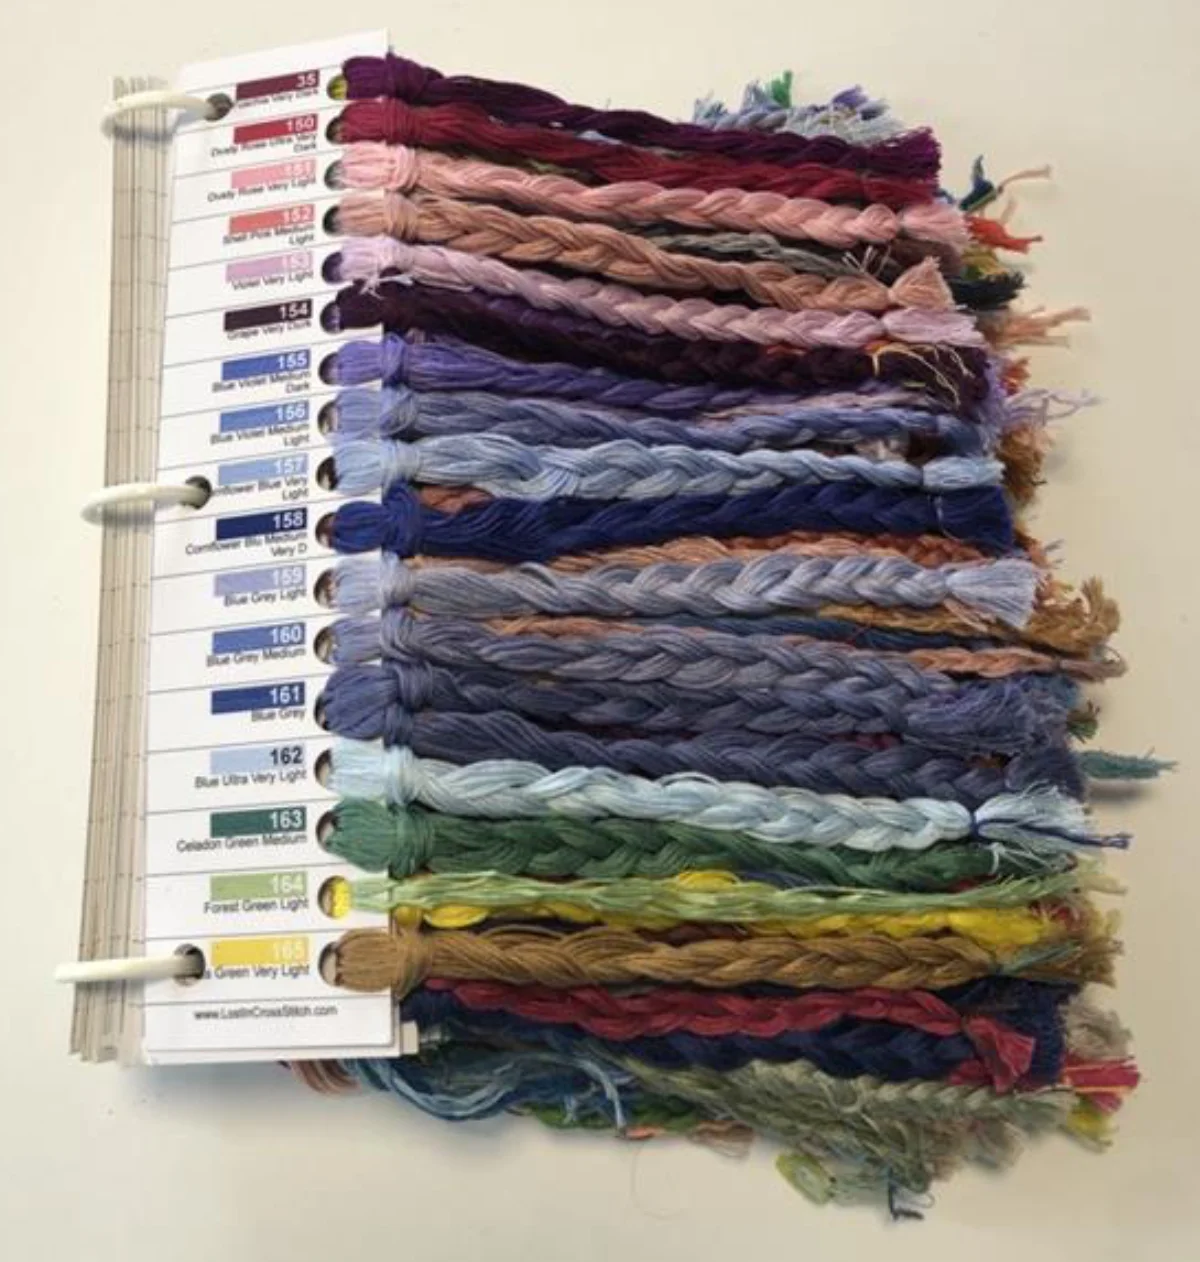
Shade Card (Colour Card)
A card showing real thread samples for every colour in a brand’s range. Handy for matching colours, because screen colours are never quite right.
Snag Nab-It (Snag Repair Needle)
A short metal tool with a needle point at one end and a roughened shaft at the other. Push the point down through the fabric right beside a stray tail, loose loop or bit of fluff, and the rough end catches it and pulls it through to the back. Snag Nab-It is the Dritz brand name, and you’ll also see it sold as a snag repair needle or thread grabber. Generic versions work just as well and cost far less: we found a multipack of snag repair needles for less than we paid for our single branded one. It’s also small enough to lose, so we keep ours in our needle case.
Stab Method and Sewing Method
Two ways of making each stitch. With the stab method, the needle goes straight down through the fabric and is pulled through, then comes straight up from the back, in two separate movements. It suits fabric held taut in a hoop or frame and keeps tension even. With the sewing method, the needle goes down and comes back up in one scooping movement, like hand sewing. It’s faster, and is usually done with the fabric held loosely or in hand, often on evenweave or linen.
Stash
Your collection of fabric, floss, patterns and supplies waiting to be used. Most stitchers’ stash grows faster than they can stitch it, which is where SABLE comes in.
Stitch from Stash (SFS)
A challenge where you commit to stitching only from supplies you already own, buying nothing new for a set stretch of time. It’s the natural antidote to SABLE, and a way to actually use some of that beautiful fabric and floss you’ve been hoarding for the right project. Harder than it sounds. The right project always seems to need just one more skein.
Skein
The standard way embroidery floss is packaged and sold. It’s a loosely wound bundle of thread, typically 8 metres long for DMC and most other brands. Each skein contains six strands that can be separated for stitching. Most cross stitch patterns tell you how many skeins of each colour you’ll need; 2 is common.
Stork Scissors
Traditional embroidery scissors shaped like a stork, with the blades as its beak. They work just like plain embroidery scissors and are a stitching-basket classic. Pretty as they are, our everyday scissors are CANARY Tiny Scissors, made by Hasegawa Cutlery in Seki, Japan. They’re barely longer than your thumb, with handles almost bigger than the blades and a little plastic cover they click into, and they’re sharp enough to snip right up close to the fabric. We have a few pairs, because one is never where you need it.
Strand
One of the six individual threads that make up a skein of embroidery floss. Most cross stitch is done with two strands in the needle at once, though this varies depending on fabric count and personal preference. Patterns usually specify how many strands to use.
Stamped Cross Stitch
A type of cross-stitch where the design is printed directly onto the fabric. The stitcher follows the printed guide rather than counting stitches from a chart. The printed pattern usually washes out once the project is finished.
Stitch Count
The number of stitches wide and tall a design is. Used to calculate finished size and fabric requirements. Our guide to reading charts shows where to find stitch count.
Suture Scissors
Small scissors made for removing surgical stitches. One blade has a tiny hooked notch that slides under a stitch, so you can lift it and snip it without catching the fabric. That makes them brilliant for frogging, especially dense or tiny stitches.
Symbols Key
A chart that links each symbol in a pattern to its corresponding floss color.
How tightly or loosely stitches are pulled. Affects coverage and fabric distortion.
Thread Conditioner
A product used to reduce tangling and fraying of floss while stitching.
Thread Count
Often confused with fabric count, thread count refers to the number of threads (both horizontal and vertical) per inch in a piece of fabric.
In practice, cross stitchers usually talk about fabric count (how many stitches per inch), but you may see thread count mentioned when shopping for evenweave fabrics.
Three-Quarter Stitch
A half stitch plus a quarter stitch in the same square. It fills part of a square so curves and edges look rounder instead of stepped.
TUSAL
Totally Useless Stitch-A-Long. Stitchers keep their thread snippets (ORTs) in a jar and share a photo each month as the jar fills up.
Tweeding (Blending)
Tweeding is when you thread your needle with two different colours at once, one strand of each, and stitch them together so a single stitch carries both. Use it to blend a custom in-between shade, add a flecked or heathered texture, or ease a subtle colour change between sections so the shift is more subtle.
UFO (Unfinished Object)
A project that has been started but not completed. A planner can help you finally finish those UFOs.
Variegated Thread
Floss that changes color along its length, creating soft color shifts and variation as you stitch.
Warp and Weft
The two sets of threads in woven fabric. The warp threads run lengthways and are held taut on the loom, and the weft threads are woven across them. Knowing which is which helps you keep your fabric straight on the grain.
Waste Canvas
A temporary, stiff grid you tack onto a fabric that doesn’t have countable holes, such as a T-shirt or tea towel. You stitch through both layers, dampen the canvas and pull its threads out, leaving your design behind.
Waste Knot (Away Knot)
A temporary knot used to anchor thread at the start, which is later removed once stitches secure the floss.
Water-Soluble Canvas
A temporary stitching grid like waste canvas, but instead of pulling the threads out when you’re done, you dissolve it in water. Handy for stitching onto clothes, bags and other non-countable fabrics.
Whole Cross-Stitch
The basic stitch used in cross stitch. It forms a complete X shape and makes up most designs.
The polite reading is “What a Terrible Finish”, wheeled out when a piece resists you the whole way and still won’t sit straight once it’s done. The other reading you can probably guess, often while frogging.
Cross stitch acronyms cheat sheet (save it for later)
XS
Shorthand for cross stitch, used in hashtags, shop names and social media posts.
Zweigart
A German fabric maker known for Aida, evenweave and linen in a huge range of counts and colours. Lugana is one of their evenweaves.
Gridding cross stitch fabric has been around for a couple of decades at least, and once you try it, it’s hard to go back. This guide covers what gridding is, how to do it with thread or marker, our best tips for getting it right, the pros and cons, and the pre-gridded fabric options. All to make it easier to get lost in cross stitch ;)
What Is Gridding?
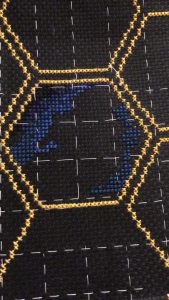
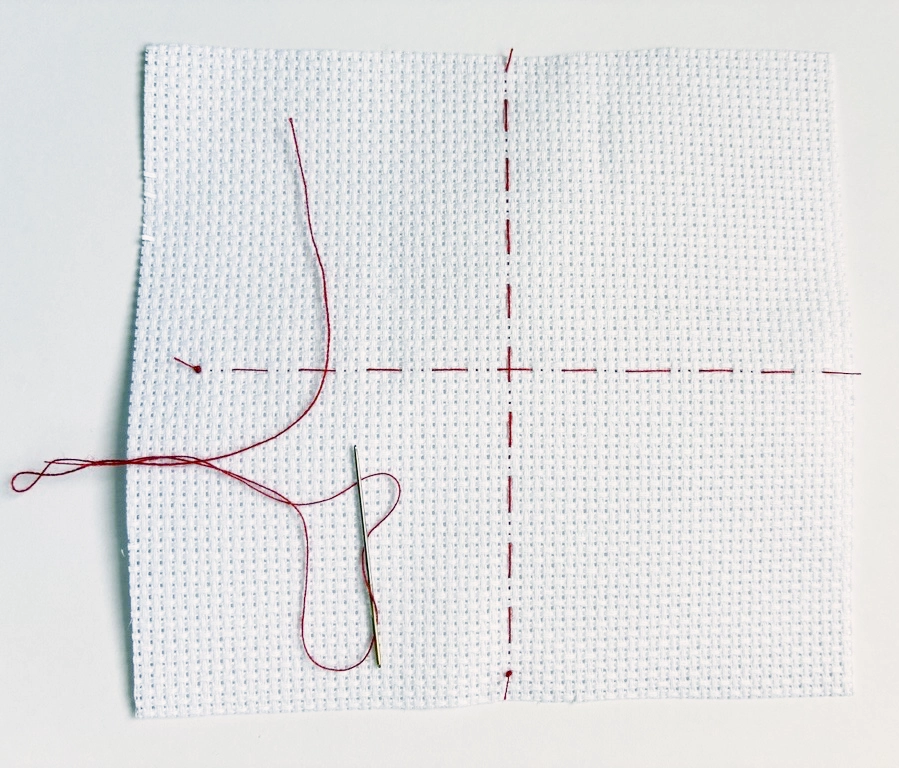
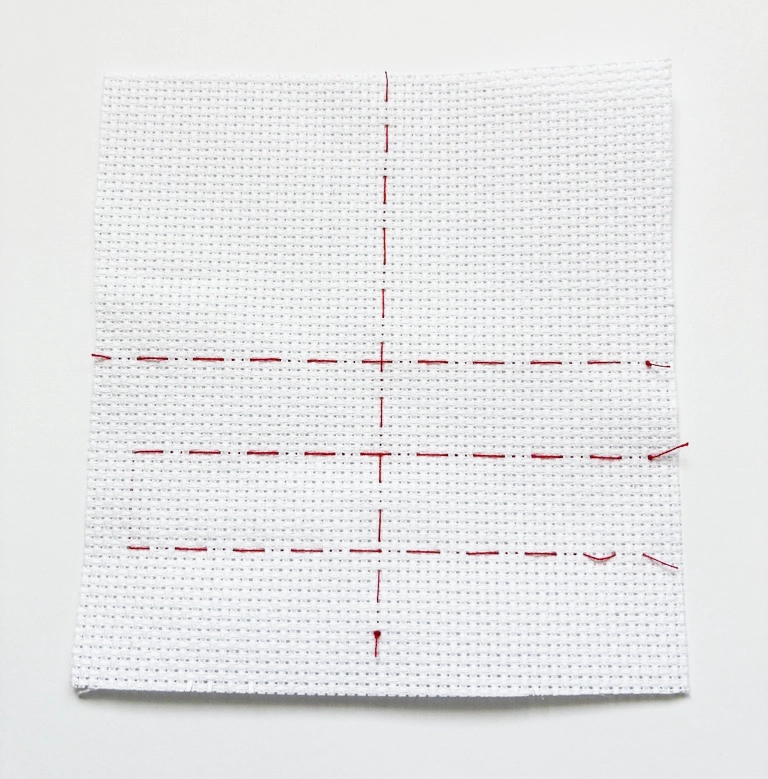
Gridding cross stitch fabric means stitching or drawing a grid onto your fabric that matches the 10×10 grid on your pattern, so you always know where you are.
That 10×10 grid is the same as the grid your chart already uses: the heavier lines. Those lines divide the pattern into smaller areas, so you can see quickly if you’re a couple of stitches out, and frog just those stitches instead of a whole section.
It’s like having a map while hiking in the woods; you know exactly where you are, so you can work out where to go next.
How I Started Gridding (I Thought I Was Cheating)
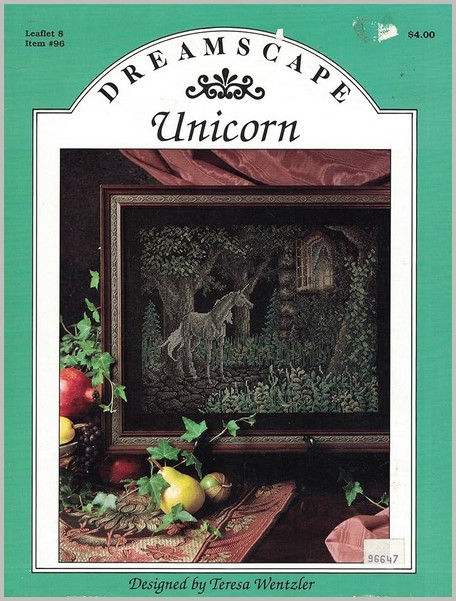
I started gridding one night about 25 years ago, working on a unicorn design stitched on linen I’d dyed black. (What was I thinking?) It was almost full-coverage before that was really a thing.
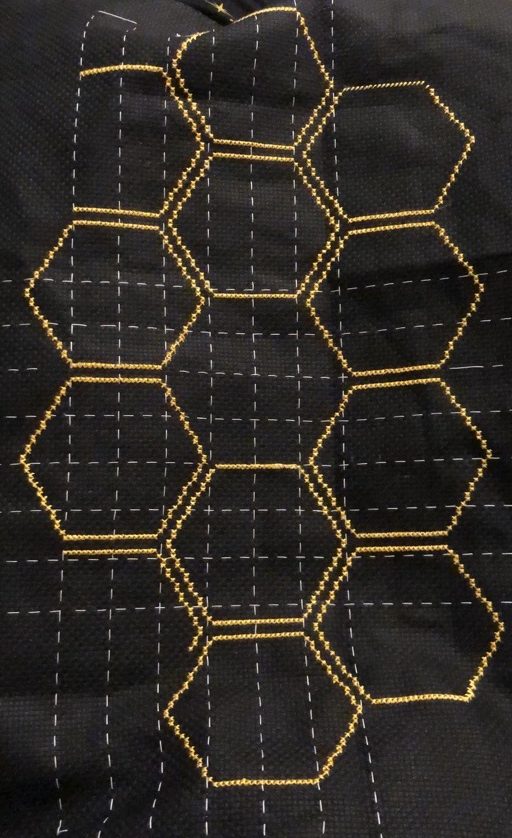
This is the design that first had me experiment with gridding.
I kept getting lost. I’d frogged for the umpteenth time, and I’d even managed to stagger my crosses, half a stitch of overlap between rows. Good grief. It is easy to do on evenweaves like linen, I told myself :)
But I loved the design too much to give up on it. So, in those pre-YouTube days, I puzzled out that if I stitched the black lines from the pattern onto the fabric with bright pink thread, I could see where I was up to.
It worked. But honestly, it somehow felt like cheating. And, it made it possible to stitch in the actual correct spot! So I kept doing it, judging myself every time I did it.
Then about 15 years ago I discovered other stitchers were doing exactly the same thing. It was a thing! It had a name! That meant I stopped thinking of it as cheating and just kept gridding. The unicorn IS still in my WIP pile because it’s a beast, full of tweeding which is part of its subtle beauty, and makes me squint a lot. But, I pick away at it when I feel like I’ve got the brain space (maybe get it finished when I retire 😁).
Your Turn: Grid or No Grid?
Join our poll, it’s completely anonymous so no judgment! You’ll see how everyone else voted the moment you have.
Pros of Gridding Cross Stitch Fabric
Fewer counting errors
Which means less frogging and more actual stitching.
You always know where you are
The grid keeps track of your position more easily. A big pattern becomes a set of small squares, and small squares are less overwhelming. Plus, “just a few more stitches to finish this square” means the old ‘completed it’ dopamine hit, more often! (Not more late nights, honest!)
It saves time in the long run
Gridding IS time-consuming up front. But you spend far less time finding and fixing mistakes afterwards.
Cons of Gridding Cross Stitch Fabric
The time it takes to set up the grid
Especially on large projects. You need patience and precision before the fun part starts.
Marker and thread mishaps
The wrong marker can leave you with lines that won’t come out. And with thread, be careful not to split the gridding thread as you stitch, or it’ll be a pain to remove (but still removable – ask me how I know :)).
It can look busy
Some stitchers find a gridded fabric too cluttered to enjoy. If that’s you, pull out the grid threads as you complete each area.
How to Grid Cross Stitch Fabric
What You’ll Need
For marker gridding:
A water-soluble fabric marker or a fine-tipped pen designed for fabrics
A ruler or straight edge, plus the light and magnifier you prefer for stitching
For thread gridding:
For light coloured fabric, a contrasting thread or fine fishing line, OR light-coloured thread for dark fabric
Needle
Snips
Choose Your Gridding Tool
There’s a few options here:
Fabric marking pens (air, water, or heat soluble)
Thread/floss
Pencil
Easy Count Guideline
Metallic blending filament
Water-soluble basting thread
Pre- gridded fabric
Fabric marking pens – I’m also a sewist who has had bad experiences with water and heat soluble markers and pens, either not coming out completely or showing up again when the temp changes. It’s possible these markers have improved a lot since I last tried them, but for me, thread is the safer way to go.
Thread/floss – We thread grid, always. Sometimes it’s sewing thread, sometimes it’s floss, depends what’s closest.
Pencil – just don’t. You think you’ll be able to erase it but I’ve seen too many sad stories of work messed up by being unable to easily remove pencil. I’ve seen people scrub at the pencil marks with a toothbrush when normal washing failed. Just – don’t.
Easy Count Guideline red– a specialty thread made exactly for gridding: fine, red, slightly slippery so it pulls out easily, basically red fishing line for stitchers. Many stitchers use fishing line instead, much cheaper! I’ve never used the guideline red, but am keen to give fishing line a go.
Metallic blending filament – again, I’ve never used this but people who love it swear that it’s slippery to remove.
Water-soluble basting thread – this is a clever one! You grid with it, and when you wash the finished piece the grid dissolves. No removal step at all. It’s sold for machine embroidery/quilting and one reel will probably last for years. Again, haven’t tried it, I don’t always wash my work so that would be annoying for me.
Pre-gridded fabric. More about this below.
Prepare Your Fabric
Iron your fabric before gridding. Wrinkles can make for wobbly grid lines.
Pick a fabric and tool combination you can actually see: markers on lighter fabrics, light-coloured threads on dark fabric, or a darker thread on lighter fabric.
Mark the Grid
Start from the centre of your fabric, the same place you’d start stitching. Fold the fabric in half both ways to find the centre point. This process is the same, regardless of which method of marking you prefer. We’re showing a stitched grid. There are some extra tips for pen marking, below.
Find the centre of your fabric.
Thread your needle. Add a knot in the end, or secure in the way you prefer.
stitch through the centre in both directions
Stitch from one edge through the centre line. A useful stitch length is 2 to 3 squares, as you prefer. The stitch length needs to be long enough to be secure but not so short that it’s hard to remove. We’ve seen people do all kind of variations. You can experiment to what you prefer, or just do the 3-3 or 2-2 that we suggest.
When you have one vertical and one horizontal line of stitching (matching the centre lines of your chart) crossing at the centre, then count over 10 stitches, and run another line.
Keep going until your fabric is gridded the same size as your chart. Do check that you’re not gridding more than your design needs!
And, it’s helpful to check your count. Sometimes I doubt I can count to ten.
In summary, every heavy line on the pattern gets a matching line on the fabric. Your fabric becomes a life-size copy of the chart’s grid.
Some stitchers prefer to start from the top left corner instead. It works, but starting gridding from the centre is helpful. Your chart’s centre arrows give you a guaranteed reference point to build from.
Gridding with a marker
Always use a ruler. Measure twice before marking. Keep the pressure gentle so the lines are clear without soaking deep into the fabric.
You’re marking in the ‘ditch’ between the threads, the same as the lines on the pattern.
Do you have to grid the whole fabric before you start?
No. Some stitchers grid everything up front and get the tedious part over in one sitting; others grid a section ahead of where they’re stitching. Both work.
Removing the Grid When You’re Done
For markers and solubles, follow the manufacturer’s removal instructions.
For thread, snip at one end and gently pull the threads out, without pulling on your stitches. You might need to cut into some threads; do it from the back and the edges, and don’t cut anything in your design. Sometimes I need a needle to coax a thread out. If you didn’t split your gridding threads while stitching, they pull out easily.
I usually remove the grid as I go, pulling threads out as I finish each area.
Pre-Gridded Fabric: Skip the Work
Pre-gridded fabrics come with a faint grid already printed or woven in. Convenient, though a bit more spendy than standard fabric, and there’s less choice in colours and types.
It’s a good option for anyone who’d rather spend the prep time stitching.
Brands like Zweigart offer pre-gridded options in various counts and sizes. The printed gridlines are designed to wash out when you’re finished, and they do! Yes I’ve used it. The limit is the colour range – it’s limited to mostly white and ecru, and not everyone carries it. But it IS super convenient, if a bit spendy.
So, To Grid or Not to Grid?
Gridding makes it easier to work through a pattern, particularly a complex one. It costs a little time to thread grid, a bit of risk to pen grid, or more money for pre-gridded fabric. For us, the saved frogging wins every time.
We thread grid. Always.
And we’re not alone. As Sheri told us in the comments: “I grid fabric with thread. And I check my grid lines, vertical and horizontal. Many of my stitching friends used to tease me… now they are gridding too.”
FAQs
Does gridding affect the final appearance of the stitched piece?
No, if done correctly. Whether you use a washable marker or thread, it shouldn’t show in the finished piece after cleaning. We don’t use markers; we always thread grid.
Can I grid any type of fabric?
Yes, if it’s an evenweave fabric. For lighter coloured fabric, use a thread or fishing line darker than the fabric colour. For dark fabric, like my gridded black Aida above, I used white sewing thread.
What’s the best thread for gridding cross stitch?
A fine sewing thread in a colour that contrasts with your fabric works well and costs almost nothing. Fishing line is the other favourite, and it has one real advantage: your needle can’t pierce it the way it can split a thread, so it always pulls out cleanly at the end. But don’t delay gridding until you have fishing line, thread or floss is perfectly fine too.
How do I remove the grid lines after I’m done stitching?
For markers, follow the marker’s instructions. For thread, gently pull the threads out, snipping from the back and edges where needed. If you didn’t split the gridding threads while stitching, they pull out easily. If you did, you can still tease the thread out gently, really doesn’t take much time. If you disturb your crosses while you’re removing gridding thread, use your needle to gently poke the crosses back into place.
Where can I buy pre-gridded fabric?
Most craft stores and online retailers that specialise in cross stitch supplies.
Evenweave fabric is a popular choice for cross-stitching, embroidery, and other needlework projects. There’s a lot of evenweave fabrics though, and when you’re starting out it can be confusing – not to mention expensive – if you choose the wrong kind of fabric for your project.
This guide will help you understand evenweave fabrics: the rustic charm of linen, the crispness of cotton, or the smoothness of blends, based on the desired look and feel of your project.
Evenweave fabrics are wonderfully uniform, made with the same number of threads per inch in both vertical and horizontal directions.
This structure provides a consistent grid of holes that make stitching a breeze.
Typically crafted from linen, cotton, rayon, or blends, evenweave is a top pick for precision and quality.
The Benefits of Using Evenweave
Using evenweave fabric helps ensure uniform stitches and simplifies the process of following complex patterns, thanks to its consistent weave. It’s versatile for various stitching techniques and thread types.
Understanding Thread Count
Thread count refers to the number of threads per square inch of fabric, affecting the size of stitches and the ease of threading.
Evenweave fabrics usually range from 18 to 32 threads per inch, with higher counts ideal for detailed work and lower counts better for beginners.
Popular Types of Evenweave
Introducing Aida: A Unique Evenweave
While traditionally grouped with evenweave fabrics, Aida offers a distinct experience. Zweigart, founded in 1877 in Germany, has been influential in popularizing Aida fabric among needleworkers. They produce high-quality Aida cloth in various counts and colors, making it widely accessible and a preferred choice for many in the needlecraft community.
Zweigart’s version of Aida fabric is known for its consistent quality, which ensures ease of stitching and durability. While they did not invent Aida fabric, their expertise in textile manufacturing has contributed to its ongoing popularity and development, providing crafters with reliable and versatile options for their projects.
Aida is also evenly woven, but its structure is more rigid and grid-like, making it especially popular for its ease of us, with stitchers of all experience levels.
You can learn more about Aida and how it compares to other evenweaves in our detailed post about Aida.
Colour Options
Aida has a vast range of colors, which cater to all sorts of project themes. From classic neutrals like white, cream, and black to vibrant hues like red, blue, green, and even metallic finishes, Aida provides an extensive palette.
Seasonal and variegated colors are also available, and on shops like Etsy, you’ll find delightful and unique hand-dyed Aida!
Linen
Linen is known for its natural beauty and durability, which makes it highly valued in the crafting world.
It’s made from the fibers of the flax plant, which has been cultivated for thousands of years. This fabric has a rich history, with evidence of its use dating back to ancient Egypt. Today, high-quality linen is primarily produced in Western Europe, particularly in countries like Belgium, France, and Ireland, where the climate is ideal for growing flax.
Linen’s use in needlework can be traced back to ancient civilizations, where it was prized for its strength and lustrous appearance. Over the centuries, it has been a staple fabric for a range of applications, from household linens (like bed sheets – we still call that group of fabrics ‘linen’ though they’re usually modern blends) to fine embroidery.
Its role in fashion and home décor continues to be significant, reflecting its enduring appeal. Linen is highly regarded for its natural luster, strength, and ability to soften with age.
It is a breathable fabric that is perfect for warm climates and offers a distinct texture that enhances the look of embroidery work. The natural variations in its fibers provide a unique beauty to each piece of needlework. Linen is also appreciated for its ecological footprint, as flax is a renewable resource and the fabric is biodegradable.
Linen’s even and open weave makes it particularly well-suited for counted thread embroidery and cross-stitching.
Its ability to handle moisture makes it durable and long-lasting, ideal for heirloom projects that will be cherished for generations.
Linen’s elegance and tactile qualities also make it a favored choice for projects that require a sophisticated touch. It can be really expensive! And, not all linen is the same – some has a more uneven texture, which is part of the appeal!
Popular types of Linen
Cashel Linen
Cashel Linen is a high-quality linen fabric typically available in 28-count. It offers the natural texture and beauty of linen with a slightly finer weave, making it suitable for detailed work.
It’s best for elegant projects that benefit from linen’s natural look and feel, such as heirloom pieces and gifts.
Belfast Linen
Belfast Linen is a softer and finer linen compared to Cashel, usually available in 32-count. It is well-loved for its smooth texture and slightly glossy finish.
It’s best for advanced projects that require fine, detailed stitching, and a luxurious finish.
Edinburgh Linen
Edinburgh Linen is typically a 36-count linen, known for its fine and even texture. It provides a tight weave that is excellent for advanced needlework requiring intricate detail.
It’s best for detailed designs where high stitch count is necessary, and a refined look is desired.
Newcastle Linen
Newcastle Linen is a 40-count linen known for its ultra-fine texture. It’s one of the finest linens available for needlework, providing a superb base for extremely detailed stitching.
It’s best for expert stitchers looking to create very detailed and delicate designs.
Colour Options
Linen fabric traditionally embraces its natural and rustic charm with a color range that reflects this aesthetic.
Natural linen hues such as oatmeal, ecru, and raw are predominant, celebrating the fabric’s organic quality.
However, dyed linens are also available in a broad spectrum from soft pastels to deep, saturated colors, allowing for versatility in project design.
Lugana
Lugana is smooth and luxurious, made from a cotton-viscose (rayon) blend, and is available in 25 to 32 counts.
It’s typically produced in Europe, notably by Zweigart, with some from Italy, a country renowned for its fine textiles. The blend of cotton and viscose gives Lugana its distinctive smooth texture and durability.
It’s been a popular choice in the needlework community for several decades. Its development is tied to the evolution of modern textile manufacturing techniques that allow for the precise blending and weaving of different fibers.
Crafters appreciate Lugana for its softness and ease of handling, especially for detailed cross-stitching and embroidery projects.
Its even weave provides a clear, defined grid pattern that aids in stitch accuracy and alignment. The fabric’s ability to drape well also makes it a favorite for creating finished pieces that look elegant and professional.
Colour Options
Lugana offers a refined selection of colors, focusing on elegance and subtlety suitable for sophisticated needlework.
Common colors include soft pastels like peach, mint, and sky blue, as well as neutral tones such as ivory, taupe, and grey. Lugana is also available in richer, deeper shades like burgundy, navy, and forest green, providing versatility for various design aesthetics.
Jobelan
Jobelan is soft, wrinkle-resistant, and made from a cotton-modal blend, typically found in 28 or 32 counts.
Like Lugana, Jobelan is also predominantly manufactured in Europe, with a significant amount of production in the United States. The fabric is a blend of cotton and modal—a type of rayon that is exceptionally soft, made from beech trees.
Jobelan was introduced in the latter part of the 20th century, as textile manufacturers sought to create fabrics that combined natural and synthetic fibers to offer both practicality and luxury in needlework applications.
Jobelan’s primary appeal lies in its softness and wrinkle resistance, making it a durable choice that stays neat and presentable even after extensive handling.
The blend of fibers provides a slight sheen, enhancing the aesthetic appeal of the embroidered or stitched project. It’s also known for its versatility, being suitable for both casual and high-end decorative pieces.
Colour options
Jobelan is appreciated for its soft and muted color palette, which complements its smooth texture and slight sheen.
Typical colors include gentle whites, creams, and beiges, alongside pastel pinks, blues, and lavenders.
For those seeking more intensity, there are options like wine reds, deep blues, and rich greens. Jobelan’s color range supports both contemporary and traditional needlework projects.
Brittney
Known for its fine texture, this 28-count cotton fabric is easy to use, and is also produced by Zweigart, among others.
It is mostly made of cotton and sometimes blended with small amounts of other fibers to enhance texture. It’s a relatively newer entrant in the cross stitch fabric market compared to more traditional evenweave materials.
It was developed to offer an alternative that combines the classic appeal of pure cotton with the advantages of modern fabric processing technologies.
Cross stitchers like Brittney’s fine texture and consistent weave, which makes precise intricate stitching easier, and great for projects where a softer feel and fine detailing are desired.
The fabric’s natural composition makes it appealing to those seeking eco-friendly material options.
Colour Options
Brittney generally sticks to a more classic color range, focusing on usability and flexibility.
It’s available in essential colors like white, ecru, and light beige, which are perfect for projects requiring a subtle and understated backdrop.
Limited editions and special dyes may occasionally introduce more vibrant or unusual colors.
Stop Buying Duplicate DMC Floss
This printable mini-book is a pocket-sized DMC inventory you can carry in your project bag. Mark what you own and what you still need, then check it at a glance in the shop, no more scrolling through notes on your phone. Trusted by hundreds of stitchers (and counting!) Instant download, print as many copies as you like.
Monaco is a 100% cotton fabric that is commonly available in a 28-count. It provides a crisp and sturdy base for needlework, making it easier to work with, especially for beginners.
It’s best for projects that require a more substantial feel and durability without the sheerness of some finer evenweaves.
Murano (Lugana 32)
Often referred to simply as Murano, this blend of cotton and modal or viscose offers a 32-count weave. It is similar to Lugana but provides a different hand and slightly different fiber blend.
It’s best for versatile projects where a smooth finish and durability are important.
Hardanger
Traditionally used for Hardanger embroidery, this fabric is usually cotton, and its weave provides a grid pattern that makes cross stitch precise and straightforward.
Best for hardanger embroidery and other counted thread techniques requiring a clear and consistent grid.
Comparing the Costs of Evenweave Fabrics
Fabric Type
Price Range
Notes
Aida
Low
Most affordable, perfect for beginners and widely available.
Monaco
Medium
100% cotton with a robust texture, very manageable for beginners.
Jobelan
Medium
Soft and wrinkle-resistant, slightly cheaper than Lugana.
Brittney
Medium
Affordable cotton fabric, good for detailed work on a budget.
Hardanger
Medium
Specifically designed for Hardanger embroidery, very precise.
Lugana
Medium-High
Smooth blend of cotton and viscose, offering a premium feel.
Murano (Lugana 32)
Medium-High
Similar to Lugana, versatile for various needlework projects.
Cashel Linen
Medium-High
Finer linen, perfect for projects requiring a delicate touch.
Belfast Linen
High
Softer, finer linen for detailed stitching, slightly glossy.
Edinburgh Linen
High
Very fine linen, ideal for very detailed work.
Linen
High
Premium natural fabric, ideal for heirloom and sophisticated projects.
Newcastle Linen
Very High
Ultra-fine linen, among the most expensive for intricate designs.
Explanation of Pricing Tiers
Low: These are the most affordable options, excellent for beginners or large projects where cost is a significant consideration.
Medium: Fabrics in this range offer good quality at reasonable prices, making them suitable for a wide range of projects.
Medium-High: These fabrics are priced slightly higher due to their quality, texture, or blend, ideal for those who want a finer base for their stitching.
High: High-quality fabrics, often made from natural fibers, suitable for detailed and heirloom projects where the material’s look and feel add to the final product’s value.
Very High: The highest priced fabrics, typically very fine and best suited for advanced stitchers or projects that require meticulous detail.
Choosing the Right Evenweave for Your Project
The choice of evenweave depends on your project and personal preference.
Lugana, for example, balances ease of use and aesthetic appeal, making it an excellent choice for various skill levels.
Choosing the Right Fabric
When considering which fabric to choose for your needlework projects, it’s important to balance cost with the specific needs of your project:
Project Type: Complex projects might benefit from finer, more expensive fabrics like Linen or Lugana, while simpler projects, especially those for beginners, are well-suited to Aida.
Experience Level: Beginners might prefer Aida for its ease of use and lower cost, whereas more experienced stitchers might choose finer fabrics for detailed work.
Budget Constraints: Aida offers the best value for those on a strict budget, while those who can invest more might consider Linen or Lugana for their superior qualities.
Choosing the Right Color
When selecting a color for your fabric, consider the following:
Project Theme: Match the fabric color with the theme or style of your project. Lighter colors are great for daytime scenes or soft designs, while darker tones can set the mood for more dramatic pieces.
Thread Visibility: Choose a fabric color that contrasts well with your thread colors to ensure that your stitching stands out.
Room Decor: If the finished project is intended for display, consider the colors of the room where it will be placed.
The variety of colors available in these evenweave fabrics ensures that needleworkers can find the perfect match for any project, enhancing both the enjoyment of the crafting process and the beauty of the completed work.
Caring for Your Evenweave Fabric
Handle evenweave fabrics gently to avoid distorting the fabric.
They should be washed and ironed carefully, typically with the fabric slightly damp, and ironed from the back to protect the fibers.
In the end –
Whether you’re a newbie or a needlework expert, understanding evenweave fabrics is key to successful projects. From the sturdy and beginner-friendly Aida to the luxurious Lugana, there’s an evenweave for everyone.
FAQs
What distinguishes Aida from other evenweave fabrics?
Aida’s grid-like, open weave structure makes it easier for beginners to see and count stitches.
Can I use regular floss on evenweave fabrics?
Yes, cotton threads work well on evenweave, though the choice of thread can vary based on the fabric’s thread count.
How do I keep my evenweave fabric from getting wrinkled?
Store it flat or rolled, and iron it gently when needed.
What’s the best thread count for detailed embroidery?
For intricate designs, a higher thread count, like 28 to 32, is recommended.
Is it possible to machine wash evenweave fabrics?
Yes, but always check the fabric’s care label and use a gentle cycle.
Now that you know about evenweave fabrics, you’re ready to choose the perfect material for your next project.
What thread to use for cross stitch affects how your stitches look, how smoothly you stitch, and how much frustration you run into along the way.
This guide covers the most common thread types, how they’re used, and what to look for when you’re starting out. You don’t need to try everything at once. Understanding the basics is enough to get good results and enjoy the process.
Note: cross stitch thread is also often referred to as floss. They’re interchangeable terms, but many cross stitchers and embroiderers prefer to use ‘floss’. :)
1. Stranded Cotton
This is the go-to choice for most cross-stitch projects.
It usually comes in a skein of about 8m long, made up of six individual strands of 100% cotton.
Depending on the fabric count and the effect you want to achieve, you can use all six strands or separate them to use fewer. Most designs use 2 strands at a time, with one strand for back stitch. If you’re stitching on 11 count Aida you might prefer the greater coverage of 3 strands.
2. Pearl Cotton
This is a bit different from stranded cotton. It’s a non-divisible thread, meaning you use it as is. It’s slightly thicker and gives a more pronounced texture to your work. This type of thread is great for adding a bit of depth to your design. There’s also not as many colors so it’s not always the best choice.
3. Specialty Threads
For those looking to add some pizzazz to their projects, specialty threads like variegated (which change color along their length), metallic, or over-dyed threads can add interesting effects.
While they can be a bit trickier to work with (metallics, looking at you!), they are perfect for adding unique touches to your project.
Our Peacock Tail design, stitched in DMC Light Works metallics by my 84 yo mum. Never heard such cursing in my life :D but it is beautiful!
Understanding these basic thread types is the first step in selecting the perfect threads for your cross-stitch project. Each type brings its own qualities and can help you achieve different effects in your stitching.
Customizing Colors
While it’s easiest to stick to the recommended colors, feel free to experiment with shades if you’re feeling adventurous or if you’re substituting unavailable colors. DMC does discontinue colors from time to time and replace them with similar ones.
Stop Buying Duplicate DMC Floss
This printable mini-book is a pocket-sized DMC inventory you can carry in your project bag. Mark what you own and what you still need, then check it at a glance in the shop, no more scrolling through notes on your phone. Trusted by hundreds of stitchers (and counting!) Instant download, print as many copies as you like.
Cross Stitch Thread Quality and Brand Recommendations
Choosing the right thread goes beyond color; quality also matters.
Opt for Trusted Brands
The brand you’re most likely to find in your local crafts store is DMC. This French textile company has been around since the 1700s and their product is great – stable dyes, high quality long-strand cotton and robust threads that will stand the test of time in your designs. And over 500 colors at time of writing.
Another brand you may find is called Anchor. However DMC bought them in 2023 and there’s no word yet on what will happen to the brand.
Color Fastness
You may find offers of no-name cross stitch threads. In our opinion you use them at your own risk. We always do a gentle hand wash of our finished work, to remove any body oils on the fabric – otherwise your work can develop weird dark spots over time.
We’ve never experienced DMC threads losing or running color. That’s not to say your experience would be the same. But we wouldn’t risk a no-name thread, especially for items that you’ll be washing more often, like cushions or decorations on clothing.
When Sandy first started cross stitching, she would buy a few skeins every time she got paid so her stash built up over time. Many of those early threads are still in her stash (though getting sparse!)
Sandy’s thread stash, built up over many years. Note how sparse some of the threads are getting!
Good quality thread lasts for years, because for most designs you’ll only use a small part of the skein. This means most stitchers end up with a growing collection. Having a basic organization system makes it easier to use what you already have.
Preparing and Handling Cross Stitch Threads
Properly preparing and handling your threads can make your stitching process more efficient. This is such a huge topic that it’s often discussed at great length and will considerable passion in online groups.
Measuring and Cutting Threads
Cut your thread to a manageable length (around 40cm/16 inches) to avoid tangling and knotting as you sew.
Organizing Threads
There are literally dozens of ways of storing your thread stash – we’ll do some posts on this later and link here. (If you’ve just read this sentence, we haven’t written them yet).
Popular ways are using bobbins or thread organizers. Label them with their color numbers for easy reference.
That Ties Things Up
If you follow the designer’s color chart and use great quality floss, you’ll set yourself up for a great stitching experience.
What to Look at Next
Now that you understand the main types of cross stitch thread and what beginners typically use, you might like to:
Choosing your first cross-stitch project is a special moment because you’re setting yourself up for long term obsession success with your new hobby. Or for massive disappointment.
Part of being successful with your first project is finding a pattern that matches your skill level and also sparks joy and excitement.
A project that’s too large or complicated can make stitching feel frustrating very quickly. One that’s well matched to your current skill level, experience and interests makes it much easier to finish, enjoy the process, and want to keep going.
This guide walks through how to choose a first project you’ll actually enjoy and finish. Once you’ve picked something, there are links at the end to help you learn about fabric, needles, and reading your first chart.
Since online shopping became a thing, there are literally hundreds of thousands of cross stitch patterns to choose from. It can be overwhelming and thrilling, especially when you find niche patterns for your own interest. And it can be very tempting to buy alllll the patterns.
And, collecting patterns can be a whole new hobby on it’s own ;)
This post can help you to not clutter up your hard drive with patterns that you think you might do one day, but when you actually look at them, they’re overwhelming.
Don’t worry, you don’t need to have even threaded a needle before! Just be honest with yourself about what feels comfortable – you’re the only one who’ll know if you’re stitching a kit that the package says is aimed at 12 year olds. Who cares, if you love it and it makes you happy?
While we’d never discourage someone from jumping into something beautiful and then figuring out as you go along, if that’s your thing, we think it’s important to start small, get the satisfaction of completing a few projects, and then work up to more.
If you’re completely new, look for patterns labeled ‘beginner’ or ‘easy’. Not every designer does that (we don’t) so that’s not always accurate. But if they are labelled that way, they’ll likely be simpler designs with fewer color changes and only full cross stitches, making them more enjoyable as you learn the basics.
There’s no prize for starting with a huge design that has hundreds of colours, with confetti stitches all over the place. Those first small finishes are really important to helping you learn fast and get the endorphin spike from finishing something you’ve worked on for hours.
Because the best project for you is one that feels doable but also a little bit exciting.
So the steps below can help you start in the right place for you.
Pattern Complexity and Size
For your first cross-stitch project, smaller and simpler really is better. A design with fewer colours and less fine detail is quicker to finish and far less overwhelming when you’re still getting the hang of where the needle goes.
That first completed piece set up your cross stitching future. Finishing something, anything, is what makes you want to start the next one. A big, intricate design that sits half-done in a drawer does the opposite. You’ll feel guilty every time you see it and maybe never try the craft again.
You don’t need to choose something “classic” or impressive for your first project. If like the design, for any reason, you’re more likely to want to pick it up regularly and finish it. That’s more important than choosing something that looks advanced.
Kits or Patterns: Both Can Work
A cross-stitch kit can be a great starting point because it includes a small piece of fabric, a needle, and just the floss colors and lengths you need to stitch that design. It removes a lot of early decisions and lets you focus on learning to stitch.
But, there’s also a great thrill in hitting your local craft supply shop to select your threads (so many pretties!), choose your fabric, and buy your needles.
Plus, our local craft shop has a really limited range of kits. You can buy beautiful ones online but it can take a while to make their way through the postal system to you.
So unless you lucked out and found a kit you love, consider buying a simple pattern. They usually have a list of the floss colors you’ll need.
Then all you need is a piece of Aida cloth, a needle and perhaps a hoop of some kind. If you’re stitching a small piece, you can do without a hoop and just stitch ‘in hand’.
Think about time and energy
Be realistic about how much time you want to spend stitching (though once you start to feel benefits you didn’t expect, you might find yourself spending more time doing it!)
Think about the rhythm of your actual week, not just the pattern. Something you can pick up and put down easily will survive the days your time or energy don’t give you any time to stitch. A big project assumes a steady run of free evenings that most of us don’t reliably get.
It’s better to choose a project that fits comfortably into your life than one you feel pressured to work on.
Common Beginner Project Mistakes
These are some of the most common issues people run into with their first project.
Choosing a project that’s too big Large designs can feel endless and make it harder to stay motivated.
Choosing a very detailed design Frequent color changes and complex charts increase the chance of mistakes early on.
Buying lots of patterns at once It’s easy to collect patterns you might never stitch. Starting with one project keeps things manageable.
Feeling you need to impress yourself or others Your first project is about learning, not proving anything.
Finish one smaller project and you’ll have learned more than the person who started a huge piece and put is aside for ‘one day’ that they never have the energy for.
We Suggest…
If you want a good first one to actually look at, our Kitten and Cactus pattern is an easy starter: a ginger kitten between two potted plants, 64 by 65 stitches, full cross stitch all the way through with no backstitch or fractionals.
The Witchy Kitten is the same straightforward style if you want a few more colours to work with.
What to Look at Next
Once you’ve chosen your first project, you might like to:
Learn more about Aida fabric and how to choose the right size and color