

Thanks for purchasing our DMC Floss Organizer Cards! This guide walks you through how to print, laminate, and assemble your set for a sturdy, professional finish.
Just looking, not bought yet? This page is the assembly guide for cards you already own.
New to the idea? See what the floss cards are all about →.
Already know you want them? Get them in our shop →.
Our Floss Organizer Cards offer a fantastic way to keep your threads beautifully organized and make sure you have minimal ORTs!
This guide will walk you through the process of creating these cards, whether you’re printing directly onto cardstock or using sticker paper, plus tips on laminating for durability.
What You Need
- Our DMC Cross Stitch Floss Organizer Cards
- Printer – either for thick paper or one that can print on 220gsm (about 60 lb cover weight) cardstock – most home printers can handle this weight easily
- Cardstock – 220gsm (60 pound) or whatever your printer can use. Thicker card is often expensive so follow our directions for a ‘sandwich’ to make your cards sturdy.
- Sticker paper (optional but recommended if you’re printing on light weight card so you end up with a thicker card in the end)
- Laminating sheets (optional but recommended)
- Scissors/craft knife/paper trimmer
- 10mm (approximately 3/8 inch) hole punch
Step 1: Choose Your Printing Method
Decide whether you want to print directly onto cardstock or print onto sticker paper. The choice might depend on your printer’s capabilities and the final look you prefer:
- Directly on Cardstock: Provides a sturdy base for your cards.
- Sticker Paper: Offers a smoother finish; print on sticker paper and fix it to cardstock for added sturdiness.
Note that if you use glossy sticker paper and an ink printer, you’ll need to leave more drying time. We recommend non-glossy but if you already have glossy, just leave it to dry longer before the next step. This way you reduce the risk of any smudging and potential discolouring of your floss.
Step 2: Print Your Floss Organizer Cards

Load your printer with your chosen paper or card and print the pages.
Make sure the print settings are adjusted to the highest quality for clear, vibrant images of the floss colors.
Step 2a: Make A Card ‘Sandwich’ (Optional)

If you’ve printed on sticker paper, stick the paper to a sheet of card. Remember to leave it to dry so that you reduce the risk of ink smudging onto your floss. If you choose to laminate, this risk is eliminated (we’ve never had ink transfer to floss, because we laminate).
If you use a colour laser printer, the toner can also transfer to your floss over time. We always laminate.
Looking for more about floss organization?
Step 3: Laminating for Longevity (Optional but Recommended)

Before cutting out your cards, consider laminating them. This step is especially useful because it:
- shields your cards from dust and fraying edges
- makes the cards sturdier and less likely to stick together or tear
- reduces the risk of any ink transferring onto your floss
- increases the lifespan of your cards significantly. My first set of homemade floss cards cards lasted 30 years without lamination but they were very ragged by the time I replaced them!
We suggest laminating before cutting – the laminate-only edge can get raggy, much more so than a cut laminated edge, which is firmer.
Step 4: Cut and Trim Your Floss Organizer Cards

After printing (and optionally laminating), use scissors or another cutting tool to cut out your cards according to the guidelines provided on the prints.
Step 5: Punch Holes

Using a 10mm (3/8″) hole punch, punch holes where marked on the card:
- first, next to the color number, name, and color swatch.
- second, along the opposite edge – 3 holes so you can thread rings or ribbon through to bind all the cards together.
Step 6: Organize Floss Cards and Bind Them
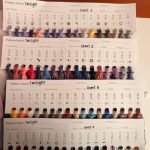
Arrange your cards from page 1 to 12 (the number-order and colour-order sets both have 12 pages), and bind them together using a ribbon, elastic, key rings, shower curtain rings, a ring binder – the choice is yours!
Having the cards bound together this way means you can flip through your floss collection easily, like turning the pages of a gorgeous book. It also keeps your threads neatly organized.
With these easy-to-follow steps, you’ll have a professional-looking set of floss organizer cards that make it easier to manage your floss, find any colour when you need it, and get lost in cross stitch faster!
Show off your finished organizer!
Tag us on Instagram @lostincrossstitch so we can see your setup — we love seeing how you make it your own.
If you’re looking for a handy way to keep track of your floss stash, our pocket-size DMC Floss Inventory Mini Book could be just what you need.



Leave a Reply