Somewhere in your house right now there are cross stitch WIPs you haven’t touched in months. One in the hoop, a couple kitted up in bags, and the rest in a drawer you’d rather not open in company. I know the state of your WIPs because I have 7 on the go as I write this, so if you were expecting this post to tell you to finish everything before starting anything new… it won’t.
A WIP, for anyone new to the term, is a work in progress: a project you’ve started and haven’t finished. The issue isn’t having them, it’s losing track of them: which floss went with which chart, where you were up to, and why you stopped.
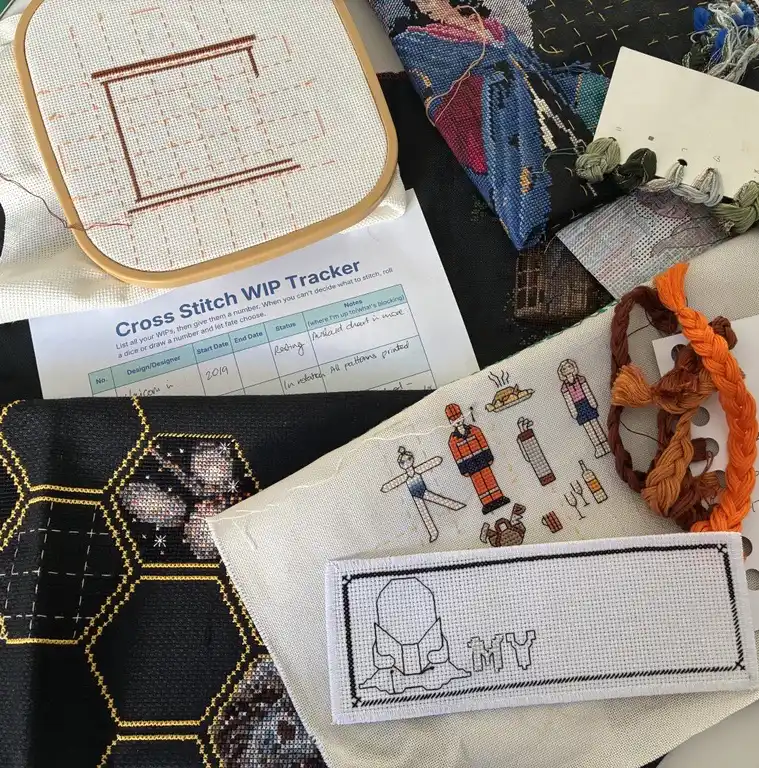
my cross stitch WIPs in July 2026.
How Many WIPs Is Too Many?
Some stitchers are strict one-at-a-timers. Some run a kind of rotation with two nights on each project in turn. Plenty of us stitch on a whim: whatever looks most interesting tonight is the one we pick up.
That’s my system, such as it is, with one override: when there’s a deadline, the deadline wins. As I write, a milestone birthday gift is priority one every night, no question, and the other 7 sit in my WIPs basket, waiting their turn.
Well, 4 are in the basket, 2 are in a drawer that makes me squint every time I open it. (Linen that I dyed black myself, what was I thinking?) and one is crumpled up in the bottom of my sewing basket, a gift for a one-time friend that’s hung around longer than the friendship did.
Whatever your number, be kind to yourself about it because this is a hobby that can bring so many benefits to our lives.
Guilt has no place.
I reckon that you can choose to see having cross stitch WIPs as part of the hobby, not something to feel guilty about.
Time to share in this little poll. Results show after you complete the poll. (it’s completely anonymous).
Please consider leaving a comment at the bottom to share your WIP story :)
Why We Have Cross Stitch WIPs
I certainly never planned to have more than one stitch on the go at a time. I truly think no one plans to have a drawer where unfinished projects wait in hope.
The WIPS build up for reasons that are mostly good, because projects have different jobs.
Right now I’m picking up my birthday gift piece every evening, but if it were my only project, stitching would start to feel like homework. So the others are the antidote.
Projects suit different moods too: a big piece for a long Sunday afternoon with your new audio book, something small and simple to help turn off your brain for the tired end of a weeknight.
Add a seasonal ornament started in October two years ago, a stitch-along that releases in parts and makes you wait, and one stunning chart you started because you had to see how it worked up, and there’s your 7 (and counting!)
In my life, WIPs aren’t a discipline problem. They’re what it looks like when stitching is part of your life rather than a task on it.
Choosing What to Stitch Tonight
So the WIP list is a great starting point. With my ADHD brain, out of sight is out of mind. My WIPs stay in sight. But a couple of years ago I made the WIP list and came up with status labels for each.
In rotation
Resting
Stalled
Waiting on supplies
Done
“Resting” is my favourite, because it’s true: that drawer isn’t full of failures, it’s full of projects having a little lie-down.
Stitching as the whim takes you has a failure mode: the night when every choice feels equal, so you scroll your phone instead of stitching at all.
You could try fixing it by making it a game:
Give every WIP a number
Let fate choose. Roll a dice, or use a random number picker on your phone. Or just close your eyes and point.
Or set up a monthly plan ahead of time, and follow it. There’s a handy monthly stitching goals planner in our Cross Stitch Planner.
If you love bingo, Jessie Marie of JessieMarieDoesStuff on YouTube invented WIPGO, where you build a bingo board for the whole year, and stitch by monthly draws.
Setup Every WIP For Success
The WIPs that are more likely to survive months of resting are the ones that are easy to pick up again, where the chart, floss, and fabric are all together in one place. If picking the project back up needs a scavenger hunt, well, it’s another delay.
If you set up every cross stitch WIP as a project, with its own little kit, you’re making it easy for future you. Even if you think this stitch won’t be paused, there’s always the life thing that has a way…
And, a gridded piece is much easier to pick up again after months away, here’s how to grid cross stitch fabric.
How to Keep Track of Your Cross Stitch WIPs
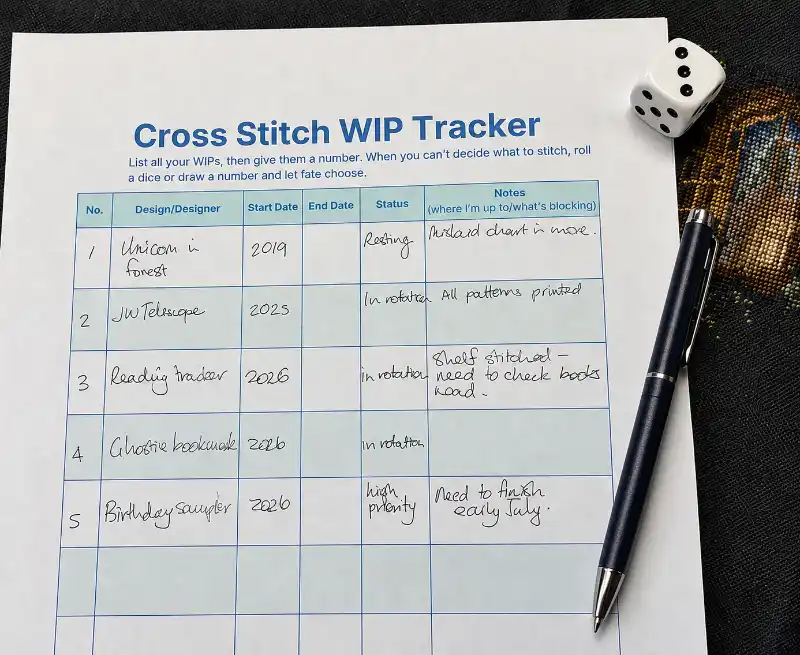
Part of the setup can be adding your WIP to the tracker page.
Each WIP gets a line: what it is, when it started, its status, and a note on where you’re up to and what’s blocking it.
When that page exists, no project is a mystery bag again, and coming back after three months away takes minutes instead of an evening of detective work.
A daily stitching log takes it one step further if you like knowing how long pieces actually take, and an annual tracker turns the whole thing into a picture: colour a square for each day you stitch, one colour per project. It’s ridiculously satisfying, and it shows you your real rotation through the year, which might surprise you.
All four pages are in the WIP Tracker Kit, and if you want the full system with stash management and inventories built in, that’s the Cross Stitch Planner.
Where Your WIPs Live
A WIP with a home gets stitched; a WIP in a plastic tangle gets avoided. Project bags solve this, one per project, kit inside, and the whole thing can travel to the couch, the car, or the doctor’s waiting room. We’ve covered choosing a cross stitch project bag that works for you.
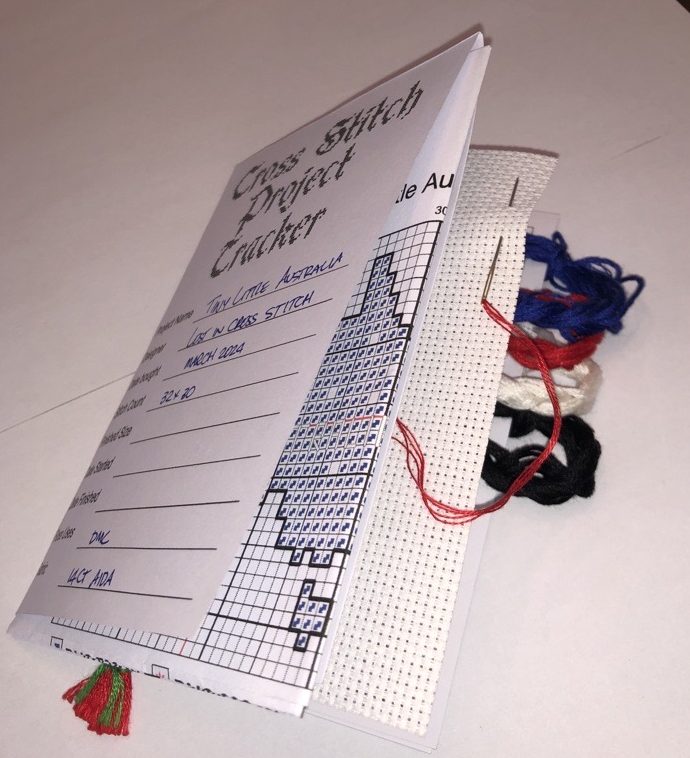
a cross stitch project starter kit with project card, pattern, floss and fabric.
The Long-Haulers
Some WIPs are meant to take a year. Temperature projects, stitch-alongs, and big full coverage pieces live in your rotation for the long haul, and they need a different kind of management: a planned pace rather than a finish line.
Every stalled WIP has a reason, and when you know the reason you can fix it.
For me it’s mistakes: I hate frogging even though I’m really good at it, and a project that needs unpicking can rest for a very long time before I face it.
Confetti patches stall me too, those sections where every second stitch is a different colour, which is why I avoid confetti-heavy charts and why we design ours with confetti kept firmly under control. One my my current WIPs is a SAL with confetti central (star systems, of course).
And then there’s the shiny new start, the WIP-maker itself. Years of managing my own magpie brain have taught me one rule that works: I don’t buy new patterns while the drawer is full. Yes it’s hard, but downsizing my home three times helped that lesson along.
Your WIP stalls probably have different reasons. But a stalled project isn’t a failure either way; mark it Resting and let the dice skip it for a while.
Getting Them Over the Line
The finish is the point. It’s the whole reason we design small: the joy isn’t just in stitching, it’s in finishing.
When a WIP finally comes off the hoop, our four-part series on finishing has twenty ideas for what it can become:
If you’ve made a cross stitch mistake, congratulations, you’re officially a cross-stitcher. Cross stitch has a special talent for making smart people say, “I swear I knew how to count before I started this.”
If you’re staring at your work thinking, What have I done? And what do I do now? know that most mistakes are fixable, plenty are hard to spot once you step back, and only a few are worth fixing because they affect the shape or the fabric.
This post will help you decide what to fix, what to leave, and what to do next, without turning your stitching session into a misery fest. Or deciding you’re not good at cross stitching and giving up!
What’s inside this post
The 10-Foot Rule
Before you reach for the seam ripper, try the 10-foot rule. Stand back from your work, about the distance someone would be if they were looking at it hanging on your wall.
Can you still see the mistake? If it disappears at a distance, it might not be worth the effort of frogging.
A lot of “disasters” disappear the moment you stop inspecting the stitches from six inches away under a bright light.
The fix-or-leave checklist
Ask yourself:
Does it change the shape? Think lettering, borders, faces, symmetry, outlines, and anything geometric.
Does it affect the fabric? Puckering, rippling, cupping, or a lumpy surface that won’t lie flat.
Can you see it from arm’s length or 10 feet away rather than 6″ from your nose under bright light?
Will it bother you every time you see the finished piece? If you know it’ll bug you forever, fixing it can be worth it.
In general:
If it changes the shape or the fabric, it’s usually worth fixing.
If it’s small, hard to spot, and the project still looks right, it’s often fine to keep going.
If you’re deep into the piece and ripping back would break your heart, it’s okay to decide it’s actually good enough, when the mistake isn’t doing real harm.
Fabric issues vs coverage worries (they’re different)
Sometimes people say “my stitching looks wrong” but they’re talking about two totally different things.
Fabric issues (tension problems)
These show up as:
puckering or rippling
a stitched area that “cups”
fabric that won’t lie flat once it’s out of the hoop
Coverage worries (holes look bigger than expected)
This looks like:
more fabric showing through than you expected
the holes feeling obvious
the stitching looking a bit thin when you’re very close
They have different fixes, so it helps to know which one you’re dealing with.
Common cross stitch mistakes (and why they’re easy to make)
If you’ve made one of these mistakes, it’s not because you’re careless. Cross stitch is a lot of tiny stitches and tiny decisions, and your brain will happily guess if you give it the chance.
When I was a young mum, cross stitch was a beautiful quiet hour after the kidlets were in bed, where I could relax and let my brain get quiet. But it also meant I was tired and mistakes are much more likely to happen when you’re tired. So if that’s you, it’s really okay to give yourself some grace, and remember that it’s only a mistake.
Most stitchers make one or more mistakes at some point, and plenty of us make a slightly different version of the same mistake on the next project too.
Being one stitch off
What it looks like: the motif shifts, a border doesn’t line up, lettering looks slightly wonky, a shape feels “off.”
Why it’s easy to make and miss: one skipped square can hide for ages, especially early in a project.
Quick fix: Stop and check whether it changes the shape or symmetry of the design. If it does, frog back to the last point you trust and correct it. If it’s in a busy area and you can’t spot it from arm’s-length distance, you may choose to keep going.
Misreading a symbol
What it looks like: the wrong stitch goes in the right place.
Why it’s easy: similar symbols, small charts, tired eyes, switching between screen and paper.
Quick fix: If it’s one small spot, do a local unpick and replace it. If you’ve repeated it across a larger area, step back and check whether it actually changes the finished look before you frog hours of work.
Using the wrong colour
What it looks like: an area is darker, brighter, warmer, or cooler than expected. (This is definitely a heart-stopping stomach-knotting moment!)
Why it’s easy: two floss shades look identical at night, bobbins get mixed, or you pick up the wrong needle (if you’re parking your needles).
Quick fix: Look at it in daylight from normal viewing distance. If it blends and you like it, you can keep it. If it jumps out, swap it now rather than spreading the color mistake further.
Stitching in the wrong place after moving your hoop (or working in sections)
What it looks like: you start a section one row too high, too low, or shifted sideways.
Why it’s easy: blank fabric gives you no landmarks.
Quick fix: Sadly there’s not really a quick fix for this. I’ve done this more often than I’d like to admit. The solution is frogging, usually after a few (or many) moments to come to terms with it! Frog it while it’s still small.
Missing a stitch
What it looks like: a tiny gap, a slightly odd spot, one little stitch that should be there but isn’t.
Why it’s easy: confetti, distractions, losing your place, or stitching late at night.
Quick fix: If you can still clearly see the hole, add the stitch. If it’s buried in a busy area and you can’t see it from normal viewing distance, it might not matter.
I have a framed piece where I missed a stitch and didn’t notice until after it was finished and on the wall. For years, every time I looked at it, all I could see was that missing stitch. But – nobody else ever noticed. Or if they did, they never said a word. Over time it became genuinely funny to me that I’d been so anxious about it, because in the scheme of things it was one tiny stitch and it made no difference to the overall design.
If you’re staring at a missed stitch right now, it’s worth asking: will this matter a month from now, or is it loud because you’ve been staring at it up close?
Twisted stitches or inconsistent stitch direction
What it looks like: an area catches the light differently or looks slightly messier.
Why it’s easy: you stitch when you’re tired, you switch methods mid-piece, or the floss twists as you work (almost everyone does this).
Quick fix: Let the needle dangle now and then to untwist your floss. If a small patch looks noticeably messy in a solid block, you can redo just that patch. If it’s scattered through a mixed area, it often disappears once the piece is finished.
Tension issues (too tight, too loose, or inconsistent)
What it looks like: rippling, puckering, a lumpy texture, or fabric that won’t lie flat.
Why it’s easy: hoop tension plus stitch tension can team up, and many people stitch tighter when they’re focused or rushing.
Quick fix: Take the fabric out of the hoop and see if it lies flat. Washing a finished piece can help fabric relax, but if it’s not laying mostly flat at this stage, it’s worth fixing sooner rather than later. If it does lay mostly flat, you may decide to keep going.
Bulky starts and ends
What it looks like: little bumps under the stitches, or shadows under light colours.
Why it’s easy: knots feel like the simplest option, and many patterns don’t teach neat starts.
Quick fix: If it’s not visible from the front, you can usually leave it. If it’s clearly showing through light stitching, unpick that small area and restart that thread with a flatter start.
Backstitch surprises
What it looks like: the piece looks strange until the outline goes in, then it suddenly works.
Why it’s easy: backstitch changes the whole look, and it’s hard to judge mid-way.
If you’re unsure about a section, test the backstitch on a small part first. It’s often enough to show you whether the stitching needs changing.
My stitches aren’t covering the fabric (the holes look big)
What it looks like: you can see more fabric than expected, holes feel obvious, coverage looks thin up close.
Why it’s easy: coverage changes with fabric count, strand count, lighting, and how your stitches sit.
Quick fix: First, step back. A little fabric showing through is part of the look, and it can add texture and dimension, especially in lighter areas. If it still looks thin from normal viewing distance, try one of these adjustments:
loosen your tension a touch
let the needle hang to untwist the floss
in areas that really show, railroading can help the strands sit neatly side-by-side
If you’re early in a project and you know you want fuller coverage, test one more strand on a scrap for the next piece, or in a tiny corner if you like.
Fixing cross stitch mistakes
Use this section when you want the “how” rather than the quick answer.
Option 1: Leave it and keep stitching
If it passes the checklist, keep going.
Option 2: Local unpicking (a small, targeted fix)
Best for one wrong stitch, a small wrong-color patch, one symbol mistake, or a messy patch.
Turn your work over and find the stitches to remove (it’s often easier from the back).
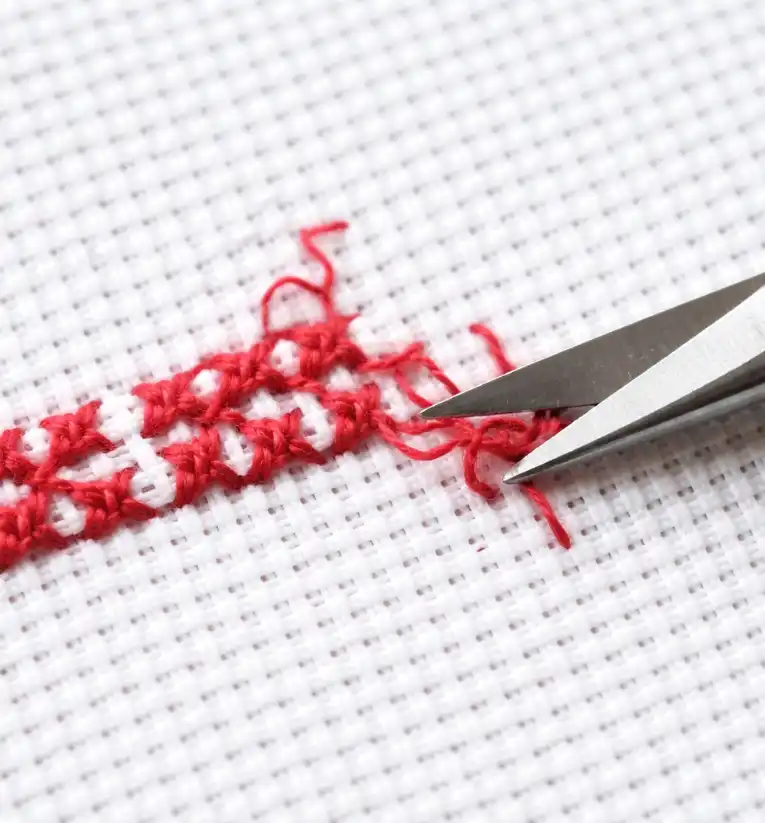
Unpick a few stitches at a time. You may need to very carefully cut your stitch – just the top of the cross, not the whole stitch! – to be able to pull it out. Very sharp embroidery scissors are the go for this.
Pull out short lengths, not long yanks. Keep trimming the floss as you pull it out so that you get fewer knots.
Use fresh floss when you move on.
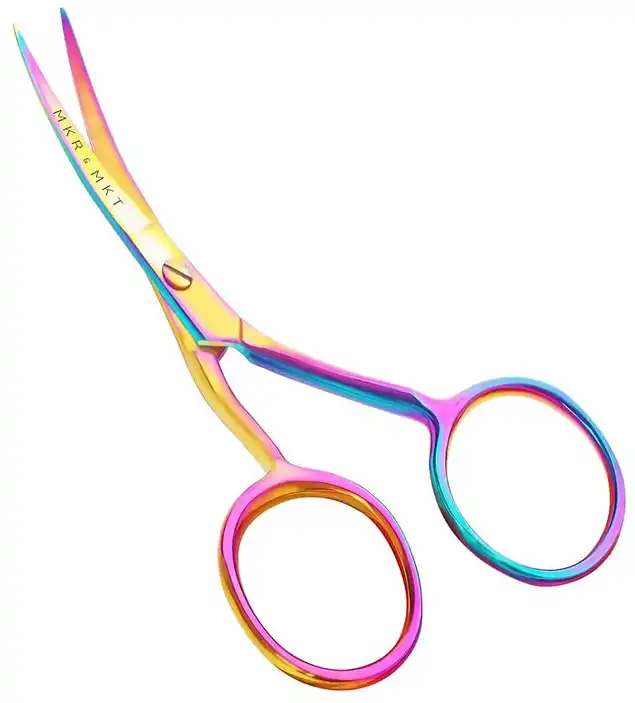
Embroidery scissors with a curved and pointed tip will make fixing crass stitch mistakes easier.
Option 3: Frog back to a safe point
Best for a miscount that affects the surrounding design, when you used the wrong color, or when you’re no longer sure where the mistake started
Find the last spot you’re completely confident is correct.
Mark it on the pattern (or take a quick photo if you’re working from a screen).
Frog back to that point.
Place a few “check stitches” before you continue, then confirm you’re aligned.
Option 4: Restart (rare, but sometimes worth it)
This is usually only worth it for borders and symmetry errors, or when you’ve accidentally rotated your fabric so you’re stitching in the wrong place (3 times on the same piece for me….)
Restarting doesn’t mean you failed. It means you’re choosing the result you want.
How to frog without wrecking your thread or fabric
Use good light.
Pull short lengths.
Cut and replace if the thread is getting fuzzy.
Go slowly
Only use scissors if you can’t avoid it. Rather unpick stitched with your needle, and keep trimming the floss so you’re pulling a short piece.
If you’re getting tired or irritated, stop and come back later.
Frogging is called frogging because you’ll say “rip it, rip it.” You’re welcome. There’s a lot more jargon to cross stitch – we unravel some of it here.
How to make fewer mistakes next time
Grid. Just do it.
Gridding can make counting and placement much easier, especially on larger pieces or designs with lots of blank space. Though even on a small piece, it really helps you find your way. Really.
Wrong colors happen when floss starts looking the same, especially at night. A floss organization system makes a big difference.
Use project cards so you’re not juggling symbols in your head
One small thing that helps is copying the key symbols and floss colors onto a project card before you start. It cuts down the mental back-and-forth while you stitch.
Add quick check moments
A quick check at the end of each thread catches mistakes before they spread. Good light helps too, especially with similar colors.
Mark the top of your fabric (so you always know which way is up)
This one got me recently.
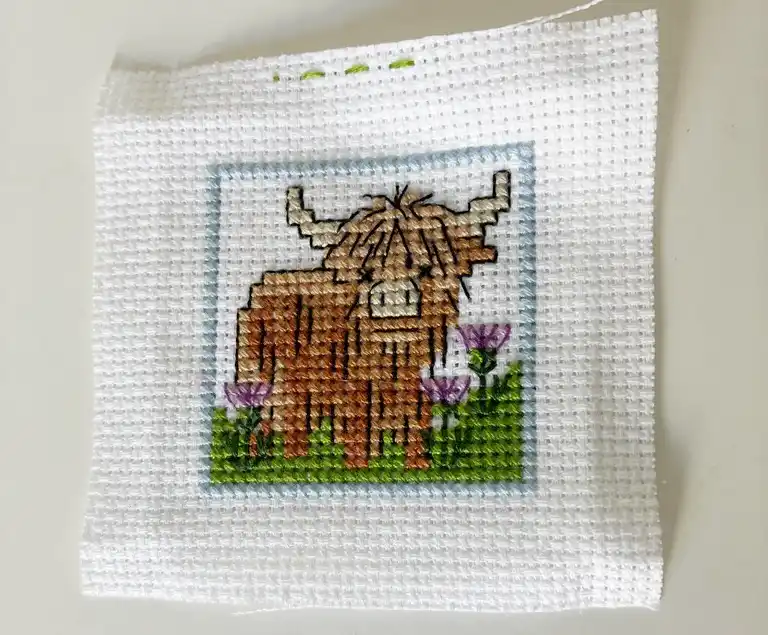
I was stitching a tiny kit someone gifted me. The Aida was too small for a hoop, so I was just holding it in my hand.
It took a while to figure out which way was actually up! I put a couple of stitches in a high-contrast thread near the top edge of the fabric so I wouldn’t turn it again. Then I frogged everything that wasn’t ‘up’. A whole night’s stitching gone. Sheesh.
I had to add a ‘top’ marker to this little design because mistakes were made!
I put it down a couple of times to re-thread the needle, picked it back up, and somehow gave it a quarter turn. I stitched away happily for a while, then realized nothing made sense because I’d been stitching in the wrong direction. And I wasn’t even sure which way was up anymore. (Cue eye roll and mega sighs. Might’ve been some language…)
About perfection
One of the reasons I love cross stitch is because the crosses are so neat and regular. It soothes my brain! But perfect really is optional, despite what we’ve learned our whole lives.
There’s an old idea that shows up across time and cultures, and I think it’s worth remembering when cross stitch starts feeling like an IQ test: humans make things by hand, so they come out hand made! That usually means: not perfect!
Sometimes people frame that as a spiritual belief (only the divine is perfect). Sometimes it’s framed as a craft belief (handmade work is meant to have a bit of life in it). Sometimes it’s told as a story about leaving a small irregularity on purpose (a piece that’s too perfect can trap your soul, the imperfection is a way for your soul to come back to you).
If a small mistake isn’t changing the shape, pulling the fabric, or failing the 10-foot rule, you’re allowed to leave it (and the only permission you need to do that is your own!).
Finish the piece. Enjoy it. Let it look like it was stitched by a person.
Cross stitch is meant to feel good. Sometimes the satisfaction of finishing the project and enjoying it, outweighs that endless chase for a stitch-perfect result.
Quick FAQ
Can I add missing stitches later?
Usually, yes. If you can still clearly see the holes and you can get the needle in neatly, you can add them.
Do I have to frog if I’m one stitch off?
Not always. If it changes the shape or symmetry, it’s often worth fixing. If it’s in a busy area and you can’t see it from normal viewing distance, you may choose to leave it.
Why does my fabric look wavy after stitching?
Most often it’s tension. Tight hoop tension plus tight stitching can cause puckering or rippling. If it won’t lie flat out of the hoop, it’s worth addressing.
Why do the holes look big in my cross stitch?
Fabric count, strand count, and tension all affect coverage. Up close, holes often look bigger than they do when the piece is viewed normally. But chances are, it’s because your stitches are too tight. They should just sit neatly above the fabric, not floppy, not tight.
How many strands should I use on Aida?
It depends on the fabric count and the look you want. Many stitchers use 2 strands on 14 ct Aida, and adjust from there based on coverage and personal preference.
Mistakes are part of cross stitch
Use the checklist, fix what must be fixed, let the tiny stuff go, and keep getting lost in cross stitch.
And if you do end up with one missing stitch that only you know about, there’s a decent chance you’ll laugh about it later.
Whether you can swap and mix floss colors is a question that every cross stitcher is going to run into sometime.
One of the joys of cross stitch is how adaptable it can be. Don’t have the exact thread the pattern calls for? No problem. You can swap floss. Prefer to use multiple brands because they’re easily available or you love certain shades? Go ahead and mix floss to your heart’s content!
However, before diving into wild color substitutions, there are a few important considerations to keep in mind, especially if you’re spending hundreds (or even thousands) of hours on a complex design.
Why You Might Want to Swap and Mix Floss
There are a lot of reasons you might find yourself needing to swap and mix floss colours or brands.
Sometimes you can’t find the exact color recommended in a pattern (remember DMC310 during COVID? Couldn’t buy it for love nor money!), or you simply prefer using a certain brand.
Maybe you’ve run out of a specific shade, or you’ve accidentally bought extras so have a stack of similar colors in your stash. Or you picked up a mystery bundle of floss at a price you couldn’t resist.
Swapping saves time and money, and it can give your project a personal touch. Here’s how to do it confidently.
Check the Color Role
Is this a focal color (like a flower’s petals or a centerpiece)? Pick a thread with a similar brightness and intensity.
For background or accent areas, you can experiment more freely, but still ensure the hue and value fit the overall palette.
Compare Under Natural Light
Minor hue differences can drastically change the look of your piece. Lay the potential replacement skein alongside the recommended threads to see if it “plays nice.” Ideally do this in daylight – electric light can change the way colours appear.
Swap and Mix Floss Brands (The Good & The Cautions)
You can absolutely mix floss from multiple brands – DMC with Anchor, Cosmo, Sullivan’s, etc. – and many stitchers do just that. Different brands often have unique color offerings that might appeal to you.
But before you start combining them, consider these points:
Color Consistency
While conversion charts exist, they’re rarely 100% precise. Dye processes vary, so the “equivalent” color in another brand might look slightly off.
Also, even within a company the dye lots can change and the dye processes can change over years. A DMC colour from 30 years ago (and I have some in my stash) can look different if you buy the same colour number now because dye components have changed to meet new health standards.
Thickness & Texture
Some brands produce smoother or thicker floss. If you like uniform coverage, do a test stitch to make sure there’s no jarring difference from one color block to another.
It may be fine for small patches or confetti stitches, but over large blocks of colour it can make an obvious difference.
Brand Reputation & Quality
This is crucial if you’re committing a lot of time (and possibly money) to a detailed project. Lesser-known brands may not be colorfast, which means they could fade or bleed if the piece is washed or exposed to direct sunlight.
When mixing brands, verify they’re all reputed for stable dyes and reliable quality. If you’re unsure, stick with widely recognized options like DMC to minimize risk.
Why We Use and Recommend DMC
We’ve always used DMC floss. It’s readily available in many places but it’s a staple for many reasons:
Availability: You can find it in most craft stores, and it’s widely used by pattern designers.
Consistency: DMC threads usually have stable, colorfast dyes, meaning they’re less likely to fade or bleed.
Range of Colors: With hundreds of shades, you’re bound to find a good match or an interesting substitute.
DMC has been around for hundred for years (it was founded in 1746!) and is known for quality.
If your pattern calls for an unfamiliar brand, you can swap floss to the nearest DMC equivalent. Just remember to compare them side by side for any differences in tone or brightness.
Cautions When You Swap and Mix Floss
Colorfastness
Avoid unknown or untested brands if you plan on washing or displaying your project in bright light. The last thing you want is to see your carefully stitched work bleeding when you wash it before framing, or losing vibrancy over time.
Bleeding
Some floss may run when exposed to water or steam. If you’re unsure, cut a small piece of the thread, dampen it, and blot it on a white cloth to check for dye transfer.
Large Projects
If you’re taking on a massive project, consistency in color and quality becomes extra important. You don’t want subtle differences or fading to ruin the uniformity of your masterpiece.
Record Your Changes
Whenever you swap or mix floss, jot down what you used. If you pause your project and come back months later, you’ll thank yourself for the handy notes. (Ask me how I know. Sigh.)
Tips for a Smooth Swap or Mix
Test Stitch
Try your replacement color or brand on a small scrap of fabric or in a corner of the design before fully committing.
Lay Out Your Palette
Line up all your chosen skeins together to see if they work together.
Trust Your Eyes
Conversion charts are a guide, not a rule. If something seems off, pick a color that feels right to you. We have a DMC to Anchor conversion chart in our Cross Stitch Planner.
Final Thoughts
There’s no one-size-fits-all approach to cross stitch, and that’s part of what makes it so enjoyable. You can swap and mix floss to use what you already have on hand or to expand your color choices.
Just remember that brand and dye quality matter, especially for those showstopper pieces you’ll cherish for years to come.
So go ahead, experiment, and stitch away! As long as you’re aware of the potential pitfalls, you’ll be able to create beautiful, long-lasting works of art.
After all, getting lost in cross stitch is one of the best things about this craft, and a little bit of planning makes sure your hours of stitching are satisfying.
These budget cross stitch tips will help you stitch more while spending less. You’ll learn where you can save, what’s worth paying for, and how to avoid the common money-wasters that creep in over time.
When I first started cross stitching, I had a toddler and a baby – the budget was tight! I used to buy about five skeins of floss each time I got paid, from a big retailer in the local shopping center. It didn’t occur to me that I could stretch my budget in all the ways we’re talking about in this post.
That’s what these budget cross stitch tips are for. They’ll help you get the supplies you need so you can stitch at least some of the things you want to stitch, even when money’s tight.
I also want to say this up front: you don’t need to have everything at once. You can start small, build slowly, and still end up with a finish you’re proud of.
I always say that cross stitch has a low barrier to entry – you can buy a kit in a thrift store for just a couple of dollars, and have everything you need to get started:
a hoop
fabric
needle
floss
pattern
often even simple instructions for this beloved hobby that’s literally hundreds of years old.
But, when you get past your first few kits, you start to need more – more challenge, more floss and ways to store it, bigger pieces of fabric, needles that feel smoother and last longer, more patterns, a Q-Snap, a stand, a light… it can literally go on and on and on and it can quickly add up.
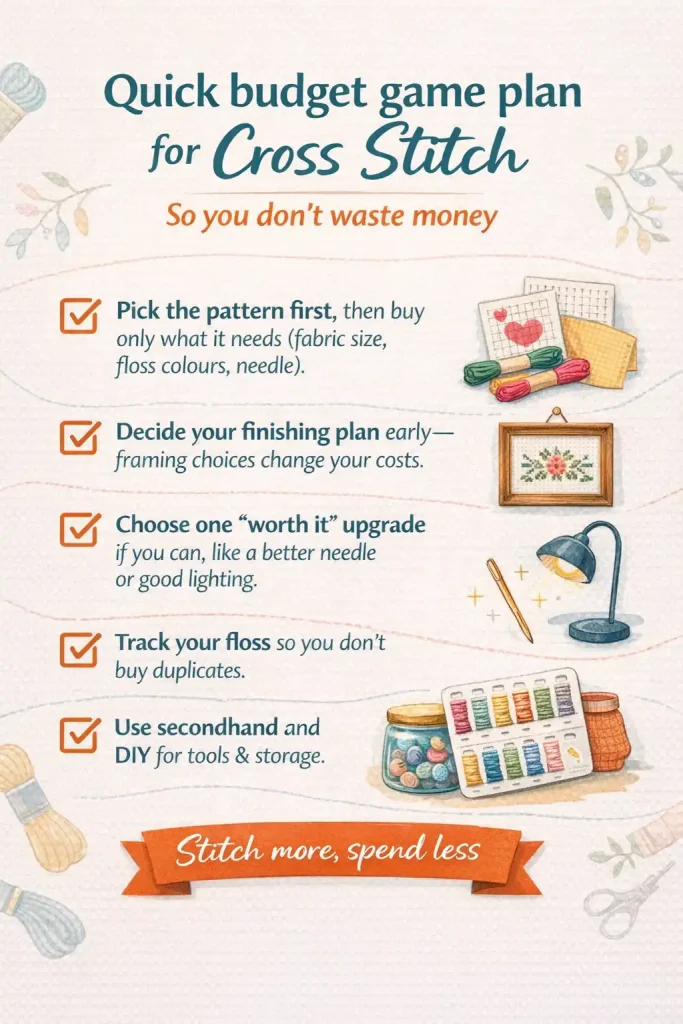
Quick Budget Game Plan (so you don’t waste money)
Want to come back to this later? Save this checklist to Pinterest.
Pick the pattern first, then buy only what it needs (fabric size, floss colours, needle).
Decide your finishing plan early, because framing choices change your costs.
Choose one “worth it” upgrade if you can, like a needle you love or lighting that makes stitching easier.
Use secondhand and DIY for tools and storage whenever you can.
1. Shop with Coupons and Discounts
Discounts can genuinely help, but they can also nudge you into buying things you weren’t planning to buy. When your budget is tight, the best savings come from only buying what you need for the project you’re stitching right now. Here’s a simple way to do that.
Start with a “payday” shopping list
Before you open a website or walk into a shop, write this down:
Your pattern name
Your fabric count and size
The floss colors you need (or the number of skeins, if you’re keeping it simple)
Needles, only if you’re actually out
That list keeps you from walking out with extras you’ll “use someday.”
Use discounts in a way that actually saves money
If shipping cancels the discount, wait. It’s usually cheaper to combine orders and pay shipping once.
Don’t buy extras just to reach free shipping. We all love to save that shipping! But if you don’t need it for this project, it isn’t saving you money.
Only stock up on things you already use constantly. Needles you like, hoops you always reach for, your usual fabric count.
If you’re tempted by a big floss haul, pause and check your current projects. If you don’t have a pattern lined up that needs those colors, it’s likely future clutter.
A budget-friendly way to buy floss over time
If you’re doing what I did in the early days, buying a few skeins at a time, you’ll get more stitching done by prioritising:
The colors you actually need now, to start the project
The rest of the colors in the next pay cycle
“Nice to have” extras later
That way, you’re always stitching something, even if you’re building a full set of DMC floss slowly.
2. Thrifting for Cross Stitch Supplies
Thrifting is one of the quickest ways to get set up without spending much. A lot of cross stitch gear is “nice to have,” and it shows up secondhand all the time.
Thrift in your local charity shops and also keep an eye on local Buy Nothing groups and Marketplace. They can be gold for cross-stitchers as people who no longer stitch love to pass on their treasured collections to people will value them.
Part-used kits (sometimes you’ll score a bunch of usable floss)
Quick checks so you don’t bring home problems
Smell check: skip anything musty or damp.
Rust: avoid rusty needles, stained metal hoops, or anything that looks like it’s been stored wet.
Fabric: look for brown water marks, fading, mold spots, or weird stickiness.
Floss: if it’s faded or feels brittle, leave it.
Easy cleaning
Wash hoops and plastic tools in warm soapy water. Let wood dry overnight.
Wipe down frames and replace the backing if it looks grubby.
If a fabric or kit looks suspicious, don’t take the risk. Saving a few dollars isn’t worth contaminating the rest of your stash with mold or strange odours.
A small thrift win that adds up
Finishing is where cross stitch can get expensive. A $3 thrift frame can replace a $30 new one, and your piece still looks lovely on the wall.
3. Try Cheaper Brands Carefully (so you don’t waste money on a bad choice)
There are cheaper floss brands and cheaper supplies out there, and sometimes they’re totally fine. The issue is that if the quality is off, you can end up paying twice, once for the cheaper option, then again when you replace it.
So here’s a practical way to approach this when you’re being mindful with your cross stitch spending.
When budget floss is usually a safe choice
Practice pieces
Small projects
Things that won’t be washed
Pieces you’re stitching for fun, not for a “perfect finish”
When you’ll want to stick with a well-known brand
Gifts
Framed pieces
Bigger projects
Anything you want to last for years
Do a quick test before you commit
You don’t need a full science experiment. Just do this:
Stitch a small swatch on scrap fabric.
Wet it and press it with a white cloth or paper towel.
Check for colour transfer.
Check how it behaves as you stitch. Does it fray, fuzz, or knot up more than you’d like?
If it passes, great. If it fails, you’ve saved yourself a lot of frustration and rework.
A budget tip that saves the most money here
If you’re going to spend on one thing, spend on the supplies that protect the finished piece. Fabric you enjoy using, floss that behaves nicely, needles that don’t snag.
Everything else can be thrifted or DIY’d.
5. DIY Supplies and Repurposing
When cash is tight, DIY and repurposing can keep you stitching without feeling like you need a full craft room setup. You don’t need fancy gear, you just need a few basics that work.
Needle Minders
At first thought you mightn’t think this is a budget cross stitch tip. But – needle minders are a handy tool for keeping track of your needles while working on your cross-stitch projects.
When I first saw them I thought – meh. Then I accidentally dropped a needle near one of the magnets holding my pattern to my magnet board – as you’d expect, the needle stuck to the magnet.
So then I did it deliberately. And loved it.
Now, I wouldn’t stitch without a needle minder. But, I make my own with a pin a friend gave me, I just popped it onto a couple of magnets and it does the job beautifully (there’s a pic below, with my magnet board).
You can make one with:
A flat button, pin, or charm
Two strong magnets (one on each side of the fabric)
Strong glue
This DIY approach saves you money and your butt/feet because you won’t be standing or sitting on a lost needle. And hopefully you also won’t be losing needles, they can be really pricey!
Note to keep magnets away from kids and pets, and don’t store them right next to anything that hates magnets.
Fabric Stretcher Bars and Stand
Fabric stretcher bars are essential for keeping your cross-stitch fabric taut and wrinkle-free while you’re stitching. You can make your own at home with lightweight wooden dowels or PVC pipes cut to the length you want.
It can take a bit of time but the savings can be worth it! Plus you’ll be able to make stretcher bars for any size embroidery. And, you’ll need more than one set. Trust me on this 😊
In case you think you’ll never need stretcher bars or a stand, think of a friend who owns a pet. And where they like to sleep.
DIY Floss Organizer
I made my first floss organizer because I needed to have my floss more organized. I can’t stand scratching through piles of stuff to find what I need, whether it’s in my sock drawer, my kitchen or my craft space.
So once I started to accumulate more than a few skeins of floss, I had to organise them. I made my first cross stitch floss organizer cards using a cereal box.
Project Bags
And that neatly brings me to project bags. Trust me, you’ll probably have more than one project on the go at any one time. You just will. And for sanity’s sake, you’ll need a separate bag for each one.
You can use plastic bags of course.
Little pencil cases are good – look around, you’ve probably got some you’re not using.
Cosmetic bags are great too.
A small tote.
I use a couple of lovely linen bags that I got years ago, with new sheets in them.
See what you’ve got stashed away and use that. Or, make up bags from tea towels or small bits of fabric from other projects.
The goal is boring, but it works: it stops floss tangles, lost needles, and half-finished projects that never get picked up again.
Magnet Board
Okay it’s debatable whether this is a budget cross stitch tip but hopefully I can help you see how it might be one. I can’t stitch without my magnet board. It holds my pattern, my snips, my marker, all in one place, and in the same place so I can immediately lay my hands on them. I bought one many years ago and then mum gave me hers so I’m blessed with two!
They are really expensive now – about $40 in our local Spotlight. You can probably pick them up cheaper with coupons or may be lucky enough to thrift one.
Or, pick up a small piece of galvanised tin from your hardware shop or friendly handy man. Smooth off the edges and voila. If you want you could paint it, or cover with a thin fabric.
OR: a biscuit tin (that’s made of tin, not aluminium) is a great alternative! It could also double as a project bag (tin).
I can’t stitch without my magnet board – it keeps my place, and all my gear together!
Used Needles Box
I really believe sewing is one of the great drivers of civilization. Think about how every bit of clothing you’re wearing, the cover of the seat you’re sitting in, even the cover of your car’s steering wheel, would not be possible without a needle.
I love needles so much I wrote a post about how we should honor them. It’s certainly something that’s done in many countries.
When I first heard about the tradition of honouring the needle, I started to save my used needles rather than just toss them in the bin. I use an old breath mints tin – one in my cross stitch box and another next to my sewing machine. If you’d like to know more about this you can read this post about honouring our sewing needles.
5. Budget Cross Stitch Tips at Your Local Library
Most local libraries have beautiful cross stitch pattern books on every theme you can imagine, including making amazing gifts and home décor, they’re the ultimate budget cross stitch tip!
Magazines (often packed with small charts you can finish quickly)
Finishing books (mounting, framing, displaying, gift finishing)
Embroidery books (helpful for stitches, thread handling, and neat backs)
How this helps when you’re strapped for cash
You can try styles before you spend money on patterns you might not love.
You can stitch smaller projects from borrowed charts while you’re building supplies slowly.
You’ll learn techniques that reduce mistakes, which saves fabric and thread.
A simple “borrowed pattern” method that works
If you find a chart you like but you can’t afford to buy supplies for it yet:
Take a photo of the cover and the designer name (or write it down).
Choose one small design from the book and stitch that first.
If you still love the style after stitching it, add that designer to your “buy later” list.
That way you’re not spending money on patterns that never get stitched.
6. Buy Supplies in Bulk
Bulk buying can be a real money saver, but only if it matches how you actually stitch. If it doesn’t, it turns into “I bought it because it was cheaper,” and it sits there. (Yes, ask me how I know….)
What’s usually safe to buy in bulk
Needles you already know you like
Your go-to fabric count (if you mostly stitch on one type)
Hoops in the sizes you use all the time and like to use for framing finishes
A few staple floss colours you keep reaching for (black, white, common neutrals)
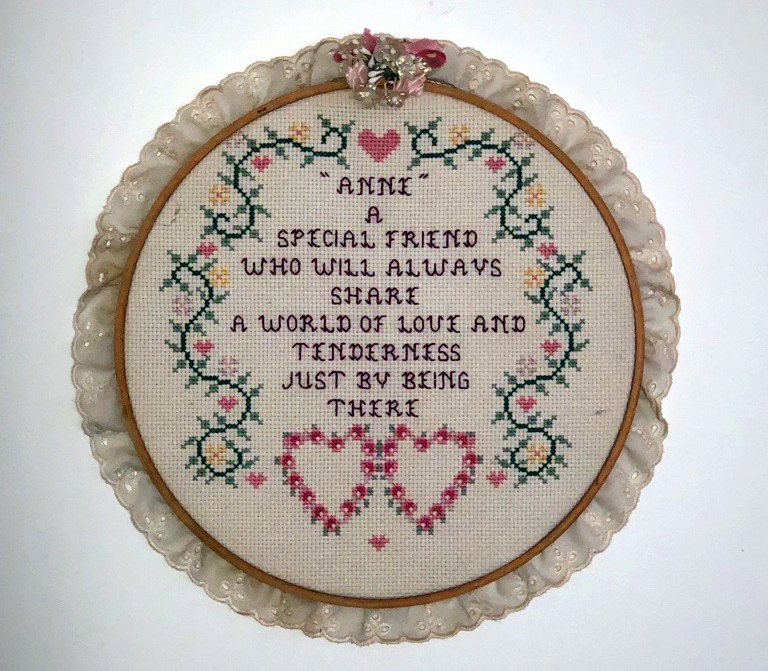
This hoop-framed design was a gift to mum from our friend Cheryl
What bulk buying often doesn’t save you money on
Random floss sets that don’t match your patterns
Specialty fabrics you haven’t tried before
Tools you don’t have a clear use for yet
The quick bulk test
Before you buy a bigger bundle, ask:
Would I still buy this if it wasn’t discounted?
Will I use it in the next 2–3 projects?
Do I already own something that does the same job?
If you can’t answer yes, it’s probably not saving you money.
A really practical bulk option
If you have stitching friends, splitting an order can be brilliant. You still get the bulk discount, you share shipping, and you’re not stuck storing a pile of supplies you won’t touch for ages.
This is one of the easiest ways to make a piece look “finished” without paying new-frame prices.
A quick thrift frame checklist:
Check the frame is solid (no wobbly corners)
Make sure the glass or acrylic isn’t badly scratched
Don’t worry about the backing or the mat, those can be replaced cheaply
If you want it to look fresh:
Wipe it down, and repaint or touch up if it’s dated
Swap the mat for a simple neutral one if the old one looks tired
Replace the backing so it sits flat and neat
Hoop finishing
Hoop finishing is a great “display it now” option. It’s inexpensive and it suits lots of designs.
The basics:
Wash your hands, then make sure the fabric is centred and tight in the hoop
Tighten the screw firmly
Trim the excess fabric, leaving enough to fold under
Secure the back with a running stitch, lacing, or a felt circle
You’ll get a clean, giftable finish without spending much at all.
Mounting on board or canvas
If you like a clean, modern look, mounting can be cheaper than framing and it’s very effective.
Budget-friendly options:
Foam board
Mounting board
A blank canvas
Keep the fabric straight and evenly tensioned. Even a simple mount looks good when the alignment is neat.
A finishing tip that saves money early
Decide how you plan to finish before you start stitching. If you know you’re using a hoop, you can buy fabric sized for that. If you’re planning a thrifted frame, you can aim for a common frame size and avoid custom costs.
8. Keep supplies organized
Making things last is the ultimate budget tip for cross stitch! My gran, and probably yours, used to say “a place for everything and everything in its place” and she was right! Being able to put my hands of the items I want, when I want them, means I have more time for stitching :)
The mantra I’ve added as an ADHD adult is: don’t put it down, put it away! Again: more stitching time!
Label partial skeins so they don’t turn into mystery thread
If you’ve got a floss inventory tracker or organiser system you like, this is where it earns its keep.
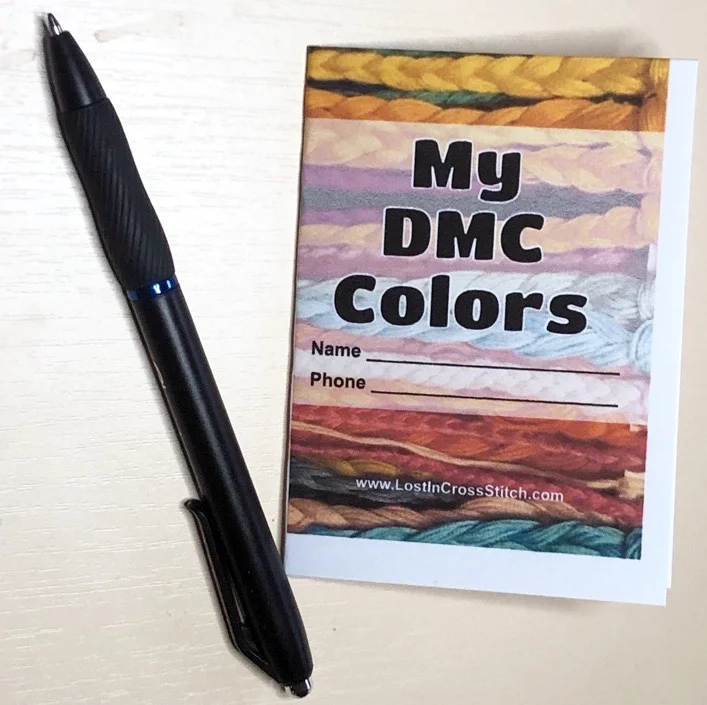
Stop Buying Duplicate DMC Floss
This printable mini-book is a pocket-sized DMC inventory you can carry in your project bag. Mark what you own and what you still need, then check it at a glance in the shop, no more scrolling through notes on your phone. Trusted by hundreds of stitchers (and counting!) Instant download, print as many copies as you like.
You don’t need a perfect system, you just need something you’ll actually use.
Store your tools so they don’t disappear
It sounds basic, but it works.
Keep needles in a needle case or a small tin
Keep scissors in the same pouch every time
Keep your threader, needle minder, and spare needles together
The goal is simple: fewer lost tools, fewer repurchases (and, at the risk of sounding boring: more stitching time! ;)).
Protect your fabric and thread
Store fabric away from damp and direct sun
Keep floss in a way you can see (so it doesn’t get forgotten at the bottom of a drawer)
Before you start, do a quick check so you don’t lose time (or money) to rusty needles, mystery floss, or fabric marks.
Keep your current project easy to pick up
This is a sneaky budget tip: if a project is easy to grab and continue, you finish more of what you start. That means you get more value out of every skein and every piece of fabric you buy.
One project bag with everything inside is often enough.
Keep stitching and keep saving
If you’re strapped for cash, you don’t need to quit stitching. You just need a few options that make supplies feel possible again.
Buy for the project you’re stitching right now, not the one you might do later.
Use the library and secondhand finds to stretch your budget further than you’d expect.
DIY what you can, and save your spending for the things that make stitching easier.
Be careful with “cheap” supplies so you don’t pay twice.
Finish simply, because a neat finish matters more than an expensive one.
Keep track of what you own so you’re not rebuying floss and tools by mistake.
Even if you can only buy a few skeins at a time, you can still stitch pieces you love. Start small, build slowly, and keep it enjoyable.
If you want a few extra ideas, these posts are good next steps:
Stitching on black Aida can seem daunting, but it doesn’t have to be!
The deep, dark fabric brings out vibrant colors and gives your designs a dramatic backdrop.
But it’s got a tricky reputation – some people think it’s too hard to see the holes, and easier to lose your place, or make more mistakes. So you’ll waste time frogging your work and might even get so frustrated that you toss it into a bag for a ‘one day’ stitch.
I promise you, as someone who has often stitched on black Aida and black linen, there are some easy changes you can make to eliminate all the challenges. It is very possible to love stitching anything on these gorgeous fabrics.
Challenges of Stitching on Black Aida or Linen
It can be tough to see the holes where your needle needs to go which can lead to mistakes: if you can’t see the holes clearly, you might misplace stitches or get off pattern.
1. Improve Visibility
These are the first tips you should use. I first used the white cloth trick with my first black aida project and it worked a treat!
I stitched my Great Whales pattern on Black Aida.
White background: Place a white cloth or a sheet of paper underneath your fabric – probably on your lap – so you can see the white through the Aida holes. This might be all you need to do. But if you need more, read on.
Light box or pad: Some stitchers swear by a light box. You can get slim ones that fit comfortably on your lap. Personally I found it made me squinting so I use mine for tracing stuff only these days. But you might find it useful.
Use good lighting: A bright, adjustable light source can make a world of difference when stitching on black Aida. A daylight lamp or one with a flexible arm that you can position just right will do the trick. I use a magnifying light and it’s awesome. Some people use magnifying glasses that also light up.
Magnification: A magnifying glass or magnifying lamp can bring those tiny holes into sharper focus, reducing mistakes.
2. Grid to Make Counting Easier
Counting threads on black Aida can feel like counting stars in a night sky. Gridding means you’re counting in 10s only, so it’s much easier to keep your place.
When we get lost in cross stitch, hours can pass in what seems like minutes. Eyes can get tired when you’re focusing closely, and more so when you’re stitching on black, even with a light background. It can cause headaches and tiredness and make you less likely to stitch.
Which is the opposite of what hobbies should do.
So to reduce the risk of eye strain:
Take regular breaks: No, that doesn’t mean step away from the cross stitch. Phew. It does mean use 20-20-20 rule. Every 20 minutes, take a 20-second break and look at something 20 feet away.
Proper lighting: You’re using good lighting anyway, right? Soft, even light is better than harsh, direct light.
Stay hydrated: Believe it or not, staying well-hydrated can help reduce overall body fatigue, including eye strain. So bring that huge water bottle with you to your stitching nook!
Use a needle threader: A good needle threader can help reduce eye strain – one less way to strain the eyes :)
High contrast needles: Black Pony Needles are brilliant but when stitching on black, a silver or gold needle will be your friend
What Do You Think?
These techniques are simple, doable and very economical. Using one or more can make stitching on black Aida much more enjoyable and less stressful.
Stitching on black Aida is a challenge worth taking on. But don’t let it stop you. The end result of a vibrant, eye-catching masterpiece is well worth the effort.
Our Cross Stitch Terms and Abbreviations list can help you decode any of those odd-sounding cross stitch terms you might be wondering about.
Frogging cross stitch is part of learning and part of finishing a piece you’re happy with. Knowing how to do it safely can save time, reduce frustration, and help protect your fabric.
If you’re new to cross stitch, frogging simply means undoing stitches after a mistake. It’s not fun, but it’s very normal, and it happens to every stitcher at some point.
This guide explains what frogging is, when it’s worth doing, when you can leave a mistake alone, and how to frog stitches without damaging your fabric or your sanity.
What is frogging cross stitch?
Frogging is the process of ripping out stitches you’ve already completed.
The name comes from “rip it, rip it,” which sounds a bit like a frog saying ribbit. The term is used across many crafts, including knitting, crochet, embroidery, and sewing.
In cross stitch, frogging usually happens because of:
A counting mistake
The wrong colour being used
A stitch landing in the wrong place
A pattern error you notice too late
None of these mean you’re bad at stitching. They just mean you’re stitching. On a recent stitch I did, it wasn’t obvious which way was up. So TWICE I spent an entire evening stitching the section, only to realise the following night that I’d been stitching upside down. As if once wasn’t enough…. anyway, thank goodness for gridding, it saved me from stitching too far to bother frogging.
When it’s worth frogging
Some mistakes really do need fixing. Frogging is usually worth it when:
The mistake throws off the rest of the pattern
A miscount affects surrounding stitches
The design is noticeably off-centre
The wrong colour changes the look of the piece
You won’t be happy continuing unless it’s corrected. If you’re anything like me, you’ll see that error every time you look at the piece, even after you’ve finished it.
If you find yourself constantly adjusting or second-guessing the rest of the project, frogging early can actually save time and frustration.
When you don’t need to frog
Not every mistake needs to be undone.
You can often leave it alone if:
The error is small and hard to see
The colour difference is subtle
The mistake doesn’t affect nearby stitches
You’re happy with how it looks overall
You accept the idea that nothing and no one is perfect. Which is true! It is a handmade thing, so perfection is not required.
Many experienced stitchers leave tiny mistakes in their work on purpose. If you have to point it out for someone to notice, it’s probably fine to keep stitching.
How to frog stitches safely
For a small number of stitches
Remove your needle from the thread.
Turn the work over and gently pull the stitches out from the back.
If needed, use the blunt end of your needle to lift stitches from the front.
Go slowly. Pulling too hard can stretch the fabric or rough up the floss around it.
For larger areas
If you need to remove a lot of stitches:
Use small, sharp embroidery scissors or a seam ripper
Snip the top leg of the stitch carefully
Gently pull the remaining thread out from the back
Work in small sections rather than cutting everything at once. This gives you more control and reduces the chance of cutting fabric threads.
What if you accidentally cut the fabric thread while frogging cross stitch?
It happens. Your heart stops, then it races. Stomach knots follow.
Even when you’re being super careful, it’s possible to nick a fabric thread while cutting stitches, especially on tightly woven fabric or when removing a large area. Or working on black. (IYKYK.)
The good news is that a small cut does not mean your project is ruined.
If the cut is small and not spreading
If you’ve only clipped one fabric thread and the hole isn’t growing:
Stop cutting straight away
Avoid pulling or stretching the area
Stitch gently over the spot when you continue
Often, surrounding stitches will stabilise the fabric enough that the cut becomes invisible once the piece is finished and washed.
If the fabric thread has split or opened slightly
If you can see a small gap forming:
Use a blunt needle to gently nudge nearby fabric threads back into place
Avoid stitching tightly across the area
Consider using one fewer strand temporarily to reduce tension
Once stitched and washed, many small gaps close up on their own.
If the cut is noticeable or under tension
For a more obvious cut, especially in a high-tension area:
Run a single strand of matching sewing thread or floss under nearby stitches on the back
This acts as a subtle support without creating bulk
Avoid knots if possible
This is a reinforcement, not a visible repair.
When a patch is worth considering
If the fabric is badly damaged or continuing to split:
Cut a small piece of similar fabric
Place it behind the damaged area
Secure it by stitching through it as you continue stitching the aida – so you stitch through both layers.
This sounds drastic, but it’s rarely visible from the front once the piece is finished.
Using iron-on interfacing for extra support
Some stitchers find it helpful to add a small piece of iron-on interfacing to the back of the fabric if a cut feels unstable or is in a high-stress area.
Choose a very lightweight interfacing, thinner than the fabric itself. I’ve successfully used woven cotton interface.
Cut a small patch, just large enough to cover the damaged area and a couple of stitches either side.
Apply it carefully to the back, following the manufacturer’s heat instructions
This can help stabilise the fabric without adding bulk, especially if the piece will be handled a lot or framed tightly later on.
It’s optional, but it can provide peace of mind if you’re worried the fabric might continue to weaken.
A reality check
Most accidental fabric cuts look far worse in the moment than they do later.
Aida cloth is more forgiving than it seems, and finished stitches, washing, and framing often hide small flaws completely. Many stitchers never find the spot again once the project is done.
One prevention tip
When frogging large areas, cutting only the top leg of stitches and pulling the rest out slowly reduces the risk of catching the fabric underneath.
What to do after frogging
After removing stitches, you might notice:
Slightly stretched holes
Fluffy fibres
Fabric that looks uneven
This is normal.
To tidy things up:
Gently rub the fabric with a clean finger to help holes close
Use a needle to coax fabric threads back into place
If needed, lightly mist or wash the piece once stitching is finished
Most fabric recovers far better than it looks like it will in the moment.
Tips to reduce frogging in future projects
You can’t avoid frogging entirely, but these habits help reduce it:
Double-check colour symbols before starting an area
Pause and check placement regularly instead of stitching long runs without stopping
Slowing down slightly often prevents having to undo much more later.
Frogging is part of stitching
Almost every finished cross stitch has been frogged somewhere along the way.
Undoing stitches doesn’t erase progress. It’s just part of the process of getting the result you want. If you’ve ever finished a piece you love, chances are you frogged something to get there.
If you want to understand more of the language stitchers use, including terms like WIP, UFO, ORT, and gridding, you might find our cross-stitch terms glossary helpful.