Category: Finishing Cross Stitch

Finishing cross stitch, and what to do with your pieces once the last stitch is in. Hoops, frames, cushions, ornaments, wearables and gifts.

  • Pros and Cons of Gifting Cross Stitch

    Pros and Cons of Gifting Cross Stitch

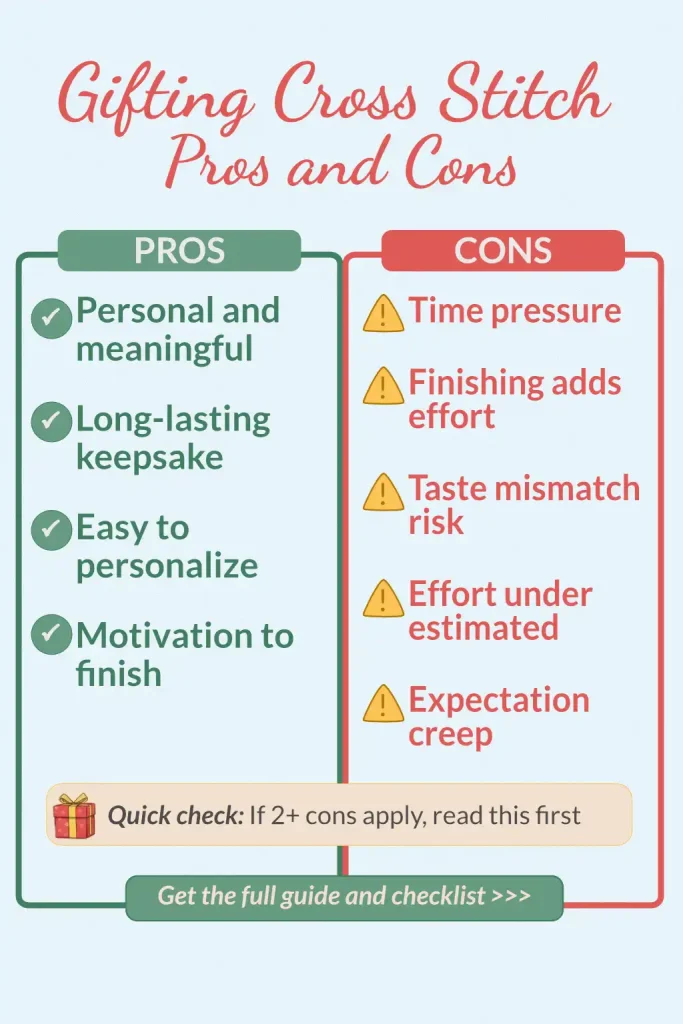
    Gifting cross stitch can feel incredibly personal, though deadlines and taste mismatch can make it stressful. If you’re unsure, choose a smaller finish, gift a starter kit, or pick a tool a stitcher will use every week.

    At some point, most stitchers think about gifting cross stitch they’ve made. A cross-stitch gift carries time, attention, and all those quiet hours of making.

    It can also get complicated fast. Deadlines, framing, recipient taste, and the awkward moment where you realize the person you love… does not love your color palette.

    Here’s a realistic look at some pros and cons, plus a few practical ways to set yourself up for gifting success.

    The best parts of gifting cross stitch

    1) It feels deeply personal

    A stitched gift says, “I made this with you in mind.” That shows care and attention that a ‘something’ bought might not show.

    2) It lasts

    Finished cross stitch holds up beautifully when it’s finished and cared for well. It can become part of someone’s home, a baby keepsake, or a holiday tradition.

    3) You can tailor it to the person

    Names, dates, a favorite animal, a quote they say all the time, their wedding colors, their dog’s ears! Cross stitch is made for personalization.
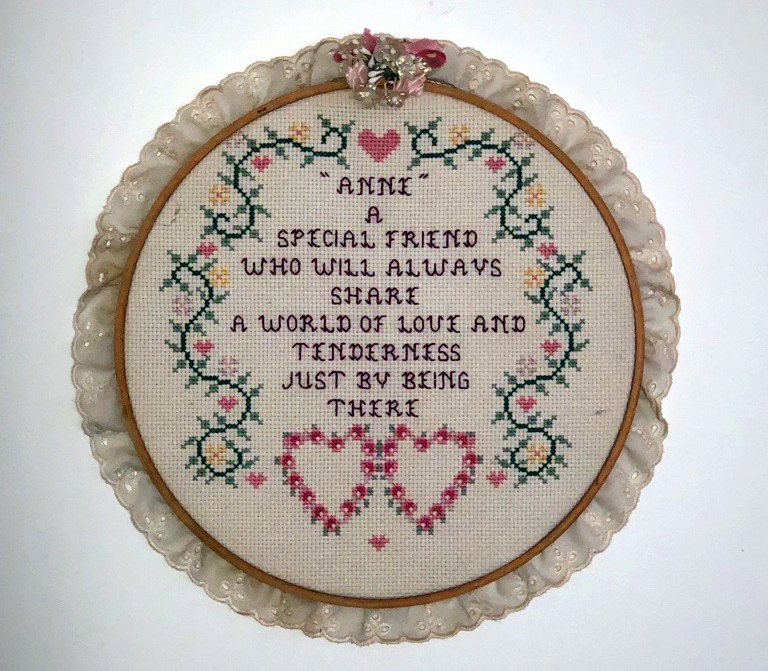
    This hoop-framed design was a gift to mum from our friend Cheryl
    This hoop-framed design was a gift to mum from our friend Cheryl in the mid 1990s

    4) It gives you a reason to finish something

    If you love starting projects, gifting can be a helpful nudge toward actually completing one.

    The tricky part of gifting cross stitch

    1) Time pressure can steal the joy

    Gifting turns a relaxing hobby into a deadline. That can be fine if you plan ahead, then it can feel awful if you are stitching under stress.

    Tip: If the date is close, choose a smaller finish, or gift the pattern and materials instead of a finished piece. Then stitch it after they open the gift, so there’s less of a deadline! (You can also tell if they’re likely to appreciate the time or not.)

    2) The recipient might not “get” the effort

    Some people will treasure it. Others will say “Oh wow, cute” and put it in a drawer. That hurts, even if they meant nothing by it.

    Quick rule: If they have handmade appreciation, cross stitch gifting is safer. If not, be prepared for them to stash your gift and maybe only bring it out when you visit. Or you might not see it ever again and you need to be okay with that.

    3) Taste is unpredictable

    Your friend might love cottage florals, then redecorate into minimal neutrals two months later. Or they might hate anything that looks “crafty” even if they love you.

    Tip: Choose designs that fit their style first, your style second.

    4) Finishing is its own project

    Stitching is one thing. Finishing (washing, ironing, mounting, framing, making into a cushion) is another. If you tend to stall at the finish line, gifting can pile up fast.

    Have a look at our Finishing Cross Stitch series – ideas for finishing cross stitch and also many small makes that could make great cross stitch gifts.

    5) Some gifts become obligation gifts

    Once you stitch for one person, others may hint. You may get pulled into a cycle of “I guess I should stitch everyone something.”

    Tip: Make gifting cross stitch something you do occasionally, not something you always do. Unless you live for stitching bookmarks and all your friends and family are readers :)

    Decision checklist: should you gift cross stitch?

    Before you commit, ask yourself:

    • Do I have enough time to stitch it with breathing room?
    • Will the recipient enjoy a handmade gift, or do they prefer commercial gifts?
    • Do I know their style well enough to choose a design they will actually display or use?
    • Am I willing to finish it properly (like professional framing), or do I need a simpler finish option?
    • Would I still be happy making it if it wasn’t a gift? (You’ll be looking at it for many many hours.)

    If you get a strong “yes” on most of those, gifting cross stitch is probably a good idea.

    Plan your gifting

    If you are someone who gifts more than once a year, planning helps a lot.

    Track who you gave it to, the pattern you gave them, the occasion, and so on.

    Our Cross Stitch Planner includes a dedicated Gift Planner page. It is basically a “keep my gifting brain organized” page plus there are conversion charts, finishing ideas, WIP trackers, and more.

    If you’re stitching for a reader, our cross stitch bookshelf reading tracker makes a lovely gift, they add a spine for every book they finish, so it fills up across the year into a record of everything they’ve read.

    Organizing cross stitch patterns is easier with a planner
    Stash management pages from our printable cross stitch planner (available in 5 styles)

    How to use a gift plan without turning stitching into homework

    • Add ideas the moment they pop into your head (even if you do nothing yet).
    • List the missing materials early (fabric count, floss, frame size).
    • Track status in simple steps: “chosen,” “kitted,” “started,” “halfway,” “finished,” “washed,” “framed,” “wrapped.”
    • Keep one “fast gift” idea ready for surprise events.

    Easier gifting ideas

    If you want the meaning without the pressure, here’s some great options:

    1) Gift a “starter kit” instead of a finished piece

    Perfect for someone who wants to learn or someone who already stitches. The kit can include a pattern you think they’d enjoy, the fabric and floss, a needle, a hoop, and even a project card.
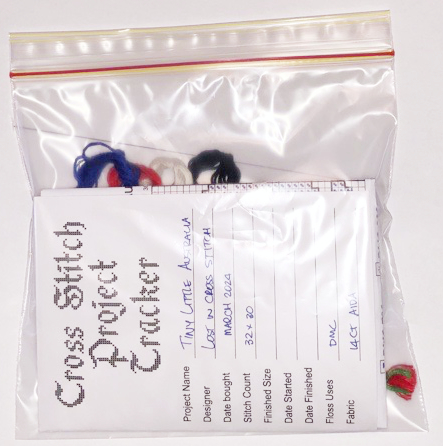
    Cross stitch project kit in a zip bag with floss, fabric and a project tracker card
    You could put your kit items into a pretty bag

    2) Gift something small but useful

    Bookmarks, ornaments, gift tags, key fobs, tiny motifs, and mini hoops are fast and still meaningful. Our wearables post might have some ideas.

    For someone who loves to travel, a mini map of a country they’ve visited makes a small, personal gift. Our Traveler Collection has them grouped by region.

    3) Gift a “choose your own pattern” voucher

    If you worry about taste, let them choose the design, then you stitch it.

    4) Gift a finished piece without a deadline

    You can still gift cross stitch without tying it to a specific date. “I made this for you” works any time.

    5) Buying a gift for a cross stitcher

    If you’re buying for a cross stitcher, a thoughtful tool can be a safer win than guessing their taste in patterns.

    Wrapping and presenting

    This can also be a fun part of gifting cross stitch.

    • Include a short note about why you chose the design.
    • Add care instructions, which would be different for a design stitched on clothing than for a framed piece.
    • If it is unframed, include a suggested frame size or finishing idea.

    So will you be gifting cross stitch?

    It can be one of the most meaningful ways to show love, as long as you choose the right project for the right person, with enough time to enjoy making it.

    If you’d like a simple way to keep gifting ideas, materials, and deadlines in one place, our Cross Stitch Planner includes a dedicated gift planner page (page 25) plus finishing references to help you get projects over the line.

    FAQs

    Is cross stitch a good gift?

    Yes, if the person enjoys handmade gifts and you have enough time to stitch without rushing. Cross stitch gifts tend be well received when the design suits their style and the finishing is tidy.

    What are the pros and cons of gifting cross stitch?

    The biggest pro is that it feels personal and meaningful. The biggest cons are time pressure, finishing work (framing, washing, mounting), and the risk that the recipient’s taste doesn’t match the design.

    How long does it take to stitch a cross stitch gift?

    It depends on fabric count, number of colors, how full the coverage is, and how fast you stitch. Small ornaments or bookmarks can be quick, while full coverage pieces can take weeks or months.

    What if I don’t have time to finish the gift?

    Choose a smaller project, switch to a simpler finish (like a hoop finish), or gift the pattern and supplies instead. You can also give a note that explains what you’re making and when you expect to finish it.

    Should I frame cross stitch before gifting it?

    Framing looks polished, but it adds cost and time. If you know their decor style, framing can be a great touch. If you’re unsure, a hoop finish or gifting a cushion, ornament or wearable.

    What’s a safe cross stitch gift if I’m not sure about their taste?

    Personalization helps, like names, dates, initials, or a tiny motif that matches something they already love. If you’re still unsure, a smaller, simpler finish tends to be less risky than a big statement piece. If they’re a reader, a bookmark can be a great idea.

    Is it okay to gift an unfinished cross stitch project?

    It can be, if the person understands what they’re receiving. Some people love getting an “in progress” gift with a story and a promise, others prefer finished gifts only. If you do it, present it intentionally with a clear plan and timeframe.

    How do I stop cross stitch gifting from becoming stressful?

    Keep gifting optional, plan earlier than you think you need to, and pick projects with realistic stitch counts for your schedule. It also helps to have one or two fast gift patterns ready for last-minute events.
    Gifting Cross Stitch Pros and Cons

    Have you ever gifted cross stitch, and would you do it again?
  • Small Cross Stitch Projects and Cross Stitch Gifts

    Small Cross Stitch Projects and Cross Stitch Gifts

    Not every cross stitch project needs to be framed, hung, or treated like a finished artwork.

    There are many designs that make perfect cross stitch gifts because they’re practical and personal pieces you can use, gift or store without needing wall space.

    Why Small Cross Stitch Projects Work So Well

    Small and giftable cross stitch projects are popular because they:

    • don’t require wall space
    • suit leftover fabric and thread
    • work well for motifs and samplers
    • make thoughtful, low-pressure gifts
    • give you that “I actually finished something” feeling

    They’re also a great option if you stitch for enjoyment first and outcome second.

    Below are some of the most popular ways stitchers turn finished pieces into small cross stitch gifts and everyday objects.

    13. Bookmarks – A Classic Small Finish

    Bookmarks are one of the most flexible small cross stitch projects.

    They work well because:

    • they don’t need perfect tension
    • they suit narrow or vertical designs
    • they’re quick to finish
    • they make easy gifts

    Popular bookmark styles include:

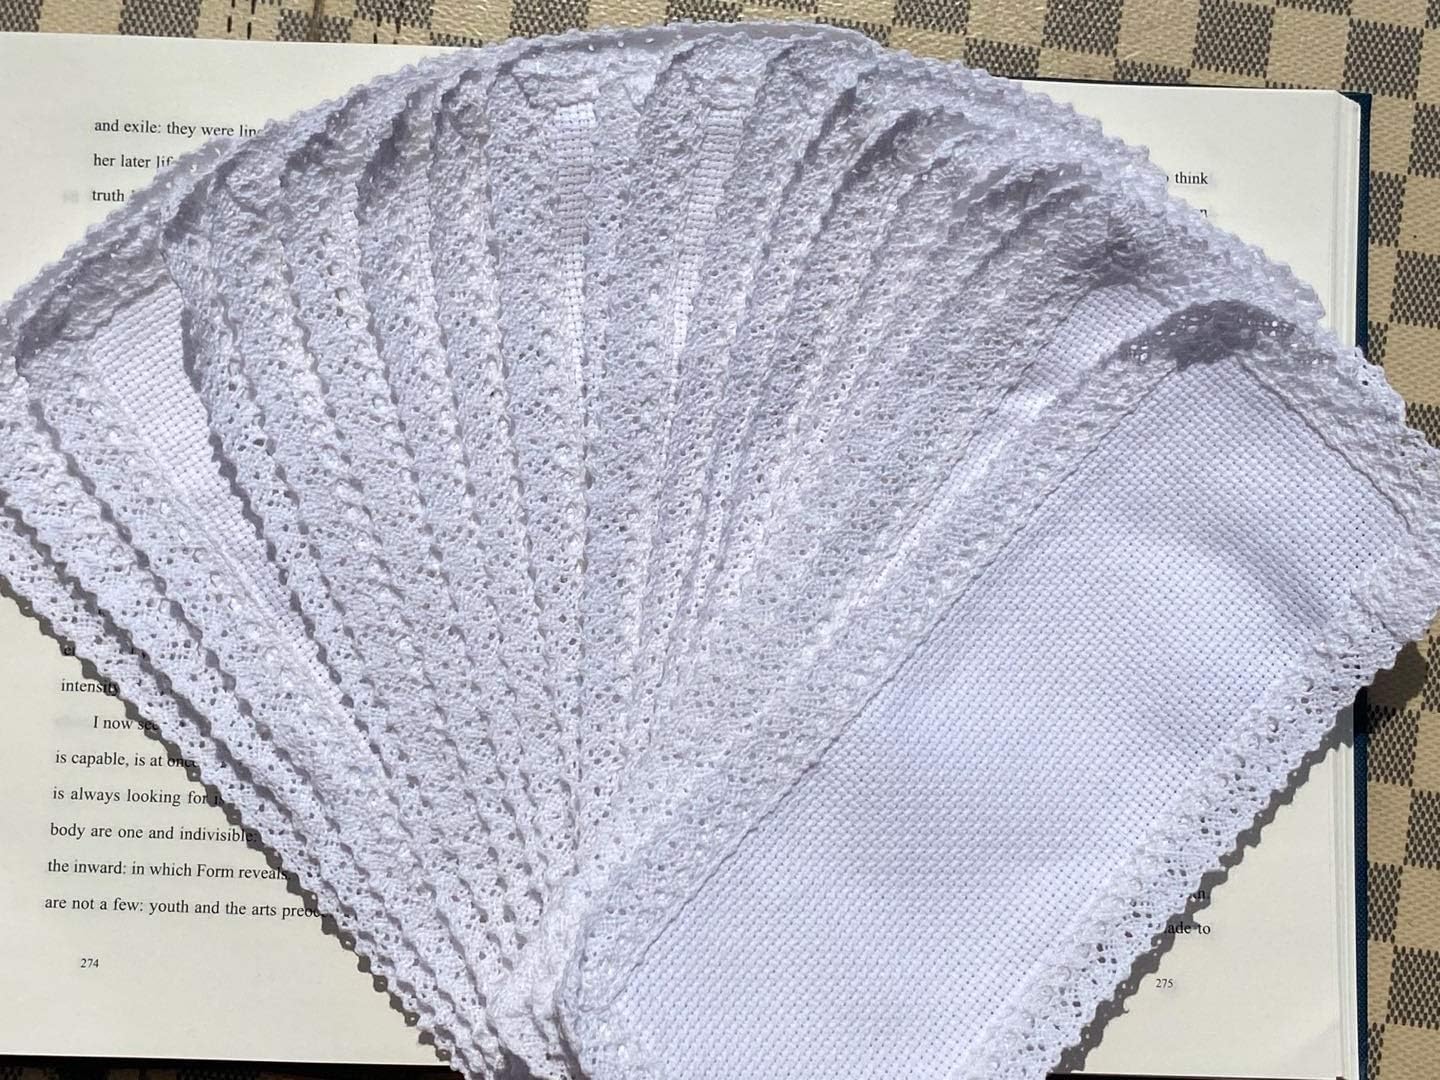
    • fabric bookmarks finished with lace, edging, or stitching
    • Aida band bookmarks for slim designs
    • folded or “tube-style” bookmarks where the stitching is protected
    • perforated paper bookmarks for a firmer finish

    Bookmarks are ideal when you want something finished but don’t want to commit to a larger project.

    14. Greeting cards and gift tags

    Greeting cards and gift tags are one of the simplest ways to finish a small stitched design. They’re light, inexpensive to post, and they feel personal without being a big commitment for the recipient.

    They’re often made using:

    • a small stitched motif
    • cardstock or blank cards
    • double-sided tape or glue
    • a cut-out window, if you want the stitching to sit inside the card

    These work well for:

    • birthdays and holidays
    • thank-you notes
    • new baby cards (names and dates)
    • quick “thinking of you” notes
    • small motifs like hearts, stars, flowers, pets, and initials

    How to make a stitched card or tag

    You can keep it simple:

    1. Stitch your small design and press it flat.
    2. Trim the fabric, leaving a border so it doesn’t fray.
    3. Stick it to cardstock, or mount it behind a cut-out window.
    4. Add a backing layer inside the card or behind the tag to hide raw edges and keep it neat.

    If you want a more polished finish, add a second layer of cardstock as a liner. It hides the messy bits and makes the card feel sturdier.

    Worth knowing:

    • If the design has beads or raised stitches, a window style usually sits flatter.
    • If you’re posting a card, keep it flat and avoid bulky finishes.
    • For gift tags, punch the hole after you’ve added the backing layer, so it stays strong.

    15. Keychains and Tags

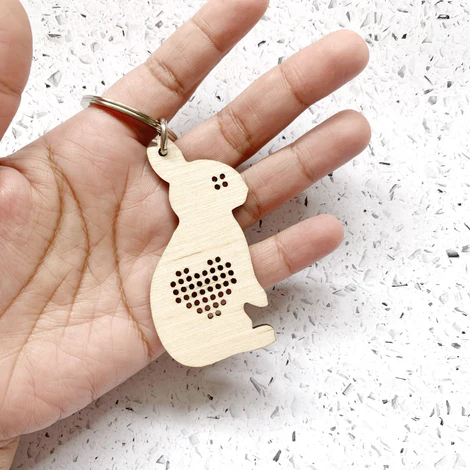
    Well, keychains are almost a subculture. Definitely a rabbit hole! Keychains make great cross stitch gifts because they’re both portable and personal.

    They’re often made using:

    • plastic canvas
    • pre-cut wooden or acrylic shapes
    • small stitched panels set into hardware frames

    These work especially well for:

    • initials
    • simple motifs
    • pets, symbols, or small icons

    Keychains are practical cross stitch gifts and don’t require the recipient to display them — which makes them surprisingly low-pressure to give.

    keychains make great cross stitch gifts

    This one from Wombat Laser.

    Use plastic canvas or add firm interfacing and perhaps a piece of felt behind your stitch, trim the edges, then attach a key ring. Consider playful motifs—pets, flowers, or geometric designs.

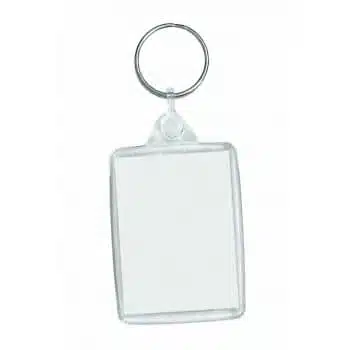
    Clear acrylic keyring insert for a cross stitch
    These are great because your stitches are protected!

    However you decide to make a keyring, you can personalise them with a name, phone number, and your (or the recipient’s) favourite motifs.

    Tie Fighter, anyone?

    16. Magnets

    Magnets are a great way to finish very small designs.

    They can be made by:

    • stitching on plastic canvas or perforated paper
    • attaching a magnet backing
    • mounting stitching onto disks, buttons, or firm bases

    Magnetic finishes work well for:

    • fridges
    • noticeboards
    • craft rooms
    • lockers or office spaces

    They’re also easy to customise, which makes them popular as small gifts or keepsakes.

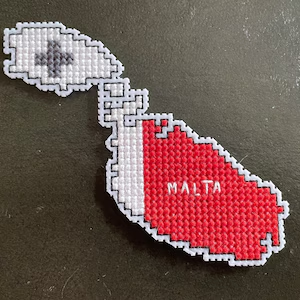
    One of our customers sent this image she made from our Tiny Little Malta flag map design. She made it into a fridge magnet – we couldn’t love it more!

    fridge magnets from perforated paper are great small cross stitch projects

    Here’s a lovely tutorial On Girl With the Elephant Tattoo. In the image below, she’s used small wooden disks that she covers with the stitched piece, and stuffs with some toy stuffing to give it some depth. Then finish the back with a bit of felt, and glue on a magnet. So pretty. It’s a very helpful step-by-step tutorial.

    ways to finish cross stitch - magnets

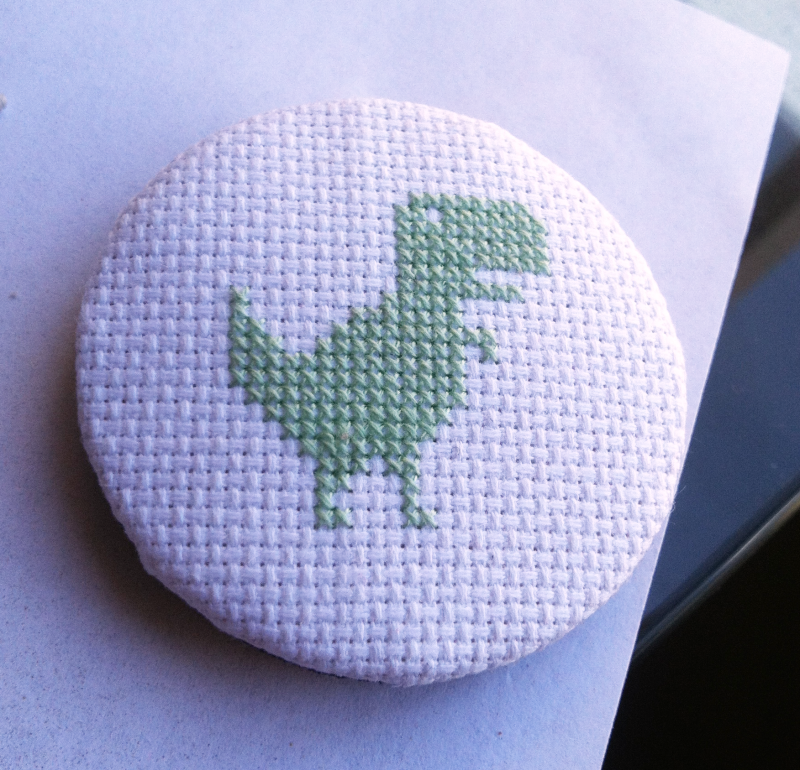
    You could even do this with covered buttons.

    17. Covered buttons (and button-style pins)

    Covered buttons are another great way to use tiny motifs. They feel a bit “finished” and polished, and you can use them in a few different ways.

    How to make a stitched button finish

    A few easy options:

    • Stitch on perforated paper or plastic canvas, then use it as the top layer on a button base.
    • Mount the stitching onto a button blank or small disk, then finish the back neatly with felt.
    • Turn it into a pin/badge by attaching a pin back instead of a magnet.

    Where stitched buttons work well

    • On project bags or needle cases
    • As a little gift add-on
    • On jackets, tote bags, or hats (if you want it wearable)
    • As a set of matching buttons from the same pattern theme

    If you like the wooden disk magnet tutorial above, the same “cover the base, add felt backing” approach works beautifully for buttons too.You could even do this with covered buttons.

    18. Needle Cases and Pincushions

    Needle cases are one of those finishes that many stitchers make once and then never stop using.

    They’re practical, durable, and personal. Small stitched organisers can include:

    • needle books
    • needle cases
    • thread keepers
    • small tool wraps

    These finishes are so satisfying because they:

    • stay useful for years
    • don’t rely on decor trends
    • feel like stitching for stitchers

    They also make excellent gifts for people who craft themselves.

    Pincushions are a great add-on finish

    If you’ve got small motifs, leftover fabric, or a few spare floss colours, a pincushion is a quick project that still feels “finished.”

    You can go as simple or fancy as you like:

    • a flat square or rectangle cushion
    • a round pincushion
    • a biscornu-style pincushion (great for tiny designs)

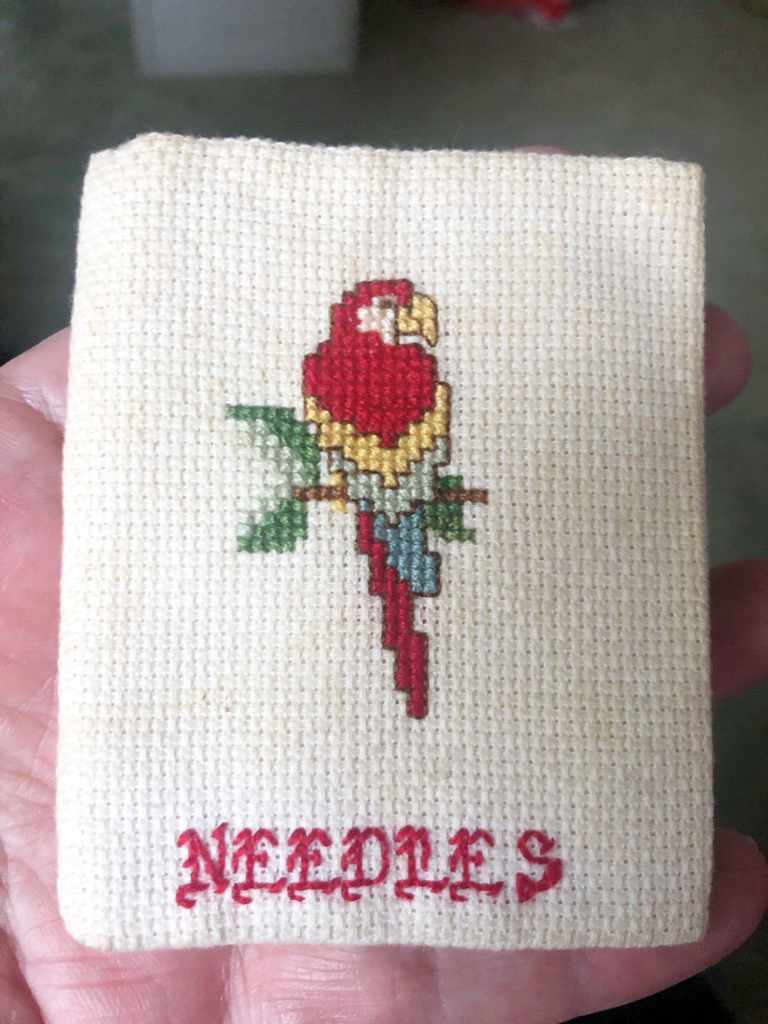
    My needlecase is below, it’s one of the first non-framing things I ever made. I’ve used it for 30 years! It’s a little grubby from being handled so often but it’s still going strong.

    It’s completely self-lined and hand stitched – no sewing machine required. You can make your own with our pattern and full 16 page all-photo instruction guide. Pick it up in our Etsy shop.

    Cross stitched needle case with a parrot and the word Needles

    19. Hanging pieces and mobiles

    Some small finishes are meant to move, sway, or hang lightly rather than sit in a frame. They’re simple, flexible, and they suit tiny designs beautifully. These include:

    • Hanging mobiles
    • Small hanging motifs (single designs or little sets)
    • Mini banners or hanging strips
    • Lightweight garlands

    Because they’re lightweight and changeable, they:

    • suit small designs
    • are easy to move around
    • feel playful rather than precious

    If you like decorating your craft space, this is a great way to use small motifs without needing a wall full of frames.

    20. Ornaments and seasonal decor

    Seasonal finishes are fun because they aren’t meant to be permanent. You get to bring them out, enjoy them for a while, then pack them away until next year.

    Seasonal finishes can include:

    • Ornaments
    • Holiday decorations
    • Seasonal trees or themed sets
    • Small seasonal hangings

    Why seasonal stitching is so satisfying

    • It’s a great way to enjoy stitching without committing to year-round display.
    • It’s easy to rotate or store.
    • It’s perfect for small motifs and quick projects.

    It can also become a lovely family tradition, you add a new ornament each year and slowly build a collection that means something to you.

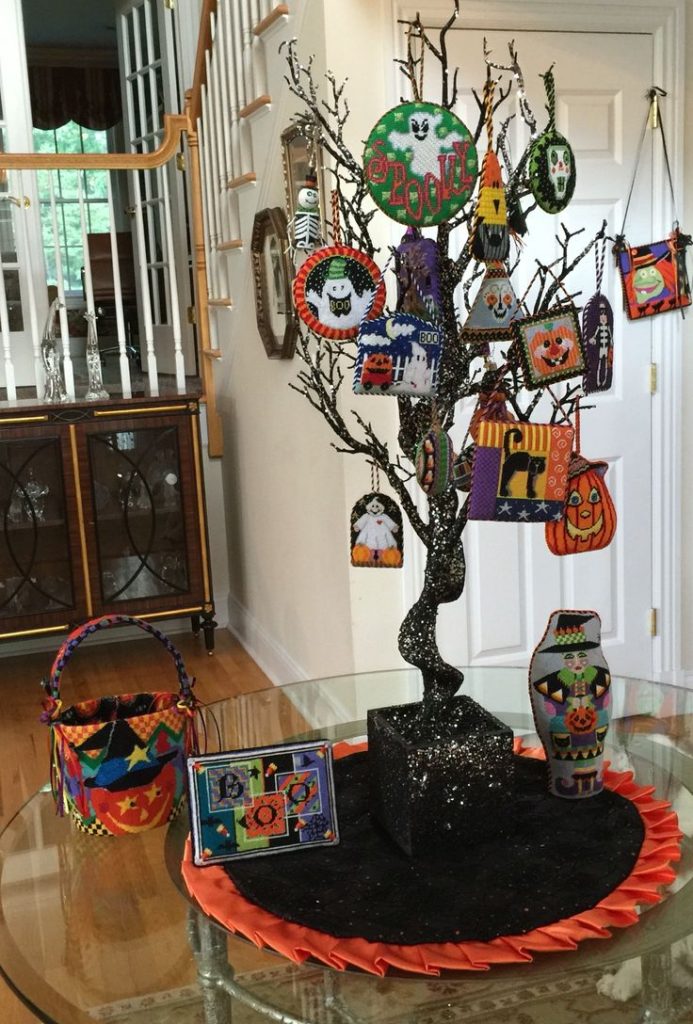
    Halloween tree decorated with small cross stitch ornaments

    Image credit: Pinterest

    When Small Projects Make the Most Sense

    Small and giftable cross stitch finishes are a good choice if:

    • you enjoy finishing projects regularly
    • you stitch motifs rather than full scenes
    • you like giving handmade gifts
    • you don’t want more wall decor
    • you want stitching to be part of everyday life.

    They’re also ideal if you’re short on time or space but still want the satisfaction of a completed piece.

    How This Fits Into the Bigger Picture

    This post is part of our series on finishing cross stitch. Start with the overview, 20 Cross Stitch Finishing Options, or go to another part: wall displays, wearable cross stitch, cross stitch decor and small projects and gifts.

    Want more finishing ideas? Take a look at the full set of ideas 20 Ways to Finish Cross Stitch hub.

    Or, jump directly to the section that suits your piece. If you want your finished piece to:

    A Final Thought

    Small projects don’t mean small effort or small enjoyment.

    Sometimes the most satisfying finishes are the ones that:

    • get used
    • get gifted
    • or quietly live in a drawer for you to appreciate any time.

    If a piece feels finished to you, that’s enough.

  • 20 Cross Stitch Finishing Options

    20 Cross Stitch Finishing Options

    There are so many cross stitch finishing options that finishing a cross stitch project can often seem harder than stitching it.

    I’ve lost count of how many pieces I’ve finished, pressed, and carefully folded away because deciding what to do next felt more complicated than the stitching ever was.

    Want to come back to these ideas? Save the pin below for later.

    cross stitch finishing options

    What this page is for

    This page is the summary of cross stitch finishing options that we like, so you can compare them and pick a direction that suits this piece.

    It helps when you have run out of:

    • wall space for framed pieces
    • money for finishing supplies
    • people to gift framed pieces to
    • storage

    It also helps when your taste has changed. A piece you loved when you were 20 might not fit your home now.

    What does “finishing” actually mean?

    In cross stitch, finishing means what you do with the piece after the stitching is complete. (More cross stitch terms decoded on our glossary post)

    That might be display, something functional, a gift, or neat storage until you’re ready. A project can be finished without ever going on a wall.

    a cross stitch magnet made with perforated paper
    Our Mini Malta Map design, stitched on perforated paper and used as a magnet

    The right finish is the one that suits how you want to use the piece, not what you think you’re supposed to do with it.

    Choose a direction first

    Most finishing ideas fit into four broad categories. Pick the one that matches how you want to use the piece.

    • Framed and wall display finishes
      Traditional frames plus other structured display options.
    • Wearable and functional finishes
      Clothing, bags, accessories, and items you can use.
    • Decor-focused finishes
      Cushions, quilts, wall hangings, banners, and flexible home decor.
    • Small and giftable finishes
      Compact projects, keepsakes, quick makes, and handy add-ons.

    Not sure which one fits?

    If you feel overwhelmed, start with this.

    1) What size is the design?

    Smaller designs tend to suit small, useful, or giftable finishes. Larger designs tend to suit wall display or bigger decor.

    2) What do you want this piece to do?

    3) Who is it for?

    Gifts often feel more satisfying when they are usable, or easy to display without extra expense.

    A finish counts if it is clean, secure, and gives you a sense of satisfaction when you look at it.

    The 20 finishing ideas list

    1. Framing – Classic wall display that protects your stitching and suits heirloom pieces.
    2. Hoop finishes – quick, charming wall finishes with a handmade look.
    3. Personalizing clothing – Turn a stitched motif into wearable detail on jackets, denim, or tees.
    4. Cross Stitch Accessories and Jewelry – Small stitched pieces turned into earrings, pendants, and wearable accessories.
    5. Bags – Add stitching to totes and pouches for a practical finish you can use every day.
    6. Charms, pins and badges – Tiny motifs finished with hardware so you can clip, pin, or attach them.
    7. Patches – Stitched designs finished as patches for clothing, bags, or mending with personality.
    8. Pillow or Cushion – A cosy home finish that makes stitching part of your everyday space.
    9. Make a Quilt Square – Convert a stitched piece into a quilt block for a bigger project over time.
    10. Wall Hangings – A textile wall finish using a rod, dowel, or banner style, no frame needed.
    11. Cross Stitch Coasters – Small functional finishes that protect surfaces and show off tiny designs.
    12. Tree Ornaments – Seasonal stitched decorations that are easy to make and bring out each year.
    13. Bookmarks – A classic small finish that’s quick, useful, and easy to gift.
    14. Greeting Cards and Gift Tags – A simple way to turn small motifs into personal notes and presents.
    15. Keychains and Tags – Portable stitched gifts that don’t require wall space or display decisions.
    16. Magnets – Tiny finishes that turn small designs into everyday fridge or noticeboard pieces.
    17. Covered buttons – Neat, polished tiny finishes you can use as buttons or small accessories.
    18. Needle Cases, biscornu and pincushions – Practical stitched tools that keep needles safe and feel made for stitchers.
    19. Hanging pieces – Lightweight finishes like garlands or mobiles that move and display as a set.
    20. Seasonal Pieces – Rotating finishes for holidays and seasons, fun to stitch and easy to store.

    Explore the series

    If you would rather read by category, start here:

    Part 1 – How to Finish Cross Stitch
    Everything framing – classic frames and many alternatives that are easy and cute.

    Part 2 – Wearable Cross-Stitch & Accessories
    Ideas for using stitching on clothing, bags, jewelry, and everyday items.

    Part 3 – Cross-Stitch Decor Ideas
    Creative ways to display finished stitching at home without defaulting to frames.

    Part 4 – Small & Giftable Cross-Stitch Projects
    Practical, personal finishes that are easy to use, share, or store.

    If you’re scrolling and feeling overwhelmed, that’s understandable. There are a lot of cross stitch finishing options, and not every finish suits every project.

    A project doesn’t have to be impressive to be finished. If it’s clean, secure, and gives you a sense of satisfaction when you look at it, that’s enough.

    When you’re ready, start with Part 1 to narrow things down or jump straight to the category that feels right.

  • Cross Stitch Decor Ideas

    Cross Stitch Decor Ideas

    Are you looking for cross stitch decor ideas without defaulting to a frame?

    You can turn your stitched pieces into cushions, wall hangings, quilts, ornaments, and other display-worthy items.

    8. Create a Pillow or Cushion

    A cozy pillow or cushion can add a touch of handmade charm to your living space. It’s a delightful way to showcase your creativity and crafting skills beyond traditional framing.

    Let’s dive into the step-by-step guide to crafting a cross stitch pillow that will effortlessly blend artistry and comfort into your home decor.

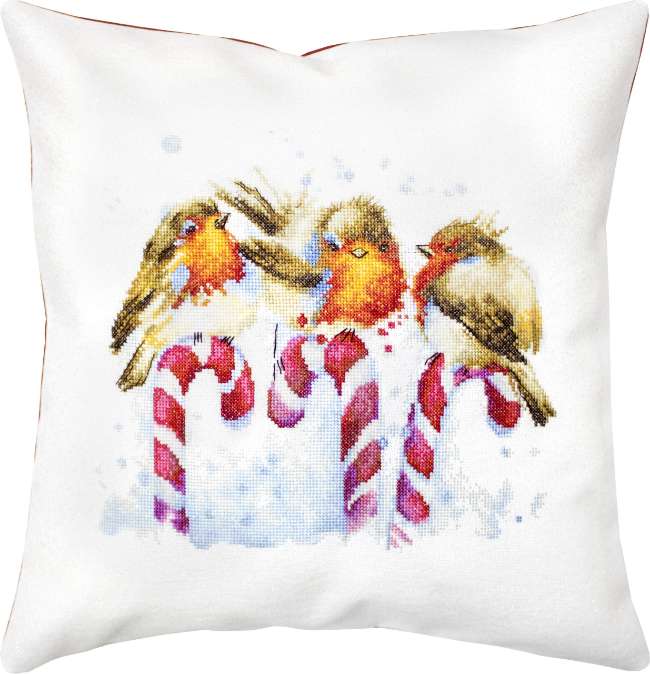
    cross stitch pillow
    cross stitch pillow

    9. Make a Quilt Square

    Adding cross stitch to a quilt is a practical form of cross-stitch decor, especially for pieces you want to use rather than hang on a wall. It works well for motifs or designs that feel too small or informal to stand alone.

    When treated like a quilt block, cross stitch becomes part of the overall design instead of the focus. Surrounding it with plain or lightly patterned fabrics helps the stitching sit comfortably within the quilt rather than competing for attention.

    This approach suits cross-stitch decor that’s meant to be lived with — folded over a chair, used on a bed, or brought out seasonally — rather than displayed on its own.

    10. Convert into a Wall Hanging

    This is an interesting and possibly more cost effective way of displaying your work.

    Hem your work and add a pocket along the top and/or bottom. Then thread a wooden dowel or a metal rod through the pocket.

    Add a decorative cord, maybe some cute embellishments like tassels or ribbons or twine, and hang.

    Voila.

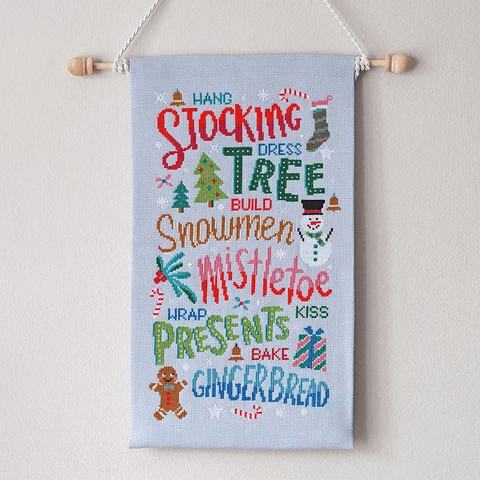
    Deck-The-Halls-Cross-Stitch-by-Caterpillar-Cross-Stitch-Wall-Hanging
    Deck The Halls Cross Stitch by Caterpillar Cross Stitch

    Magnetic poster hangers (easy to swap, easy to style)

    Magnetic poster hangers use two wooden bars with strong magnets inside. You clamp the fabric at the top and bottom, then hang it with the included cord or strap. It gives a simple, minimalist look, and it is easy to change out when you feel like a refresh.

    Best for

    • long samplers
    • seasonal pieces you want to rotate
    • stitched fabric you do not want behind glass

    Worth knowing

    • choose a hanger that matches the width of your stitched area, or slightly wider
    • if the fabric is thick, check the magnet strength
    • for extra grip, some people add a thin strip of acid-free double-sided tape inside the hanger

    There’s a full tutorial for a DIY magnetic hanger on Gathered.

    magnetic hanger as a way to finish cross stitch
    This magnetic hanging was originally featured in The World of Cross Stitching issue 341 (January 2024).

    If you hang a cross stitch ‘open air’ (no glass/acrylic in front), dust will slowly settle into the stitches and fabric. Over time it can dull light areas, and the gritty particles can add tiny amounts of wear when the piece moves in airflow or when it’s handled for cleaning.

    Dust can hold moisture. In a damp spot, that can contribute to mildew or mold. Dust build-up can also attract insect pests.

    If you want the best protection from dust (and day-to-day splashes or fingerprints), glazing is the strongest option. Glass or acrylic creates a barrier that cuts down airborne dust and household pollutants (like grease or smoke) reaching the stitching.

    If you keep it open-air, gentle maintenance works well: use low suction and vacuum through a mesh/screen (tulle, nylon stocking, fiberglass screen) so the nozzle never grabs threads.

    11. Cross Stitch Coasters

    Yes, it is possible to turn cross stitch into functional cross-stitch decor. I first saw these in the 1990s – clear plastic coasters with room at the back to insert a cross stitch design.

    They came in all sorts of shapes and sizes and were surprisingly expensive, so I only ever bought three. I still have them. Nearly 30 years later they’ve held up fairly well, although they’re definitely showing their age, including a burn mark from a guest who stubbed out a cigarette. Right???

    cross-stiitch-coaster makes lovely and useful cross stitch decor

    These are great for small designs, and these days there are far more options.

    This style of coaster comes and goes but they do a great job of protecting your stitching while keeping it usable. As I’m writing this I’m looking for a link where you could pick up a set.

    • Current options include:
    • wooden or cork shapes with tiny holes that you stitch directly into (though it’s worth thinking about whether you want drinks resting straight on your stitches)
    • plastic, perspex, or acrylic frames in many shapes and sizes, now much cheaper and easier to find
    • plastic canvas finishes, which handle spills better than you might expect
    • fabric coasters, hemmed and backed with cork or padding.

    Resin-set finishes pop up from time to time as well.

    Personally, I lean toward simpler solutions: fewer supplies, less fuss, and more time spent stitching.

    12. Cross Stitch Ornaments

    Ornaments are a natural fit for seasonal cross-stitch decor. They’re small, decorative, and easy to rotate through the year, which makes them especially appealing if you enjoy stitching for holidays or special occasions.

    From Christmas to Easter, Halloween to Valentine’s Day, there’s almost always a design that suits the moment. Ornaments are also a good choice when you’re in the mood for something quick and display-worthy rather than a long project.

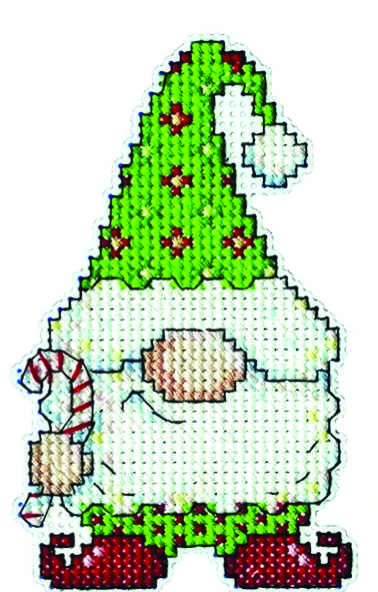
    Cross stitch Christmas gnome with a green hat and candy cane
    This cutie is stitched on paper!

    Common ornament styles include:

    • flat stitched pieces backed with felt or fabric
    • mini hoop finishes
    • simple padded or 3D shapes
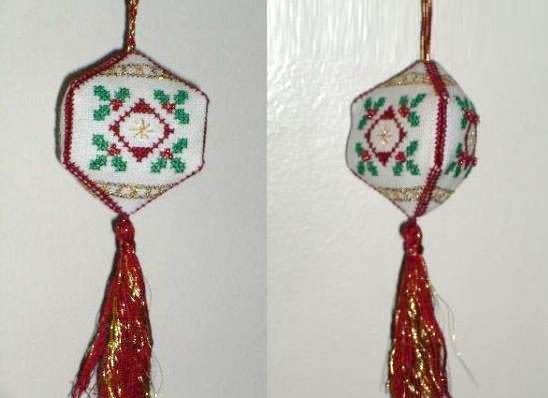
    Two hexagonal 3D cross stitch Christmas ornaments with red tassels

    They can be stitched on Aida, evenweave, or perforated paper, depending on the look you want and how structured you’d like the finished piece to feel.

    Small embellishments like ribbons, beads, metallic thread, or simple tassels can add a bit of interest without overpowering the stitching. A hanging loop is all that’s needed to turn a finished piece into decor.

    Ornaments are often stitched for enjoyment rather than permanence, but many people like to add a date or initials. Over time, they quietly become part of a family’s seasonal rhythm.

    So Many Ideas, So Little Time

    There’s no shortage of ways for cross stitch decor. Sometimes the hardest part is choosing which idea to try next. Spending too long Googling can get overwhelming (and cut into actual stitching time), so the aim here is simply to show what’s possible.

    If even one of these cross stitch decor ideas sparks a project, then the page has done its job. Whether you stitch something to hang, use, rotate seasonally, or simply enjoy making, there’s always another way to let cross stitch fit into your space and your life.

    Want more finishing ideas? Take a look at the full set of ideas 20 Ways to Finish Cross Stitch hub.

    Or, jump directly to the section that suits your piece. If you want your finished piece to:

    This post is part of our series on finishing cross stitch. Start with the overview, 20 Cross Stitch Finishing Options, or go to another part: wall displays, wearable cross stitch, cross stitch decor and small projects and gifts.

  • Wearable Cross Stitch Projects and Accessories

    Wearable Cross Stitch Projects and Accessories

    In this second part of the series on different ways to finish cross stitch, we’re looking at wearable cross stitch and cross stitch accessories: ways to finish stitching so it can be worn, carried, or used as part of everyday life.

    From clothing and bags to jewelry, pins, and patches, these ideas focus on finishes that move with you rather than sitting on a wall. Decorative finishes are just one part of the bigger picture, and if you’d like a full overview of all the ways cross stitch can be finished, the main guide pulls everything together in one place.

    I thought I had a handle on this topic before writing the post. Turns out, there are a lot of creative people out there. If you don’t come away with at least one new idea, let me know.

    3. Personalizing Clothing with Cross Stitch

    Create unique, personalized clothing pieces that showcase your creativity and style and give you a new way to finish a cross stitch and wear your craft with pride.

    Choosing the Right Fabric and Thread

    Choose durable fabrics like cotton or denim that can hold the stitches well and are comfortable to wear. Make sure your embroidery floss is colour fast – of course we’ll always say DMC fits the bill.

    Placement and Design Ideas

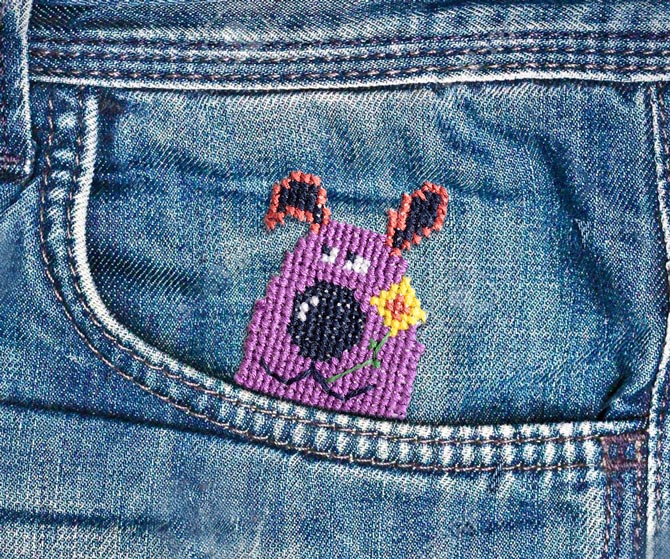
    Cross stitched dog on the pocket of denim jeans

    Get creative with where you place your cross stitch designs on clothing, like a small motif on the pocket of a denim jacket, or a border to the hem of a t-shirt (or sleeve hem, or neckline).

    Try adding a personalized monogram to a cap – not the rim, obviously – you’d need a drill to get through that thickness!

    Popular design ideas include geometric patterns, botanical motifs, and quirky phrases that reflect your personality.

    Finishing Techniques for Clothing Items

    You will need to buy waste canvas. You sew a square of waste canvas big enough for your cross stitch onto the item of clothing you want to decorate.

    When you’ve stitched your design, you remove the waste canvas – pull it out thread by thread.

    Be sure that you don’t stitch through the threads of the waste canvas or you will swear – a lot – when you try to remove the canvas threads.

    It is worth it though. It’s lovely and lasts for many years, especially if you finish the back of your stitches (fusible interface or fabric backing) to prevent snags and unraveling.

    Turn the garment inside out before washing in cold water on a gentle cycle, to preserve the design.

    4. Cross Stitch Accessories and Jewelry

    You might not have thought about jewelry as a way to finish cross stitch – to be honest, nor had I until I started researching this post. But it’s pretty awesome!

    You can make rings, earrings and pendants – and if you go up a tiny bit in size, charms and keychains are next!

    You can create stunning accessories that stand out and experiment with high thread count fabrics (though you might need a magnifying glass!) and materials like metal mesh, wooden pre-drilled shapes and of course, plastic canvas – that can all stretch your stitching skills.

    If you’re up for a challenge, or just want to try something new, this could be for you!

    A Unique Cross Stitch Finish: Jewelry

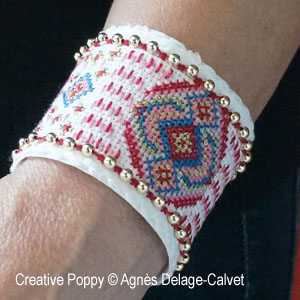
    Find mini motifs that will scale down to fit jewelry findings, or stitch up bands to make bracelets.

    Cross stitched cuff bracelet on a wrist
    Image Credit: Creative Poppy

    Add beads, sequins, or tiny charms to add texture and sparkle, and initials, names, or meaningful symbols to turn a simple accessory into a special keepsake.

    5. Bags

    Consider the size, shape, and material of the bag to ensure that it complements your cross-stitch design. A plain canvas tote or a denim backpack can provide the perfect canvas for your creative expression. Or, you can add a panel to the flap or pocket.

    6. Charms, Pins and Badges

    Charms, pins, and badges are all built on the same idea, take a tiny design and turn it into something you can clip, pin, or attach. They’re great for using up small motifs, and they make brilliant little gifts.

    Phone charms might come and go, but bag and zipper charms never really do.

    If you like the idea of key chains or rings, you can treat them as part of this category too. A keyring can be a keyring, but it can also be a charm on a backpack, tote bag, project bag, or zipper pull.

    How to make them

    You’ve got a few easy options, depending on what you want the finished piece to be.

    1: stitch on plastic canvas or perforated paper (fast and sturdy)

    • Stitch your small design.
    • Trim it neatly to shape (leave a small border if you need to).
    • Attach your finding:
      • keyring chain or lobster clasp for a charm
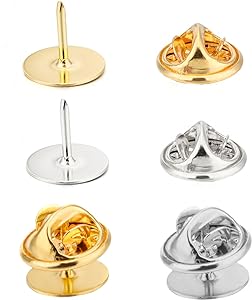
      • pin back for a pin
      • badge clip or reel if you’re doing something wearable

    2: stitch on fabric, then mount onto a firm base (more flexible shapes)

    • Stitch on fabric.
    • Mount it onto a small sturdy base (card, felt, wooden disk, or acrylic blank).
    • Finish the back neatly, then attach your finding (pin back, clasp, clip, chain).

    Option 3: finish as a covered button (for a polished look)
    If you want that tidy, “finished product” look, a covered button style finish can work beautifully. You can then use it as:

    • a pin or badge
    • a bag charm
    • a button-style accessory

    Best for

    • backpacks, tote bags, and project bags
    • jackets, hats, and denim (pins/badges)
    • small gifts and keepsakes
    • using tiny motifs from larger patterns

    Worth knowing

    • Keep the back neat if it will touch clothing or get handled a lot.
    • If it’s going on something that gets bumped around (keys, bags), sturdy bases and sealed edges matter more than perfection.
    Pin back to finish cross stitch
    Pin back to make wearable cross stitch accessories

    7. Patches

    For a patch, you’d definitely only be stitching onto fabric. This technique means you’re not using waste canvas, which can be really tricky to remove.

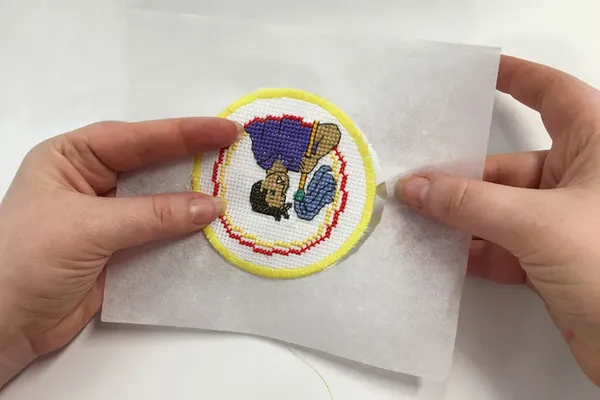
    Finish the edges well, and then sew onto a bag or item of clothing. These are probably more robust than stitching directly onto clothing. There’s a great tutorial at Gathered.

    Making a sew-on patch from a finished cross stitch
    Image credit: Gathered

    Really, the only limit here is your imagination.

    And time. I don’t know about you, but there’s enough cross stitch time for me!

    More To Explore

    Wearable cross-stitch and accessories are a great option if you like your stitching to be used, carried, or shared rather than displayed. Whether it’s a jacket detail, a bag panel, a piece of jewelry, or a simple patch, these finishes let your stitching become part of everyday life.

    Want more finishing ideas? Take a look at the full set of ideas 20 Ways to Finish Cross Stitch hub.

    Or, jump directly to the section that suits your piece. If you want your finished piece to:

    This post is part of our series on finishing cross stitch. Start with the overview, 20 Cross Stitch Finishing Options, or go to another part: wall displays, wearable cross stitch, cross stitch decor and small projects and gifts.

  • 20 Ways to Finish Cross Stitch: Wall Displays

    20 Ways to Finish Cross Stitch: Wall Displays

    If you want to display your cross stitch on the wall, you’ve got more options than a standard frame. This page covers classic framing plus easy alternatives like floating frames, wrapped canvas, gallery walls, and hoop finishes.

    Want the full list of 20 ways to finish cross stitch? Start at the hub.

    This is the “wall display” path in our series on ways to finish cross stitch. It covers classic framing plus several easy alternatives that change the look without turning your project into a whole sewing job.

    If you want wearable ideas, decor, or small gift finishes, start at the hub and jump to the category that fits your piece.

    FIRST: It’s Okay to Never Display Your Cross Stitch

    There is no rule that says a finished piece must end up on a wall.

    Some pieces are stitched because the pattern was fun, the stitching felt calming, or you simply wanted something satisfying to do with your hands.

    If you want to press it, fold it, and keep it in a project box, that is a valid finish.

    1. Framing: The Familiar Option (but not the only one)

    Framing is the most common way to finish cross stitch, so it makes sense to mention it, but it’s only one option.

    Beautiful cross stitch by my mum one of many creative ways to finish cross stitch
    Beautiful cross stitch by my mum, completed in 2005

    A frame can:

    • protect the stitching
    • turn a piece into wall art
    • suit traditional or heirloom designs

    Framing on a budget

    If you want a frame but you don’t want to spend much, start with op shops, Facebook Marketplace, and Buy Nothing groups. You can also reuse frames you already have and refresh them with a quick wipe or a coat of paint. Standard frame sizes are usually much cheaper than custom framing, so it can help to choose your finish size with that in mind.

    Quick frame check before you buy

    • Check the frame is solid and not warped.
    • Check the glass or acrylic is not badly scratched.
    • Smell the backing. If it’s musty or looks like it has been stored damp, skip it (or have a plan to replace it).
    • Make sure there’s enough depth for fabric and mounting board, not just a thin photo.

    If you want the ‘cheap upgrade that looks expensive’, replace the mat and backing. It makes a thrifted frame look fresh straight away.

    Floating frame (the sandwich glass look)

    A floating frame gives you a clean, modern finish where the fabric looks like it is suspended inside the frame. Your stitched piece sits between two panes of glass, so you can see the edges, and sometimes the back as well.

    Best for

    • smaller to medium pieces
    • modern designs and typography
    • pieces where the fabric edge looks neat

    Worth knowing

    • you’ll want the stitching to sit flat, with no bulky knots or raised beads
    • bright light can show any marks or creases on the fabric, so pressing matters
    Floating frame cross stitch
    Image credit: Reddit

    Floating frames can be pricier than standard frames, so they’re often best for smaller pieces or for designs you really want to feature.

    You might pick up a floating frame in your favourite thrift shop, or use a clear acrylic photo frame to get a similar look for less.

    Wrapped canvas (stretched canvas finish)

    Wrapped canvas gives your stitching a crisp, frameless look. Pick up a canvas from a dollar store, wrap your fabric around it making sure there’s no wrinkles, and secure it at the back.

    Best for

    • bold designs that suit a modern, frameless look
    • pieces you want to hang quickly
    • anyone who wants a “finished” result without shopping for frames

    Worth knowing

    • your stitched area needs enough spare fabric around it to wrap neatly
    • strong, even tension as you wrap it matters more than perfection

    Here’s a full tutorial using a quilted piece as an example.

    Gallery-style wall display (one story, many pieces)

    A gallery wall is a brilliant option when you have lots of small finishes, or a set that belongs together. It can be a neat grid of matching frames, a mix of sizes, or a themed collection that grows over time.

    Best for

    • series projects (mini maps, SALs, monthly motifs)
    • collections that are still in progress
    • small pieces that feel too “tiny” on their own

    Worth knowing

    • matching frames create a calm, organised look
    • mixed frames look more playful, but a simple rule helps, like one colour family or one frame style
    • layouts are easier if you arrange on the floor first, then hang
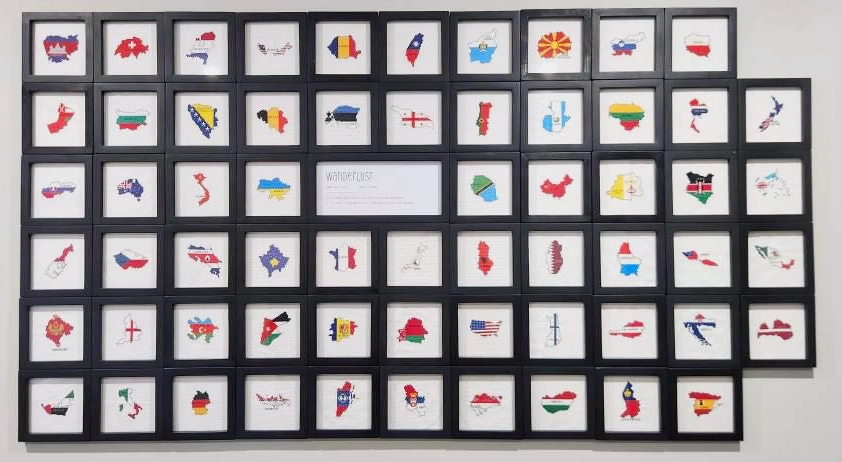
    Full wall of framed travel cross stitch country maps

    The gallery wall display above is by Emma, one of our travelling cross stitching customers. We’re blown away every time we see it!

    final bw mini book

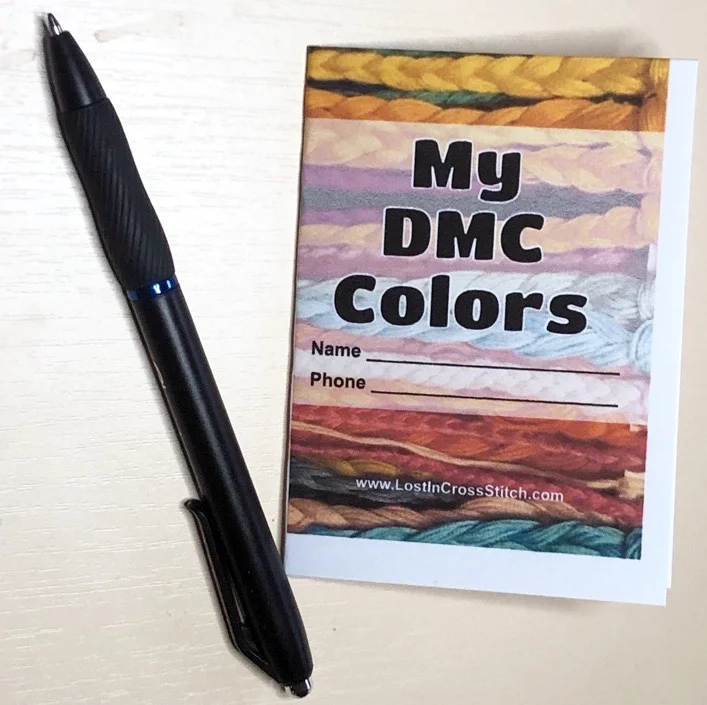
    Stop Buying Duplicate DMC Floss

    This printable mini-book is a pocket-sized DMC inventory you can carry in your project bag. Mark what you own and what you still need, then check it at a glance in the shop, no more scrolling through notes on your phone. Trusted by hundreds of stitchers (and counting!) Instant download, print as many copies as you like.

    2. Hoop finish (simple, charming, and quick)

    Finishing in a hoop is one of the quickest ways to display cross stitch. It suits pieces that feel casual, cheerful, or handmade on purpose, and it works well for small designs.

    Best for

    • small motifs
    • gifts
    • seasonal pieces you might swap out

    Worth knowing

    • a tidy back makes the whole thing look more “finished”
    • a hoop can also be hung in a cluster, which looks great on a small wall
    This hoop-framed design was a gift to mum from our friend Cheryl
    This hoop-framed design was a gift to mum from our friend Cheryl

    A wall of framed Tiny Little Countries flag map cross stitches

    Small enough for a hoop, made for a travel wall

    Our Tiny Little Countries patterns are mini flag maps that stitch up quickly and fit a small hoop or frame. Stitch the places you’ve been and hang them together.

    Where This Leaves You

    If framing has lost its appeal, you now have options.

    Whether you want to wear your stitching, use it in your home, turn it into something small and meaningful, or simply enjoy the act of finishing, there’s more than one way forward.

    Want more finishing ideas? Take a look at the full set of ideas 20 Ways to Finish Cross Stitch hub.

    Or, jump directly to the section that suits your piece. If you want your finished piece to:

    This post is part of our series on finishing cross stitch. Start with the overview, 20 Cross Stitch Finishing Options, or go to another part: wall displays, wearable cross stitch, cross stitch decor and small projects and gifts.

Browse by topic