

These budget cross stitch tips will help you stitch more while spending less. You’ll learn where you can save, what’s worth paying for, and how to avoid the common money-wasters that creep in over time.
When I first started cross stitching, I had a toddler and a baby – the budget was tight! I used to buy about five skeins of floss each time I got paid, from a big retailer in the local shopping center. It didn’t occur to me that I could stretch my budget in all the ways we’re talking about in this post.
That’s what these budget cross stitch tips are for. They’ll help you get the supplies you need so you can stitch at least some of the things you want to stitch, even when money’s tight.
I also want to say this up front: you don’t need to have everything at once. You can start small, build slowly, and still end up with a finish you’re proud of.
If you’re stitching on a budget because it helps you unwind, you might also enjoy our post on why cross stitch for relaxation is worth making time for.
In this post
I always say that cross stitch has a low barrier to entry – you can buy a kit in a thrift store for just a couple of dollars, and have everything you need to get started:
- a hoop
- fabric
- needle
- floss
- pattern
- often even simple instructions for this beloved hobby that’s literally hundreds of years old.
But, when you get past your first few kits, you start to need more – more challenge, more floss and ways to store it, bigger pieces of fabric, needles that feel smoother and last longer, more patterns, a Q-Snap, a stand, a light… it can literally go on and on and on and it can quickly add up.
Quick Budget Game Plan (so you don’t waste money)
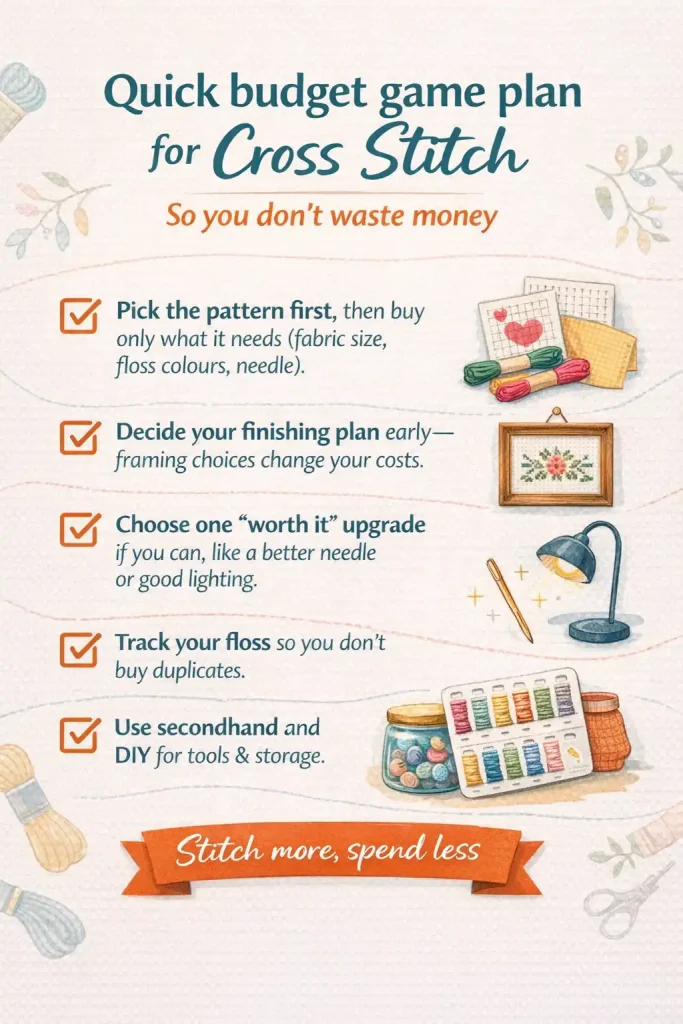
- Pick the pattern first, then buy only what it needs (fabric size, floss colours, needle).
- Decide your finishing plan early, because framing choices change your costs.
- Choose one “worth it” upgrade if you can, like a needle you love or lighting that makes stitching easier.
- Track your floss so you don’t buy duplicates by mistake.
- Use secondhand and DIY for tools and storage whenever you can.
1. Shop with Coupons and Discounts
Discounts can genuinely help, but they can also nudge you into buying things you weren’t planning to buy. When your budget is tight, the best savings come from only buying what you need for the project you’re stitching right now. Here’s a simple way to do that.
Start with a “payday” shopping list
Before you open a website or walk into a shop, write this down:
- Your pattern name
- Your fabric count and size
- The floss colors you need (or the number of skeins, if you’re keeping it simple)
- Needles, only if you’re actually out
That list keeps you from walking out with extras you’ll “use someday.”
Use discounts in a way that actually saves money
- If shipping cancels the discount, wait. It’s usually cheaper to combine orders and pay shipping once.
- Don’t buy extras just to reach free shipping. We all love to save that shipping! But if you don’t need it for this project, it isn’t saving you money.
- Only stock up on things you already use constantly. Needles you like, hoops you always reach for, your usual fabric count.
- If you’re tempted by a big floss haul, pause and check your current projects. If you don’t have a pattern lined up that needs those colors, it’s likely future clutter.
A budget-friendly way to buy floss over time
If you’re doing what I did in the early days, buying a few skeins at a time, you’ll get more stitching done by prioritising:
- The colors you actually need now, to start the project
- The rest of the colors in the next pay cycle
- “Nice to have” extras later
That way, you’re always stitching something, even if you’re building a full set of DMC floss slowly.
2. Thrifting for Cross Stitch Supplies
Thrifting is one of the quickest ways to get set up without spending much. A lot of cross stitch gear is “nice to have,” and it shows up secondhand all the time.
Thrift in your local charity shops and also keep an eye on local Buy Nothing groups and Marketplace. They can be gold for cross-stitchers as people who no longer stitch love to pass on their treasured collections to people will value them.
What’s worth grabbing
- Hoops
- Frames (great for finishing)
- Floss in skeins, on bobbins or even in bags
- Aida or other evenweave fabrics
- Small storage boxes or tins
- Project bags, pouches, pencil cases
- Craft books and magazines
- Part-used kits (sometimes you’ll score a bunch of usable floss)
Quick checks so you don’t bring home problems
- Smell check: skip anything musty or damp.
- Rust: avoid rusty needles, stained metal hoops, or anything that looks like it’s been stored wet.
- Fabric: look for brown water marks, fading, mold spots, or weird stickiness.
- Floss: if it’s faded or feels brittle, leave it.
Easy cleaning
- Wash hoops and plastic tools in warm soapy water. Let wood dry overnight.
- Wipe down frames and replace the backing if it looks grubby.
- If a fabric or kit looks suspicious, don’t take the risk. Saving a few dollars isn’t worth contaminating the rest of your stash with mold or strange odours.
A small thrift win that adds up
Finishing is where cross stitch can get expensive. A $3 thrift frame can replace a $30 new one, and your piece still looks lovely on the wall.
3. Try Cheaper Brands Carefully (so you don’t waste money on a bad choice)
There are cheaper floss brands and cheaper supplies out there, and sometimes they’re totally fine. The issue is that if the quality is off, you can end up paying twice, once for the cheaper option, then again when you replace it.
So here’s a practical way to approach this when you’re being mindful with your cross stitch spending.
When budget floss is usually a safe choice
- Practice pieces
- Small projects
- Things that won’t be washed
- Pieces you’re stitching for fun, not for a “perfect finish”
When you’ll want to stick with a well-known brand
- Gifts
- Framed pieces
- Bigger projects
- Anything you want to last for years
Do a quick test before you commit
You don’t need a full science experiment. Just do this:
- Stitch a small swatch on scrap fabric.
- Wet it and press it with a white cloth or paper towel.
- Check for colour transfer.
- Check how it behaves as you stitch. Does it fray, fuzz, or knot up more than you’d like?
If it passes, great. If it fails, you’ve saved yourself a lot of frustration and rework.
A budget tip that saves the most money here
If you’re going to spend on one thing, spend on the supplies that protect the finished piece. Fabric you enjoy using, floss that behaves nicely, needles that don’t snag.
Everything else can be thrifted or DIY’d.
5. DIY Supplies and Repurposing
When cash is tight, DIY and repurposing can keep you stitching without feeling like you need a full craft room setup. You don’t need fancy gear, you just need a few basics that work.
Needle Minders
At first thought you mightn’t think this is a budget cross stitch tip. But – needle minders are a handy tool for keeping track of your needles while working on your cross-stitch projects.
When I first saw them I thought – meh. Then I accidentally dropped a needle near one of the magnets holding my pattern to my magnet board – as you’d expect, the needle stuck to the magnet.
So then I did it deliberately. And loved it.
Now, I wouldn’t stitch without a needle minder. But, I make my own with a pin a friend gave me, I just popped it onto a couple of magnets and it does the job beautifully (there’s a pic below, with my magnet board).
You can make one with:
- A flat button, pin, or charm
- Two strong magnets (one on each side of the fabric)
- Strong glue
This DIY approach saves you money and your butt/feet because you won’t be standing or sitting on a lost needle. And hopefully you also won’t be losing needles, they can be really pricey!
Note to keep magnets away from kids and pets, and don’t store them right next to anything that hates magnets.
Fabric Stretcher Bars and Stand
Fabric stretcher bars are essential for keeping your cross-stitch fabric taut and wrinkle-free while you’re stitching. You can make your own at home with lightweight wooden dowels or PVC pipes cut to the length you want.
It can take a bit of time but the savings can be worth it! Plus you’ll be able to make stretcher bars for any size embroidery. And, you’ll need more than one set. Trust me on this 😊
Here’s a great YouTube video to get you started.
In case you think you’ll never need stretcher bars or a stand, think of a friend who owns a pet. And where they like to sleep.
DIY Floss Organizer
I made my first floss organizer because I needed to have my floss more organized. I can’t stand scratching through piles of stuff to find what I need, whether it’s in my sock drawer, my kitchen or my craft space.
So once I started to accumulate more than a few skeins of floss, I had to organise them. I made my first cross stitch floss organizer cards using a cereal box.
Project Bags
And that neatly brings me to project bags. Trust me, you’ll probably have more than one project on the go at any one time. You just will. And for sanity’s sake, you’ll need a separate bag for each one.
- You can use plastic bags of course.
- Little pencil cases are good – look around, you’ve probably got some you’re not using.
- Cosmetic bags are great too.
- A small tote.
- I use a couple of lovely linen bags that I got years ago, with new sheets in them.
See what you’ve got stashed away and use that. Or, make up bags from tea towels or small bits of fabric from other projects.
The goal is boring, but it works: it stops floss tangles, lost needles, and half-finished projects that never get picked up again.
Magnet Board
Okay it’s debatable whether this is a budget cross stitch tip but hopefully I can help you see how it might be one. I can’t stitch without my magnet board. It holds my pattern, my snips, my marker, all in one place, and in the same place so I can immediately lay my hands on them. I bought one many years ago and then mum gave me hers so I’m blessed with two!
They are really expensive now – about $40 in our local Spotlight. You can probably pick them up cheaper with coupons or may be lucky enough to thrift one.
Or, pick up a small piece of galvanised tin from your hardware shop or friendly handy man. Smooth off the edges and voila. If you want you could paint it, or cover with a thin fabric.
OR: a biscuit tin (that’s made of tin, not aluminium) is a great alternative! It could also double as a project bag (tin).

Used Needles Box
I really believe sewing is one of the great drivers of civilization. Think about how every bit of clothing you’re wearing, the cover of the seat you’re sitting in, even the cover of your car’s steering wheel, would not be possible without a needle.
I love needles so much I wrote a post about how we should honor them. It’s certainly something that’s done in many countries.
When I first heard about the tradition of honouring the needle, I started to save my used needles rather than just toss them in the bin. I use an old breath mints tin – one in my cross stitch box and another next to my sewing machine. If you’d like to know more about this you can read this post about honouring our sewing needles.
5. Budget Cross Stitch Tips at Your Local Library
Most local libraries have beautiful cross stitch pattern books on every theme you can imagine, including making amazing gifts and home décor, they’re the ultimate budget cross stitch tip!
What to borrow
- Cross stitch pattern books (alphabets, motifs, samplers, themed designs)
- Magazines (often packed with small charts you can finish quickly)
- Finishing books (mounting, framing, displaying, gift finishing)
- Embroidery books (helpful for stitches, thread handling, and neat backs)
How this helps when you’re strapped for cash
- You can try styles before you spend money on patterns you might not love.
- You can stitch smaller projects from borrowed charts while you’re building supplies slowly.
- You’ll learn techniques that reduce mistakes, which saves fabric and thread.
A simple “borrowed pattern” method that works
If you find a chart you like but you can’t afford to buy supplies for it yet:
- Take a photo of the cover and the designer name (or write it down).
- Choose one small design from the book and stitch that first.
- If you still love the style after stitching it, add that designer to your “buy later” list.
That way you’re not spending money on patterns that never get stitched.
6. Buy Supplies in Bulk
Bulk buying can be a real money saver, but only if it matches how you actually stitch. If it doesn’t, it turns into “I bought it because it was cheaper,” and it sits there. (Yes, ask me how I know….)
What’s usually safe to buy in bulk
- Needles you already know you like
- Your go-to fabric count (if you mostly stitch on one type)
- Hoops in the sizes you use all the time and like to use for framing finishes
- A few staple floss colours you keep reaching for (black, white, common neutrals)
What bulk buying often doesn’t save you money on
- Random floss sets that don’t match your patterns
- Specialty fabrics you haven’t tried before
- Tools you don’t have a clear use for yet
The quick bulk test
Before you buy a bigger bundle, ask:
- Would I still buy this if it wasn’t discounted?
- Will I use it in the next 2–3 projects?
- Do I already own something that does the same job?
If you can’t answer yes, it’s probably not saving you money.
A really practical bulk option
If you have stitching friends, splitting an order can be brilliant. You still get the bulk discount, you share shipping, and you’re not stuck storing a pile of supplies you won’t touch for ages.
7. Finishing on a Budget
There are so many ways to finish your cross stitch, Framing is one way, and it doesn’t need to cost a fortune:
Thrifted frames
This is one of the easiest ways to make a piece look “finished” without paying new-frame prices.
A quick thrift frame checklist:
- Check the frame is solid (no wobbly corners)
- Make sure the glass or acrylic isn’t badly scratched
- Don’t worry about the backing or the mat, those can be replaced cheaply
If you want it to look fresh:
- Wipe it down, and repaint or touch up if it’s dated
- Swap the mat for a simple neutral one if the old one looks tired
- Replace the backing so it sits flat and neat
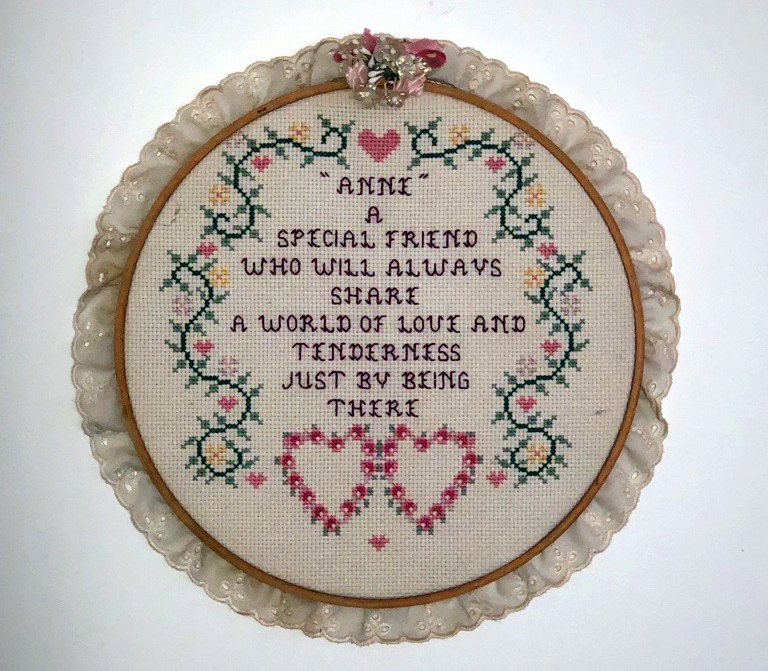
Hoop finishing
Hoop finishing is a great “display it now” option. It’s inexpensive and it suits lots of designs.
The basics:
- Wash your hands, then make sure the fabric is centred and tight in the hoop
- Tighten the screw firmly
- Trim the excess fabric, leaving enough to fold under
- Secure the back with a running stitch, lacing, or a felt circle
You’ll get a clean, giftable finish without spending much at all.
Mounting on board or canvas
If you like a clean, modern look, mounting can be cheaper than framing and it’s very effective.
Budget-friendly options:
- Foam board
- Mounting board
- A blank canvas
Keep the fabric straight and evenly tensioned. Even a simple mount looks good when the alignment is neat.
A finishing tip that saves money early
Decide how you plan to finish before you start stitching. If you know you’re using a hoop, you can buy fabric sized for that. If you’re planning a thrifted frame, you can aim for a common frame size and avoid custom costs.
8. Keep supplies organized
Making things last is the ultimate budget tip for cross stitch! My gran, and probably yours, used to say “a place for everything and everything in its place” and she was right! Being able to put my hands of the items I want, when I want them, means I have more time for stitching :)
The mantra I’ve added as an ADHD adult is: don’t put it down, put it away! Again: more stitching time!
Track your floss so you don’t buy duplicates
Duplicate floss buying is one of the most common budget leaks. A simple system helps:
- Keep a quick list of what you own
- Mark off what you’ve used
- Label partial skeins so they don’t turn into mystery thread
If you’ve got a floss inventory tracker or organiser system you like, this is where it earns its keep.
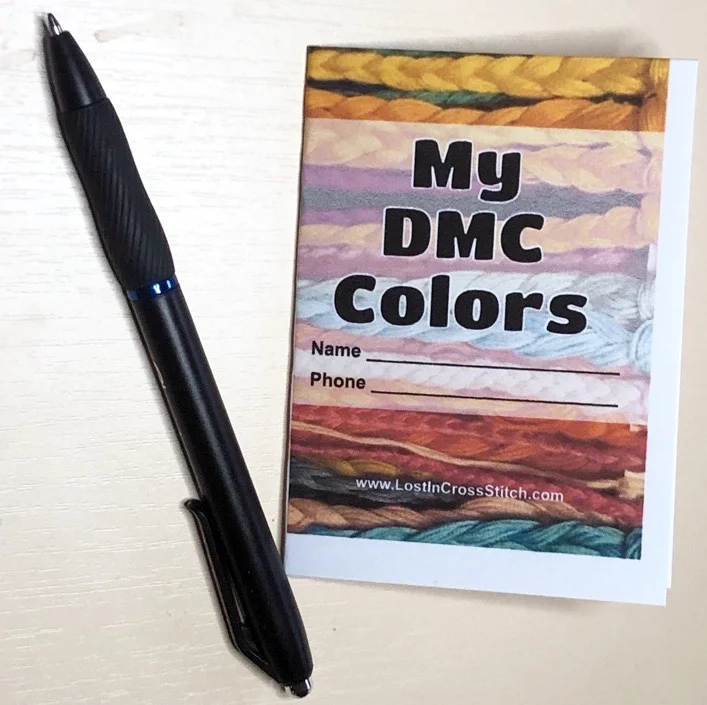
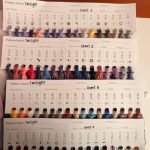
Stop Buying Duplicate DMC Floss
This printable mini-book is a pocket-sized DMC inventory you can carry in your project bag. Mark what you own and what you still need, then check it at a glance in the shop, no more scrolling through notes on your phone. Trusted by hundreds of stitchers (and counting!) Instant download, print as many copies as you like.
You don’t need a perfect system, you just need something you’ll actually use.
Store your tools so they don’t disappear
It sounds basic, but it works.
- Keep needles in a needle case or a small tin
- Keep scissors in the same pouch every time
- Keep your threader, needle minder, and spare needles together
The goal is simple: fewer lost tools, fewer repurchases (and, at the risk of sounding boring: more stitching time! ;)).
Protect your fabric and thread
- Store fabric away from damp and direct sun
- Keep floss in a way you can see (so it doesn’t get forgotten at the bottom of a drawer)
- Before you start, do a quick check so you don’t lose time (or money) to rusty needles, mystery floss, or fabric marks.
Keep your current project easy to pick up
This is a sneaky budget tip: if a project is easy to grab and continue, you finish more of what you start. That means you get more value out of every skein and every piece of fabric you buy.
One project bag with everything inside is often enough.
Keep stitching and keep saving
If you’re strapped for cash, you don’t need to quit stitching. You just need a few options that make supplies feel possible again.
- Buy for the project you’re stitching right now, not the one you might do later.
- Use the library and secondhand finds to stretch your budget further than you’d expect.
- DIY what you can, and save your spending for the things that make stitching easier.
- Be careful with “cheap” supplies so you don’t pay twice.
- Finish simply, because a neat finish matters more than an expensive one.
- Keep track of what you own so you’re not rebuying floss and tools by mistake.
Even if you can only buy a few skeins at a time, you can still stitch pieces you love. Start small, build slowly, and keep it enjoyable.
If you want a few extra ideas, these posts are good next steps:
Cross stitch for beginners (for simple project choices and fewer expensive mistakes)
Ways to finish cross stitch (more low-cost display options)
Floss organisation basics (so you stop buying duplicates)


Leave a Reply