Category: Floss Organization

Embroidery floss organization that works: storage ideas, DMC trackers, floss cards and ways to kit up each project so nothing gets lost between sessions.

  • Organising a 132-Colour Full Coverage Cross Stitch: Sara’s Canva Trick

    Organising a 132-Colour Full Coverage Cross Stitch: Sara’s Canva Trick

    A full coverage cross stitch with 132 thread colours is a lot to keep straight before you’ve put in a single stitch. Sara, one of our customers, worked out a way to set up her floss cards in Canva, and it’s so clever we asked if we could share it.

    It started with a review. Sara left one on our project cards and mentioned, almost in passing, that she’d uploaded the PDF to Canva and filled in all her thread numbers and chart symbols there. We use Canva every week. It had never once occurred to us to do that.

    So we got in touch, and she very kindly wrote up her whole process. Here’s Sara, in her own words:

    I’m Sara from Ohio! Brand new to cross stitching but incredibly familiar with needing things just so.

    Just like I’m a mood reader, I’m a mood crafter. Additionally, I am a planner.

    Ten colours by hand, 132 colours not so much

    Sara’s first project was a full coverage Christmas stocking for her daughter. It used ten colours, so she wrote the DMC numbers on her cards by hand and drew the chart symbols beside them. In her words, she’s “not an artist”, and the symbols showed it.

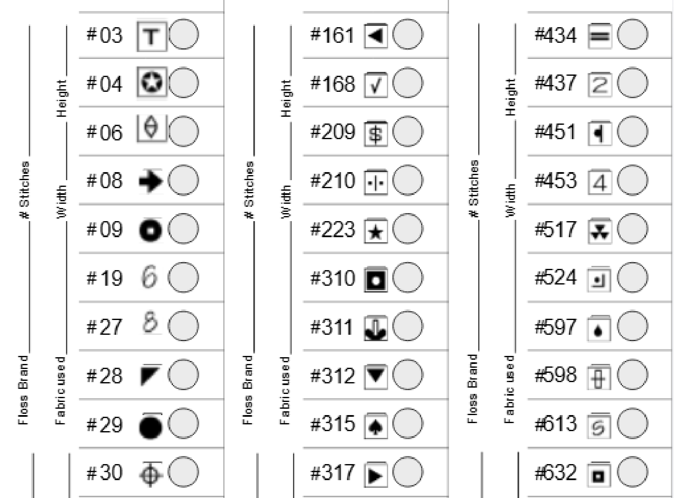
    Her second project, Twilight in the Wilderness, is a different beast. It has 132 colours, and every one of them has its own chart symbol.

    Having 132 different symbols—some of which are the same symbol facing different directions—meant I wanted to be darn sure I had the right ones for the right thread, AND that they were legible and facing the right way.

    On a large project, every extra colour is one more chance to mix two threads up.

    For an overview of choosing and using patterns, see our guide to cross stitch patterns for beginners.

    Setting up the cards in Canva

    Sara used to develop curriculum and run workshops for high school students, so she knows Canva well. She bought our Large project floss organisation cards and went straight there. Here’s her process, step by step.

    1. Get the PDF into Canva. Download the PDF as usual. In Canva, go to Create, then Upload, and choose the file. Canva opens it as an editable design, with the card layout ready to fill.
    2. Add the thread numbers.
      • On free Canva, add a text box, type your numbers and line them up with the rows on the card.
      • Sara has Canva Pro, so she let its AI assistant do the lining up. She pasted in her numbers, pressing Enter after each one so they sat in a column.
      • She asked the assistant to match the column to the rows on the card. It took a couple of goes to get the wording right.
      • Once the first column looked right, she changed the text size and asked it to reformat to match.
      • Then she duplicated that column into the next card and nudged it into place.
    3. Add the symbols. This is the clever bit.
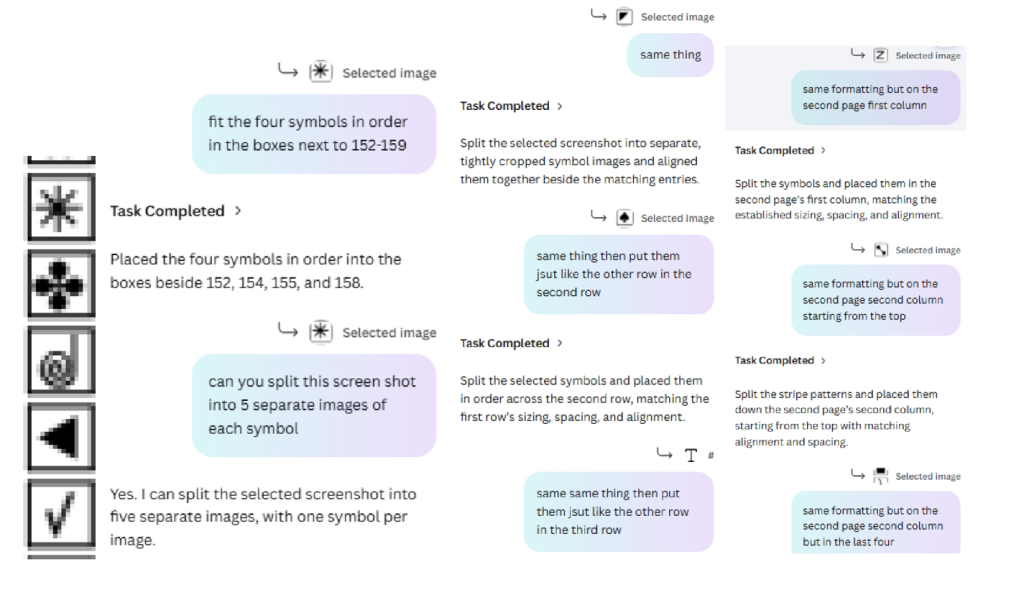
      • Sara opened the chart PDF in a split window beside Canva and took a screenshot of the symbol key.
      • She cropped the screenshot to the symbols for that card and pasted it into Canva.
      • She asked the AI to split it into separate symbols and place them in order beside the matching thread numbers.
      • Once she had a prompt that worked, she just said “same thing” for the next row, the next column and the next page. Her 132 colours filled three pages of cards.
      • Without Canva Pro, crop each symbol from your screenshot and drag it into place by hand. With 132 symbols that gets tedious, but for 20 or 30 colours it’s very manageable.
    4. Number the cards to match the bags. Sara repurposed the “Fabric used” field on each card as a sheet number, so her cards run Sheet 1 to Sheet 8.

      Every sheet has a matching zip-lock bag for its spare skeins, labelled with the same number and the range of DMC numbers inside. The other fields she left blank apart from the pattern name.

      If you want to fill them in, add a text box in Canva, rotate it and drop it on the line.

    THEN, when I had that prompt perfected, the rest of it was a breeze. I would just ask it to do the same thing.
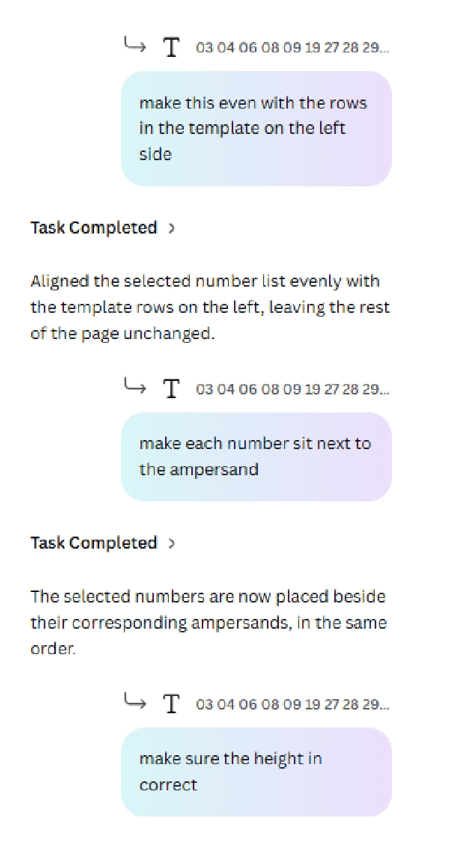
    Canva AI assistant prompts lining up a column of DMC thread numbers with the rows on a project floss card template.
    Sara’s prompts for lining up the thread numbers. It took a couple of tries to get the wording right.
    Canva AI assistant prompts splitting a screenshot of cross stitch chart symbols and placing each one beside its matching thread number.
    Once one prompt worked, “same thing” did the rest.
    Finished project floss card layout from Canva, with DMC numbers and chart symbols filled in down three columns.
    The finished layout in Canva. Only the pattern name and sheet number are filled in on each card.

    Loading the cards

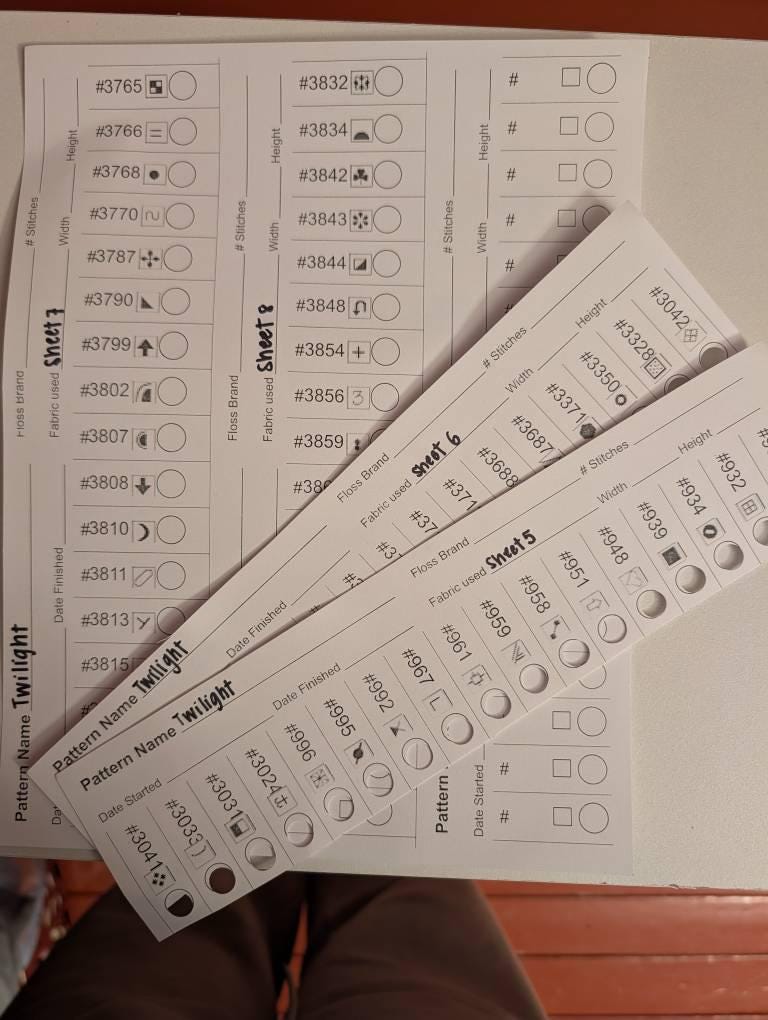
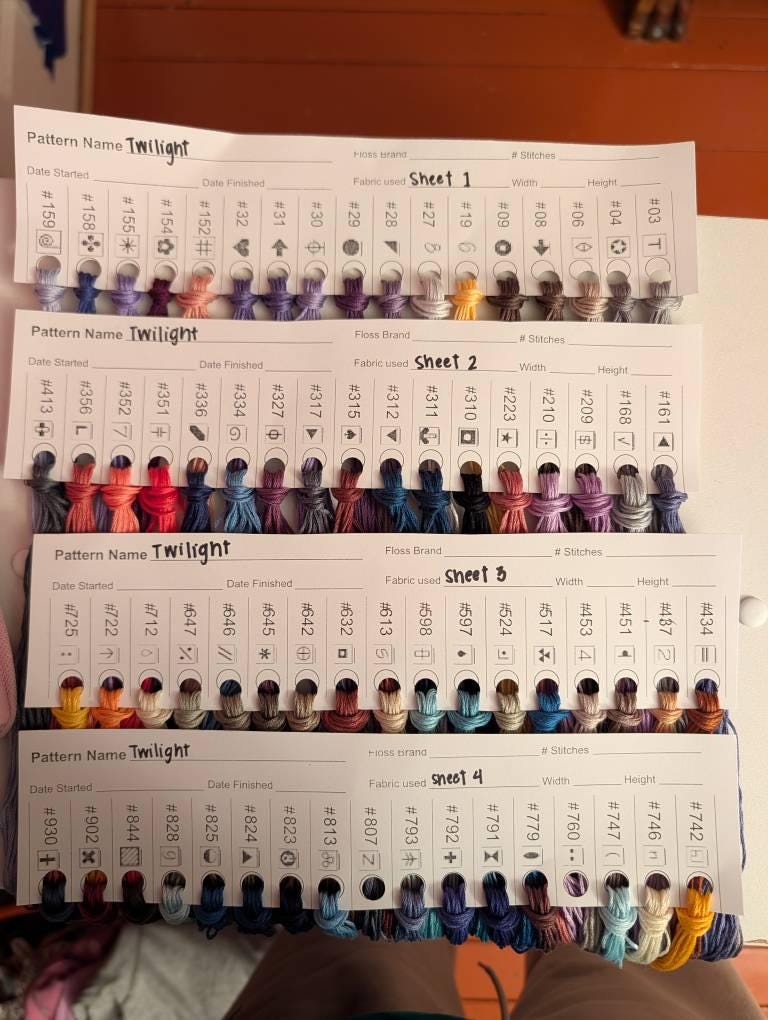
    Printed project floss cards for the Twilight pattern, filled in with DMC numbers and symbols and ready to cut and load with thread.
    Printed and ready to cut, punch and load.

    With the cards printed, Sara cut them out, punched the holes, put a show on TV, and loaded the thread.

    Each Large project card holds 17 colours, and there are three cards to a printed page. Sara’s 132 colours came to eight cards across three pages, with a few spare slots on the last card. If you’re working out how many you’ll need, divide your colour count by 17 and round up.

    The part we’d steal straight away is her sheet bags. Sara has a zippy bag labeled with the sheet number, to hold the spare skeins for the colours on that sheet. As Sara puts it, “if you run out of thread, you just grab the bag labeled for that sheet and don’t have to dig through the collection for the whole project.”

    This works neatly alongside a master system for your whole stash, like our DMC Floss Storage and Organisation System. The master cards keep track of everything you own. The project cards and sheet bags hold what you’ve pulled out for this one piece.
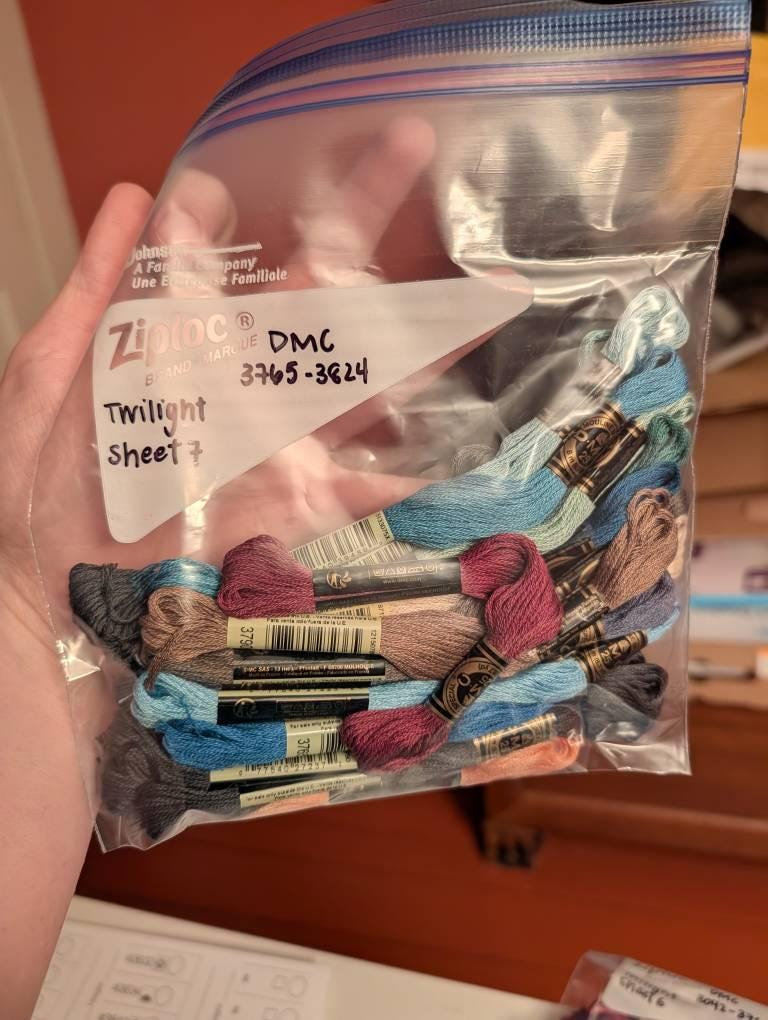
    Zip-lock bag labelled Twilight Sheet 7, DMC 3765 to 3824, holding spare skeins of blue, grey and plum embroidery floss.
    One bag per sheet, so the spares for each card are always together.

    Sara hasn’t started stitching yet, but the setup has already done its job:

    The organization has already improved my confidence in this because I know I’ve got the correct symbols/labels and I can easily read them.

    And because the cards live in Canva, a ratty card a couple of years into the project is just a reprint.

    Making cards last a multi-year project

    Sara expects Twilight in the Wilderness to take years, so she wanted sturdier cards. She glued her cardstock to backing board with spray adhesive, cut the cards out, and then found her craft punch couldn’t get through it. That needs a heavy-duty handheld punch.

    I didn’t want to spend $10 out of spite so I just reprinted it on cardstock and have it flimsy for now. I’m sure I’ll change my mind and do it eventually.

    If you want cards that last without the backing board, the card sandwich method from our floss organiser assembly guide also works for project cards.

    Sara has a nice idea for sturdy cards, too. Punch three holes along the top of each card and keep them in a project binder, with a clear sheet protector behind each card holding that sheet’s spare thread. You take out one card at a time, and its thread comes with it.

    Or, you could punch the zippy bag and store it in the same spot. Or use one of those clear binder pouches with a zip closure.

    Our take
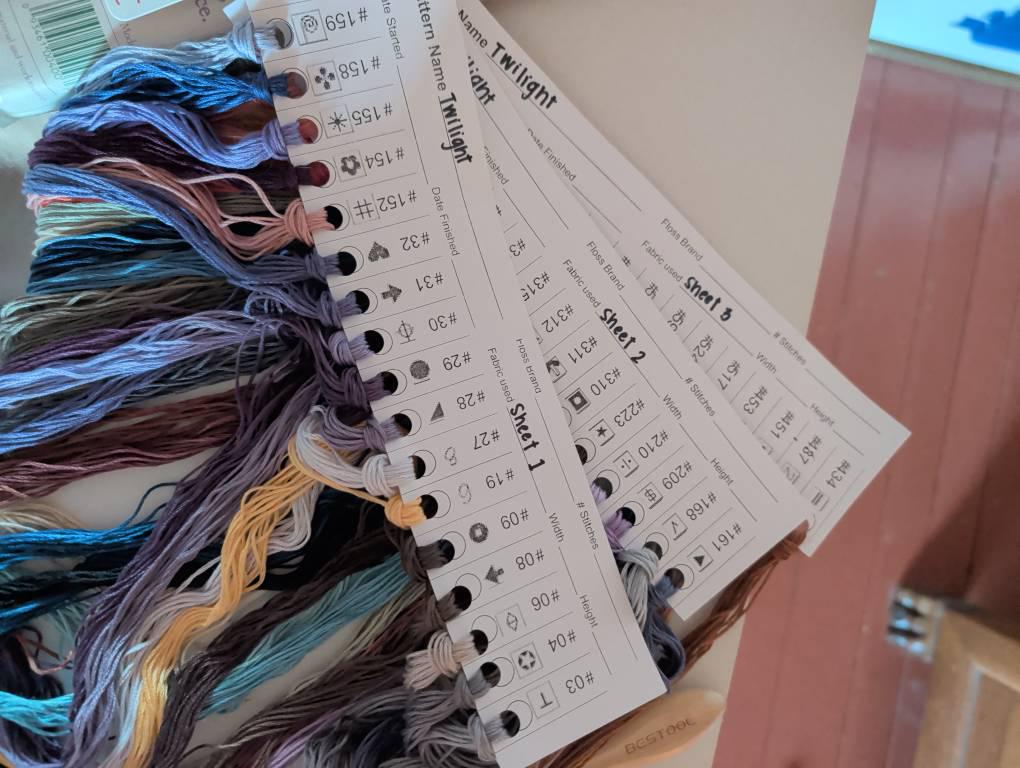
    Loaded project floss cards fanned out, with purple, blue, grey and gold DMC thread looped through each hole.
    All 132 colours, loaded and in order.

    We always kit up a project before we start, and we use the cards every time. Until now, we’d only ever filled them in by hand. Sara’s method suits any project where the symbols matter, and on a full coverage piece they matter a great deal.

    One thing we’d add: we always braid the floss once it’s looped onto the card. A loose plait stops the strands tangling and keeps the ends from getting ratty, and it still slides off easily when you want to move a colour between cards, from your master set onto a project card and back again when you’re done. Here’s floss we moved onto our Temperature Project card, straight off the master set.
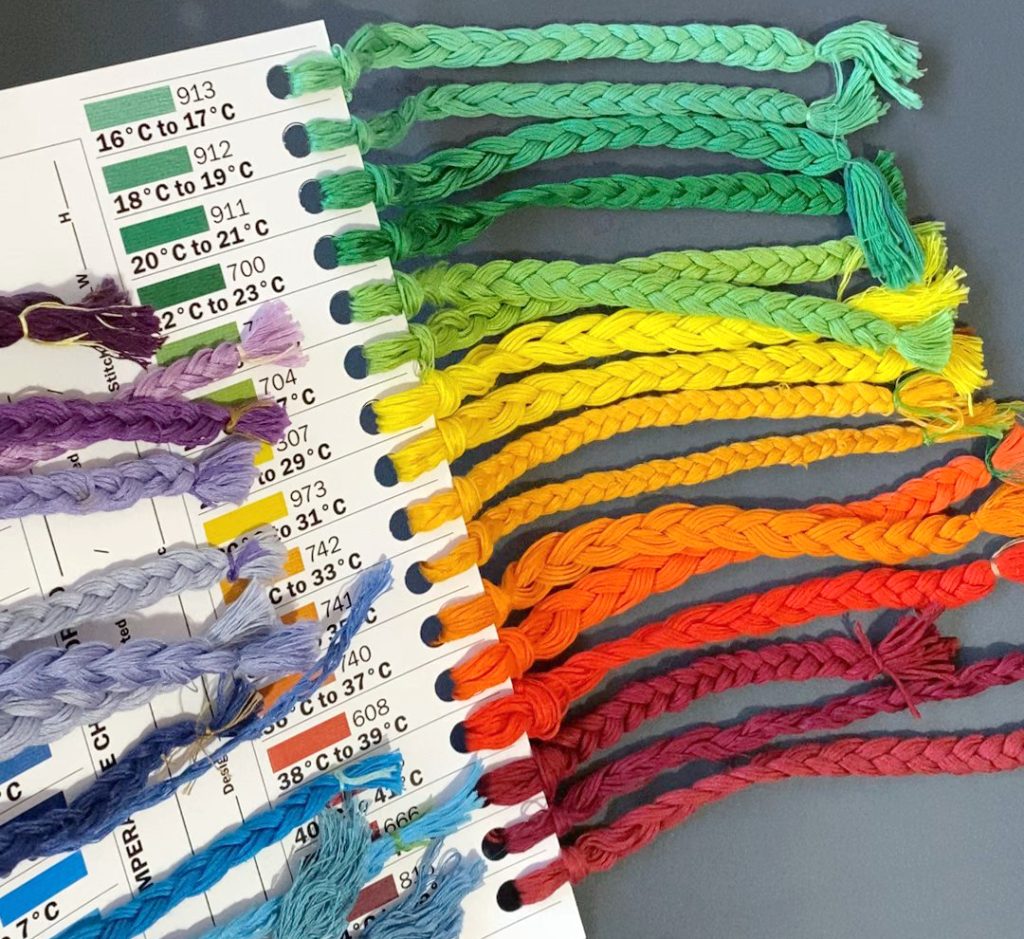
    cross stitch temperature project card loaded with floss
    Our cross stitch temperature project card, printed and loaded with floss

    Sara signed off her write-up as “Teacher/Developer meets Type A eldest daughter meets crafty mom meets you!” which is about the best summary of a cross stitcher we’ve read.

    Thank you, Sara, for letting us share it.

    If you’d like to try it, the cards Sara used are our Large project floss organisation cards. For the rest of the setup, see how to kit up a cross stitch project, and for organising everything else, our guide to organising embroidery floss.

    Got your own trick for a big project? We’d love to hear it. Get in touch.
  • Colour Order or Number Order: How to Organise Your Embroidery Floss

    Colour Order or Number Order: How to Organise Your Embroidery Floss

    Somewhere around the thirty-skein mark, you realise you’re spending your precious stitching time scratching through your pile of embroidery floss to find the colour you need. The shoebox has become a tangle, and in there you find a second skein of a colour you bought a couple of months ago because you didn’t remember you already had it.

    So you decide: got to organise this. You already know there are gaps in the numbering of DMC and other brands. The real question is colour order or number order? And the answer depends on what you prefer, and how your brain works.

    The three ways stitchers store their floss

    There are really three states a floss collection can be in.

    The first is where most of us start: the shoebox, the plastic bag you brought the floss home in, the drawer you rummage through. It works fine for a handful of skeins but chaos grows along with your stash.

    Every stitcher has been there so you’re not behind. The other two are:

    • number order
    • colour order.

    Before you pick one, note that the order is a separate question from the storage method. If you haven’t yet decided whether you’re a cards person, a sleeve person, a harp person, or a bobbins person, start with our guide to floss storage methods and come back once you’ve settled that. This post is about what happens next: how to sequence the colours once you know how you’re storing them.

    This is the great divide of floss organisation, so let’s settle it properly. Vote below and see which team is winning. ;)

    The case for number order

    Number order means your floss sits in the same sequence DMC assigns it, from 1 to 5283.

    Its big advantage is that the rest of the cross stitch world already speaks this language. Pattern thread lists are usually written in number order. Shopping lists are in number order.

    When you sit down to kit up a new project, you run your eye down the chart’s list of numbers and check them straight off against your collection in the same sequence, no hunting. If you’re working towards a full DMC set, number order shows you the gaps at a glance, because a missing number is an empty slot in an otherwise unbroken run, which is exactly what a thread tracker or inventory list is built to catch. And when you’re standing in the craft store with your shopping list, number order is usually how you find the colour you’re looking for.

    It’s the practical, list-driven choice. If the way you stitch revolves around patterns, shopping lists, and building a complete set, number order keeps you in step with all of them.

    The case for colour order

    Colour order means your floss is arranged the way your eye sees it: the reds together, the blues running from palest sky to deepest navy, the greens grading through sage and olive and forest.

    The case for it is partly that it’s a thing of beauty and a joy to use. But it’s also genuinely more practical for certain jobs. When you reach for “that soft dusky sage” rather than “524”, colour order puts your hand on it without a number lookup.

    When you want to swap a shade in a chart, or turn a pink flower purple, you need to see the neighbouring shades side by side to choose well, and colour order lays them out for you.

    The same is true when you’re blending or tweeding, choosing colours that sit well together.

    example of tweeding in cross stitch
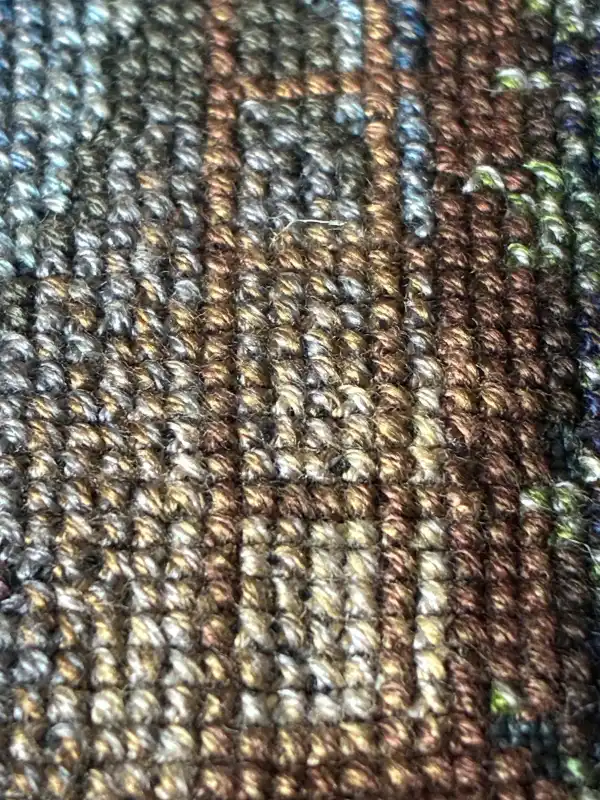
    Multiple tweeded colours in this example – the greys and browns in particular. Also – real hand stitching – the stitches are not quite perfect.

    But what’s best?

    Is there a best? We think it’s what you prefer, what works for your own brain and eyes.

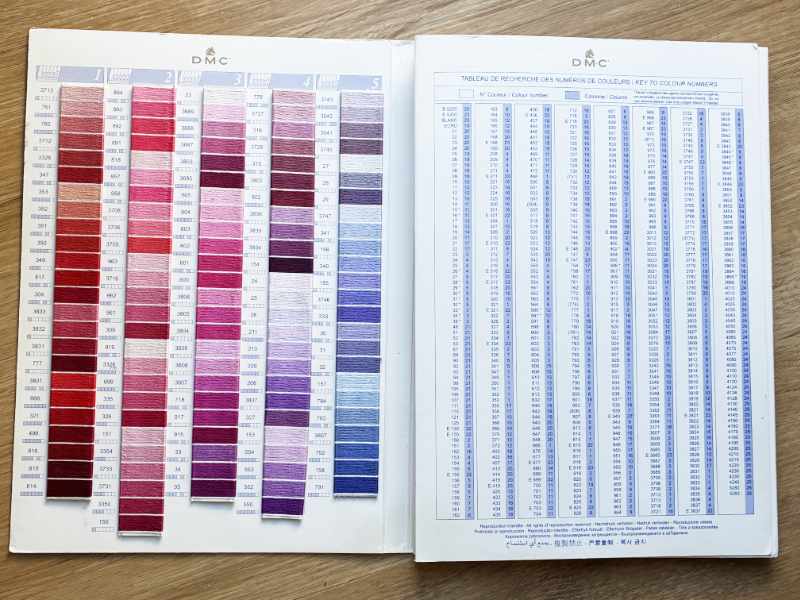
    But, DMC’s own colour card, the lovely (and pricey) one with real thread snippets that all designers use and many stitchers covet, is arranged in colour order, not number order.

    DMC floss card showing both number order and colour order for floss
    Our DMC floss card, showing their clever way of using both number order and colour order for floss

    The company that assigns the numbers still chose to display its threads by colour when it built its reference.

    BUT they didn’t abandon numbers. The card has a number index showing where each colour sits, so you get the visual layout with a lookup path back to the numbers. Best of both worlds, in other words, and a fair hint at where the convenience really lies.

    So which one suits you?

    Before we get into it, declare your allegiance. Every stitcher sorts their floss one of two ways, or has a bag/box and good intentions. Vote below and the tally will show you where everyone else stands.

    Neither order is right or wrong. Most of us lean one way without ever having put it into words. If you’re still not sure, this quick check might help:

    Your situationNumber orderColour order
    You’re working towards a full DMC set✓
    You’re kitting up a new pattern from its thread list✓
    You want to check what you own against a pattern✓
    You shop to a thread list at the craft store✓
    You reach for “that soft sage”, not “524”✓
    You want to swap a shade in a chart or match a new colour to it✓
    You’re blending or tweeding and choosing shades that sit well together✓
    You mostly stitch from your stash, not to a shopping list✓

    If you ticked mostly down the left, number order is your system. If you ticked mostly down the right, colour order will feel like home.

    And if you landed somewhere in the middle, you’re in good company, that’s what DMC does too :)

    The tools, in whichever order suits you

    We make our printable floss organising tools in both orders, because stitchers genuinely split on this and we’d rather you had the one that fits the way you work.

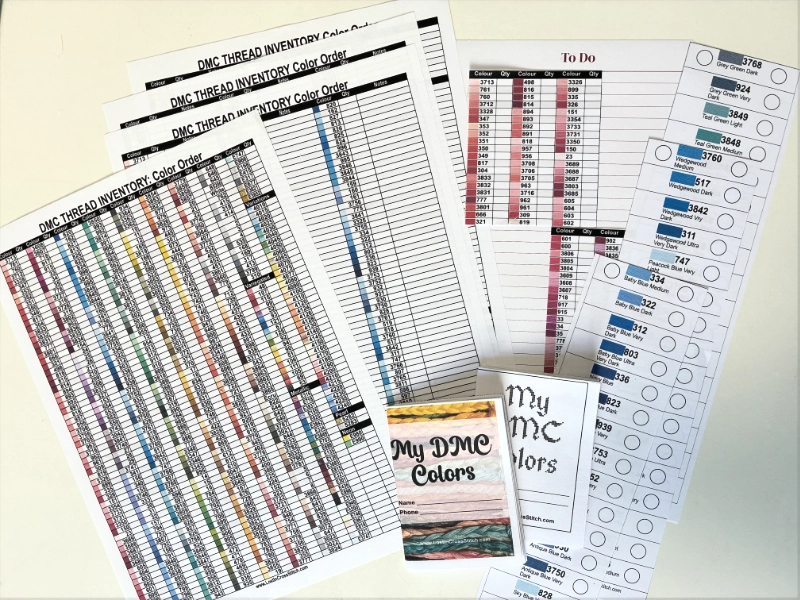
    our colour order printable cross stitch inventories come in 5 styles
    Our colour order printable cross stitch inventories come in 5 styles

    Every one is an instant download, ready to print at home, and updated to the latest DMC floss chart (2023). There is space for you to add any discontinued floss colours you might own.

    Note that printed colour swatches are a faithful guide, but every printer renders colour a little differently, and ink on paper will never be a perfect match for dyed thread. Treat a printed colour reference as a strong guide rather than an exact match, and you won’t be caught out.

    Get it sorted, and get back to stitching

    The order you choose matters far less than choosing one and sticking with it. Once your floss has a home and a sequence, every project starts faster, the duplicate-buying stops, and you spend your stitching time stitching rather than searching.

    If you’d like the bigger picture, our Complete Guide to Embroidery Floss Organisation pulls together everything from first sort to full collection, storage to tracking, in one place. Then pick your order, kit up, and enjoy getting happily lost in cross stitch.

  • Embroidery floss alternatives to DMC

    Embroidery floss alternatives to DMC

    Whether you’re a cross stitcher, an embroiderer, or a bit of both, you’ve probably noticed that DMC floss costs more than it used to. There have been several price increases over the past few years, and when you’re kitting up a larger project or trying to build a colour collection from scratch, those increases add up. DMC isn’t the only option. If you’re looking for an embroidery floss alternative that can save you money without ruining your finished piece, there are several worth knowing about.

    The trick is knowing which ones work, when to use them, and when it’s worth sticking with DMC.

    CXC: the budget option that uses DMC’s numbering

    CXC is a brand of embroidery thread manufactured in China. The thing that makes it interesting is that it uses the same colour numbering system as DMC. If your pattern calls for DMC 310, you grab CXC 310. No conversion chart, no guessing.

    The price difference is significant. Depending on where you buy, a full set of CXC colours can cost a fraction of what the equivalent DMC set would run you. Even buying individual skeins, the savings are substantial, especially on full-coverage cross stitch projects or embroidery pieces that need dozens of colours. If you’re curious just how much a full DMC collection actually costs, we broke down the real numbers here.

    CXC is most commonly available through AliExpress, and some Etsy sellers carry it too. Availability varies by region, so you may need to allow for shipping time.

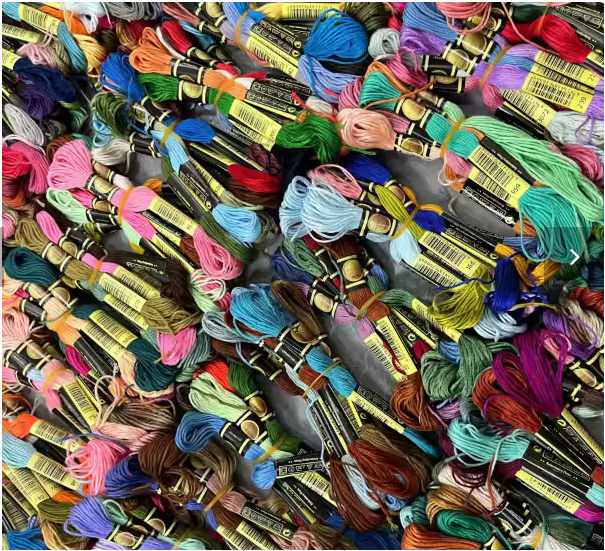
    CXC embroidery floss skeins in a rainbow of colours

    CXC covers 447 colours, which matches DMC’s standard solid range. The newer DMC colours numbered 01-35 aren’t available in CXC. Some stitchers use a brand called AMO to fill that gap, as it covers those missing numbers and is designed to work alongside CXC. We haven’t tried AMO ourselves, so we can’t speak to the quality, but it’s worth knowing it exists if your pattern calls for those newer shades.

    When buying from AliExpress (which is where you will mostly find CXC at the price points we’re talking about in this post), make sure you’re getting actual CXC-branded thread, not generic unbranded floss.

    The same factory produces a lower-tier line called Rosace, which is what you’ll often get in cheap random bundles. Look for ‘CXC’ on the label and check the barcode starts with 69 (China). Searching for ‘CXC two labels’ will get you the most recent production run.

    How does it stitch?

    We want to be upfront: we haven’t personally stitched with CXC (though we’ve just bought a set so will post about that later). Sandy started collecting DMC more than 30 years ago, so that’s what fills our floss books. But we’ve looked closely at what experienced stitchers consistently report, and the picture is fairly clear.

    CXC is a poly-cotton blend, while DMC is 100% Egyptian cotton. In practice, word is that CXC feels slightly softer and thicker, and it doesn’t have quite the same sheen as DMC.

    Side by side, you can see the difference. On its own, it looks lovely.

    The colours are close to DMC but not identical. For a project stitched entirely in CXC, this isn’t a problem. Mixing CXC and DMC on the same piece is where you might notice a shift, so it’s best to pick one brand per project.

    Some stitchers find CXC knots a bit more than DMC. Good technique helps: shorter thread lengths, letting your needle dangle to untwist regularly, railroading. It’s worth knowing upfront so it doesn’t catch you off guard.

    On the plus side, polyester tends to hold colour well. Several stitchers have tested CXC for colour bleeding (even with reds, which are notorious) and reported good results. Fading over time may actually be less of a concern with a poly-cotton blend than with pure cotton.

    Worth noting: some AliExpress listings describe CXC as 100% cotton, but the consistent finding from stitchers who’ve tested it is that it’s a poly-cotton blend. It’s one of those things to be aware of when buying through marketplace platforms where product descriptions aren’t always accurate.

    Whether you settle on CWC or DMC, you’ll still want a way to keep it all in order. Our printable floss organizer cards work for both.

    Anchor: a quality alternative with its own colour range

    Anchor has been around almost as long as DMC. It’s manufactured in Germany, offers around 460 colours, and is 100% Egyptian cotton with double mercerisation, so the quality is well established.

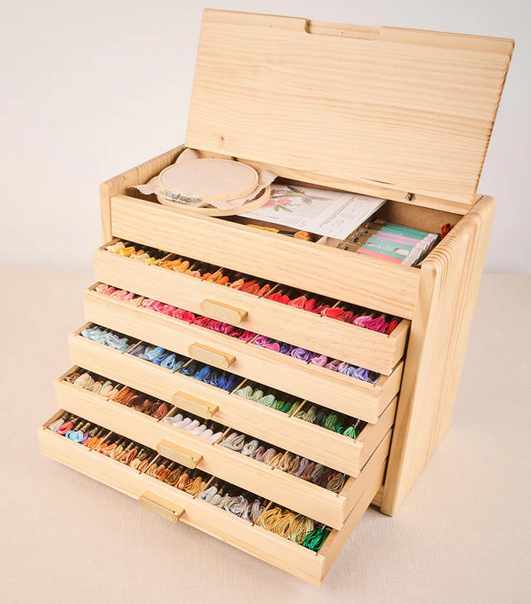
    Anchor embroidery floss box
    Image from https://anchorcrafts.com/products/anchor-large-wooden-chest-with-489-skeins

    We’ve used Anchor’s variegated floss over the years because the colours are stunning and the stitching experience is really smooth. It’s a brand we’d happily recommend for any project, whether that’s cross stitch, embroidery, or a mix of techniques.

    The main thing to know is that Anchor uses its own numbering system. If your pattern is charted for DMC, you’ll need a conversion chart. They’re easy enough to find online, but it’s an extra step compared to CXC’s direct numbering match.

    Anchor is generally more expensive than CXC but can be cheaper than DMC depending on where you are and where you shop. Availability varies by country. It tends to be more common in the UK and parts of Europe than in North America.

    One thing worth noting: DMC acquired Anchor in 2023, so both brands are now under the same parent company. So far (in 2026), Anchor continues as a separate product line with its own colours and numbering, but it’s something to be aware of, because pricing and availability could change over time.

    Cosmo: the premium alternative

    Cosmo, made by Lecien in Japan, offers 501 colours made from extra-long staple Egyptian cotton, so has a beautiful lustre. Stitchers who’ve tried it say the texture and sheen is lovely.

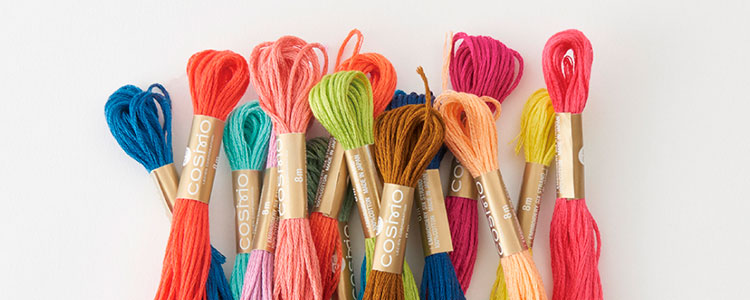
    Cosmo embroidery floss skeins in assorted colours
    Cosmo floss – image from https://www.lecien.co.jp/en/embroidery/floss/cosmo

    Cosmo is available in North America, Europe, Australia, and parts of Asia, though it’s not always easy to find locally. Like Anchor, it uses its own numbering system, so you’ll need a conversion chart for DMC-charted patterns.

    Cosmo sits at a similar price point to DMC (sometimes higher), so it’s less of a budget play and more of a “different quality experience” option.

    If you enjoy trying new threads and you spot it in a local shop or online, it could be worth picking up a few skeins to test.

    Sullivans

    Sullivans is another option you might come across.

    It’s 100% cotton, and each skein’s label also has the closest DMC equivalent, which makes substitution straightforward.

    Quality reviews are mixed, with some stitchers reporting colour variance, so it’s worth testing a few skeins before committing to a project.

    When embroidery floss alternatives make sense (and when to stick with DMC)

    You don’t have to be a one-brand stitcher. It’s perfectly fine to use different floss for different projects depending on what you’re making and how you want the finished piece to look and feel.

    A budget alternative like CXC works well for practice pieces and learning new techniques, personal projects you’re stitching or embroidering for the enjoyment of it, smaller or quicker designs where you want to keep costs low, and full-coverage pieces where the sheer volume of floss needed could make DMC pricing hard to justify.

    For pieces you’re planning to pass down or display for years, gifts where you want that extra-polished finish, or projects where you’re already using DMC floss, it makes sense to invest in what you trust.

    There’s no wrong answer. It’s about matching the floss to the project and your budget.

    Keeping track when you’re using more than one brand

    If you’re using different brands across different projects, staying organised matters more than ever. Labelling your cards or bobbins clearly and tracking what you own saves you from buying duplicates or accidentally mixing brands mid-project.

    If you don’t already have a system, our embroidery floss organisation guide walks through the basics of getting your stash under control. And because CXC uses the same numbering as DMC, our mini thread tracker works for both brands. You can carry it in your project bag and check what you have before you buy.

    DMC Floss organisation DIY cards
    Get our DMC Floss organisation DIY cards here
    Cross stitch organizing starter bundle with printable floss drops, WIP tracker and project bag cards

    Keep each project’s floss together, whatever the brand

    Our Cross Stitch Organizing Bundle has printable floss drops for kitting up each project’s colours, bag cards to label every WIP, and a tracker for the whole pile. It works just as well with Anchor, Cosmo or a mix as it does with DMC.

    Worth trying, not worth stressing over

    Choosing embroidery floss alternative brands doesn’t have to be a high-stakes decision. If the cost of DMC is making you put off a project, or if you’re just starting out and the idea of building a full collection feels overwhelming, there are real options that will let you keep stitching.

    Pick up a few skeins of something new, test them on a small piece, see how they feel in your hands. That’s all it takes.

    And if you’re looking for more ways to stretch your stitching budget, our budget cross stitch tips post has plenty of ideas that have saved us over the years.

    Frequently Asked Questions

    Does CXC have all the DMC colours?

    CXC covers 447 colours, matching DMC’s standard solid range (colours 150-3866, plus Blanc, Ecru, and B5200). The newer DMC colours numbered 01-35 are not available in CXC (at time of writing, early 20206). Some stitchers use a brand called AMO to fill that gap.

    We haven’t tried AMO ourselves, so we can’t vouch for it, but it’s worth knowing about if your pattern calls for those newer shades.

    Is CXC floss the same as DMC?

    No. CXC is a separate brand manufactured in China. It uses the same colour numbering system as DMC, which makes it easy to substitute, but the thread itself is different. CXC is a poly-cotton blend rather than 100% cotton, and the sheen and texture are slightly different.

    The colours are close but not identical, so it’s best to avoid mixing both brands on the same project.

    Can you mix CXC and DMC floss on the same project?

    It’s not recommended. While the colour numbers match, there are subtle differences in shade, thickness, and sheen between the two brands. These differences can be visible when stitched side by side.

    For the best results, stick with one brand per project.

    What is the cheapest alternative to DMC embroidery floss?

    CXC is currently the most affordable widely available alternative. A full set of CXC colours costs a fraction of the equivalent DMC set, and individual skeins are significantly cheaper. It’s available through AliExpress and some Etsy sellers.

    Anchor and Cosmo are other alternatives, though they sit closer to DMC in price.

    Do DMC floss organisers and trackers work for CXC?

    Yes. Because CXC uses the same numbering system as DMC, any organiser or tracker built around DMC numbers works for CXC too. Our mini thread tracker is designed around DMC numbering, which means it’s just as useful if you’re building a CXC collection.

    Is CXC floss colourfast?

    Multiple stitchers have tested CXC for colour bleeding, including with notoriously tricky reds, and reported good results.

    As with any floss, it’s a good idea to test a small swatch before washing a finished piece, especially for darker or more vibrant colours.

  • Choosing a Cross Stitch Project Bag That Works for You

    Choosing a Cross Stitch Project Bag That Works for You

    A cross stitch project bag doesn’t need to be fancy, expensive, or purpose-made. Its job is simple: keep everything for one project together so you can pick it up and stitch.

    If you’ve already started using a cross stitch project kit, the project bag is just the container. It supports the system, but it isn’t the system itself.

    What’s in This Post

    What We Mean by a “Project Bag”

    A project bag is something that holds one active project and stays with it while you’re stitching.

    It might be:

    • a fabric bag
    • a zip-lock bag
    • a pencil case
    • a document wallet
    • a basket, box, or binder
    • something repurposed from another use

    It actually doesn’t matter what the project ‘bag’ looks like. What does matter is that everything for one project lives together, for the life of that project.

    Your pattern belongs in there too. There’s more on that in our guide to cross stitch patterns for beginners.

    Cross Stitch Project Bag vs Storage Tote: Why the Difference Matters

    It helps to separate these two ideas, because they solve different problems.

    A project bag:

    • holds one project
    • opens and closes easily
    • is accessed often
    • moves with you while you stitch

    A storage tote:

    • holds multiple projects or supplies
    • is opened less frequently
    • is meant for longer-term storage
    a cross stitch project bag is different to a storage tote.

    Neither is better than the other. They just do different jobs. Most stitchers use both without really thinking about it.

    What Actually Makes a Good Project Bag

    A good project bag is one that works with how you stitch. In practice, that usually means:

    • it’s the right size for your project
    • it closes securely so that small items don’t fall out, or undesirable items don’t find their way in.
    • it keeps small tools from drifting to the bottom
    • it protects your fabric

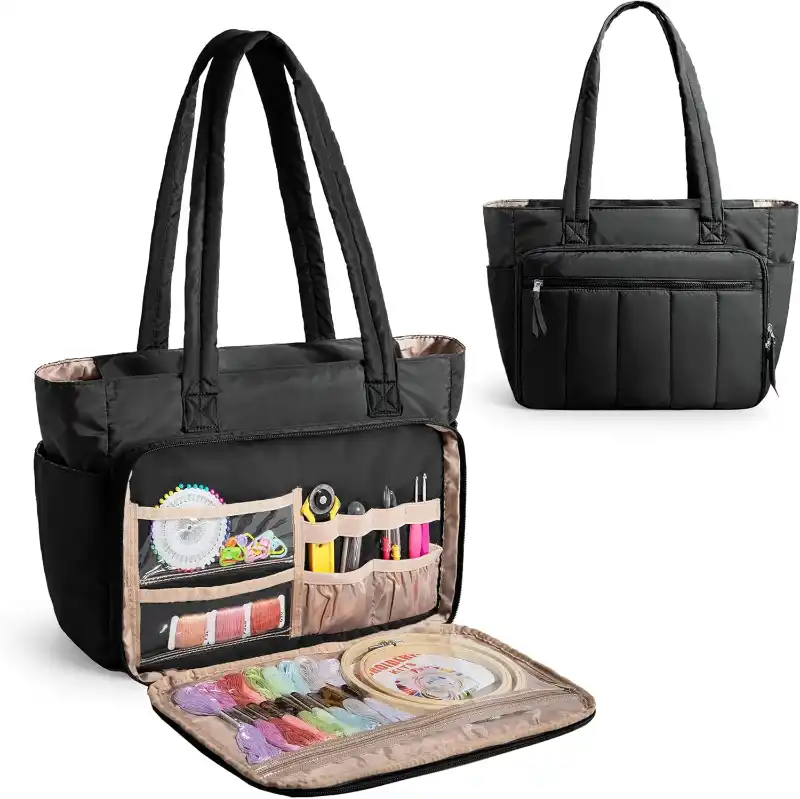
    Pockets can be helpful for things like needles, snips, and threaders, especially if you don’t want those loose in the bag. Easy-open closures matter too, because you’ll be opening and closing the bag often.

    Waterproof, Not Waterproof, or Somewhere in Between

    Most project bags aren’t waterproof, and that’s fine.

    Fabric bags are common and work well for everyday stitching. At the same time, spills happen. Coffee gets knocked over. Bags get put down in places you didn’t plan for.

    Many stitchers (including me) use:

    • a fabric project bag on the outside
    • a small zip-lock or inner sleeve around the fabric (and maybe floss) inside

    That way your project gets some protection without needing a fully waterproof bag. Waterproof linings or vinyl panels can be a bonus, but they’re not strictly needed.

    Why Being Able to See Your Project Helps

    When you can see what’s inside your cross stitch project bag, even briefly, it’s easier to remember:

    • what the project is
    • where you’re up to
    • why you were enjoying it
    • why you want to finish it!

    It might just be my ADHD brain (out of sight, out of mind) but a bag with mesh panels or vinyl windows, or completely made of see-through material, can really help. Being able to glance at the bag and recognize the project can make it easier to come back to it, especially if you have more than one project on the go. (Who, me?)

    Keeping Your Project Visible Without a See-Through Bag

    If your project bag isn’t see-through, you can still make the project visible in other ways.

    This is where Project Bag Cards come in.

    A Project Bag Card can:

    • slip into a small vinyl pocket on the outside of the bag, so you can see the project details without opening it
    • live inside the bag and be pulled out on its own, without unpacking the whole project.

    Having the project name, fabric, and key details on a card gives you a quick reminder of what’s inside the bag. It helps you reconnect with the project without handling the fabric or the floss every time.

    This kind of visibility works well alongside tools like Project Floss Organization Cards, where the physical parts of the project are already kept together.

    You Don’t Need the Perfect Bag to Get Started

    It’s easy to get excited about a new project and skip over the planning side of things.

    You don’t need the perfect cross stitch project bag to start using one. A “good enough” bag works just fine. You can always change or upgrade later if you find something isn’t working for you.

    What matters most is the habit of keeping the project contained so that you can make the most of your precious stitching time.

    How Project Bags Support Project Kits

    A project bag works best when it holds a complete kit of everything you need for your project.

    When your floss, fabric, pattern, and tools stay together:

    • nothing gets lost between sessions
    • you don’t have to reassemble things each time
    • it’s easier to pick the project back up after a break

    That’s why project bags and [cross stitch project kits] work so well together. The kit is the system. The bag supports it.

    Using Cross Stitch Project Bags at Home and Away

    Most stitchers naturally use different projects in different places.

    Larger projects often stay at home. Smaller projects are easier to take with you. When you’re stitching away from home, secure closures and fabric protection matter more, and simple setups usually work best.

    Even with large, home-based projects, a small bag tied to the side of a frame can keep floss, snips, and patterns together and easy to reach.

    A Simple Habit That Makes Stitching Easier

    A project bag isn’t about buying the right thing. It’s about giving your project a home.

    When your project is contained, visible, and easy to access, stitching feels simpler. You spend less time setting up and more time doing the part you actually enjoy.

    If your project bag helps you pick up your stitching and get started, it’s doing exactly what it needs to do.

  • How Creating a Cross Stitch Project Kit Gives You More Time to Stitch

    How Creating a Cross Stitch Project Kit Gives You More Time to Stitch

    A cross stitch project kit can make a real difference when your projects, patterns, and supplies are scattered across different places. When everything for one project lives together, you spend less time setting up and more time stitching. Your floss is ready, your pattern is there, and you can sit down and get straight into the part you actually enjoy.

    Creating a kit for each project doesn’t add work to your stitching. It removes friction. Over time, that gives you more chances to get lost in cross stitch, with all the calm and focus that comes with it.

    When Your Projects and Supplies Are Scattered, Stitching Gets Harder

    Stitching is meant to be absorbing and relaxing, but it can start to feel oddly effortful when things aren’t where you expect them to be. Even when you know what you want to work on, small interruptions creep in.

    You might find yourself:

    • deciding which project to stitch
    • checking whether you already have the right floss
    • trying to remember where you left off
    • digging through bags or boxes for tools

    None of this is difficult on its own, but it quietly eats into your stitching time. This kind of time suck happens once you have more than one project on the go, or a growing stash of supplies.

    What a Cross Stitch Project Kit Actually Is

    Like a kit you buy from a retailer, you can make your own kit that has everything you need for one project, kept together as a set.

    That usually includes:

    The important part is that the kit stays together. When you pick it up, you’re not collecting pieces from different places. You’re opening one kit and stitching. A project bag can help you here too.

    There’s more on keeping your pattern with your kit in our guide to cross stitch patterns for beginners.

    Why Making a Kit Saves You Time Every Time You Stitch

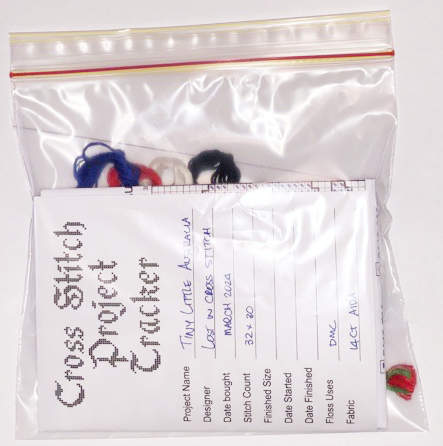
    Cross stitch project kit in a zip bag with floss and a project tracker card

    When your project is already kitted up:

    • you don’t spend time deciding what to work on
    • you don’t stop mid-session to look for floss or tools
    • you can pick the project back up easily after a break
    • your stitching time stays focused.

    This is one of the best ways we’ve found to get more time to cross stitch. You’re just protecting the time you already have.

    Preparing Your Floss Once Is the Real Time Saver

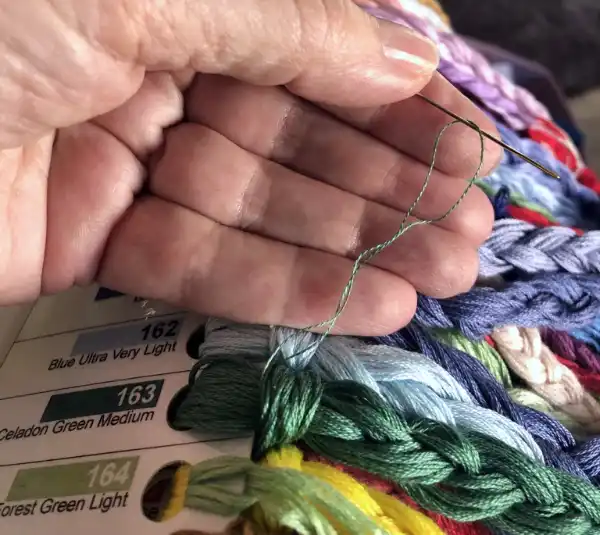
    The biggest time saver in a project kit is prepared floss. By this we mean floss that is pre-cut into the right lengths, and stored in a way that lets you pull out just one or two strands.

    Cross Stitch Terms and Abbreviations: A to Z Glossary

    When you prepare your floss at the start of a project, you do the work once:

    • you cut the skein into usable lengths
    • you separate strands if needed
    • you attach those lengths to the project

    After that, stitching is fast. You pull a strand, thread your needle, and keep going. You’re not unwinding skeins, cutting thread mid-session, or dealing with leftover bits (floss orphans) you’re not sure what to do with and that end up in your OORT jar or the bin!

    This is a do-once job that pays you back over months of stitching and over the life of the skein itself. This approach grows naturally out of long-term floss organizer systems, where preparing floss upfront saves time again and again.

    Why Project Floss Organization Cards Tie the Whole Kit Together

    When you’re at the stage in your stitching life that you’re doing multiple projects (several works-in-progress are normal), this way of work is such a time saver.

    A Project Floss Organization Card holds just the floss for one project. All your colors are visible at once, fixed in place, and easy to grab. The card lives with your project kit, so your floss never drifts away from the project it belongs to.

    I always write the project name and floss numbers on the card. Dates are useful too, especially when time has a way of slipping by. Writing down the fabric helps if things ever get separated. Everything else on the card is optional. You fill in what helps you and ignore the rest.

    Because the cards come in different sizes, you can choose one that suits the number of colors in your project, whether you’re working with three colors or thirty.

    Choosing the Right Card Size for Your Project

    You usually know how many colors a project has before you start, so choosing a card is straightforward. Larger projects use larger cards. Smaller projects work well with any size, including the fold-up card.

    Cards can be reused too. You can use the back for a new project, use pencil for initial markup, or repurpose it for stitch-alongs. They’re designed to be part of your stitching cycle, not something you throw away. The different formats live alongside other printable tools for planning and stitching.

    Why This Works From Your First Project Onward

    This way of kitting projects works no matter where you are in your stitching.

    If you’re new to cross stitch, it helps you start with useful habits. Your floss doesn’t tangle. Nothing drops loose into the bottom of a bag. Everything stays together. Over time, those habits make stitching feel easier and more enjoyable, which is why many beginners appreciate simple systems like this when learning cross stitch basics.

    If you’ve been stitching for years, kits make it easier to manage multiple projects without mixing things up. You always know which floss belongs where, which is helpful if you rotate projects or stitch away from home.

    Using Project Kits for Travel, Gifts, and Stitch-Alongs

    Project kits are ideal for stitching away from home. You grab one kit and go, knowing everything you need is already there.

    They also work well for stitch-alongs. You can reuse a card from month to month, turning it over or updating it as the new design is released. If the SAL is well designed, you’ll be using the same colour set for every pattern so you might only kit up once for the duration.

    Kits also make thoughtful gifts. If you’re giving a chart to another stitcher, you can turn it into a complete kit by adding fabric, floss, and a Project Floss Organization Card.

    The fold-up card was designed with small projects and travel designs in mind, making it a natural fit for gifting and portable stitching.

    What Happens When a Project Is Finished

    When you finish your project, any remaining floss goes back into your master set. The card goes back into your stitching box, ready to be reused. We generally get at least four uses out of each card before they get too tatty.

    But mainly, you’re not left with any “just in case” floss scraps, and nothing gets lost between projects.

    A Simpler Way to Protect Your Stitching Time

    Creating a cross stitch project kit doesn’t change how you stitch. It changes how easy it is to start.

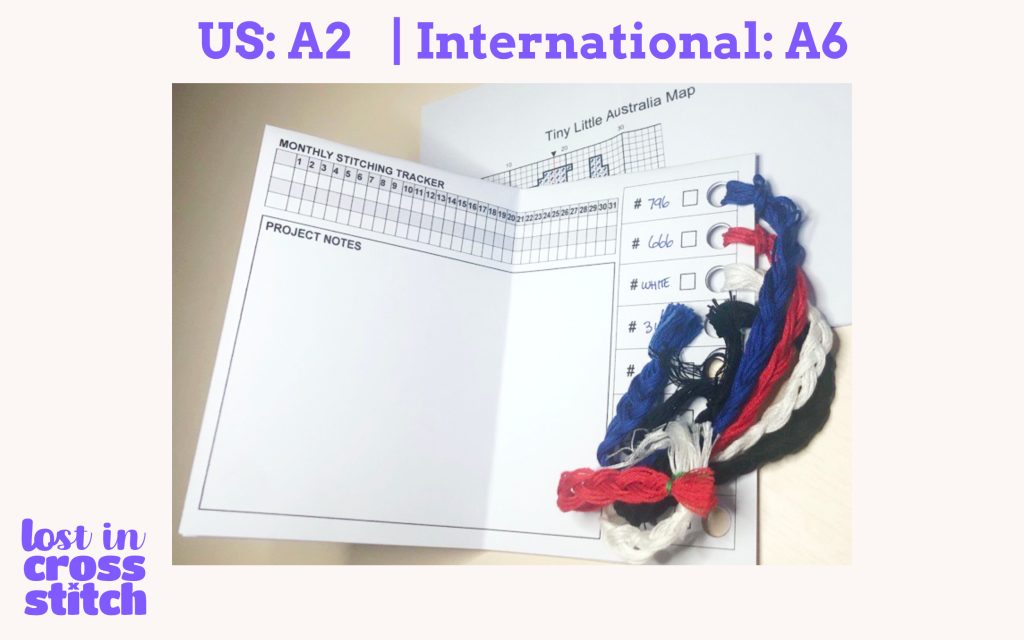
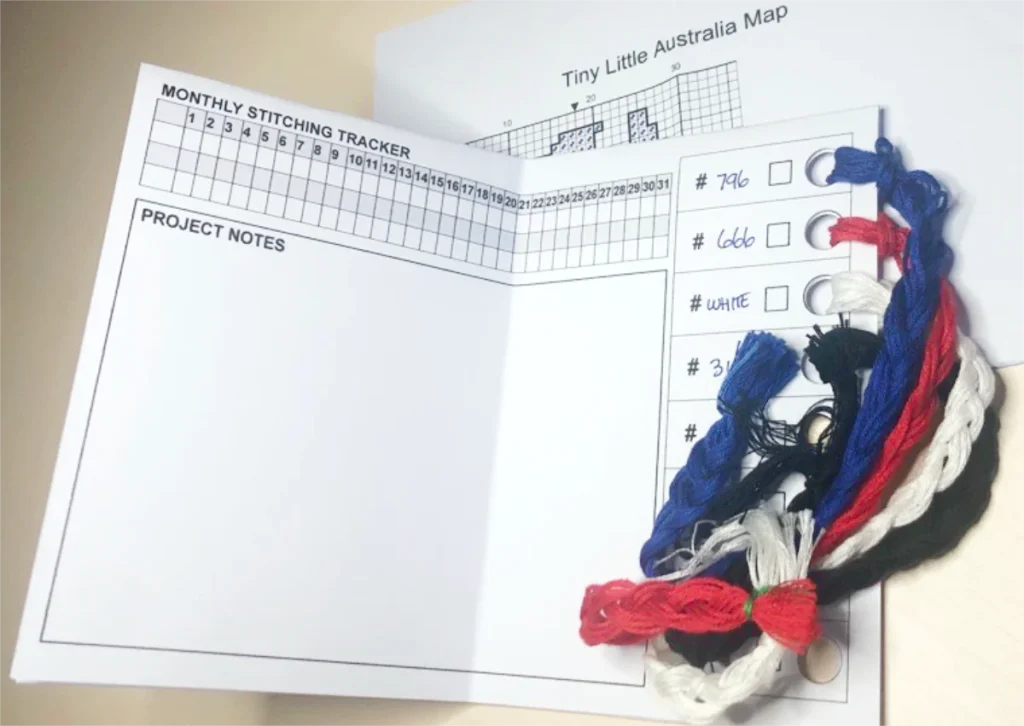
    Our small cross stitch project kit floss organizer card has a tracker included
    Our small project kit floss organizer card has a tracker included

    When your floss is prepared, your tools are together, and your project is ready to go, you spend less time setting up and more time stitching. This is our favourite thing – more time to get lost in cross stitch :)

    If keeping your projects contained sounds appealing, Project Floss Organization Cards support exactly this way of stitching, both practical and quick.

  • The Complete Guide to Embroidery Floss Organization

    The Complete Guide to Embroidery Floss Organization

    A tidy floss collection isn’t just beautiful, it’s practical. When every colour is where it should be, stitching feels effortless. No more rummaging through bags or finding five half-used skeins of the same shade in a tangled mess.

    I’ve been building and refining my system for decades, and this guide brings together everything I’ve learned, from simple organizing steps to full DMC collections, printable tools, and long-term storage ideas.

    This is your one-stop place for everything embroidery floss organization, including how to set up, store, track, and protect your collection.

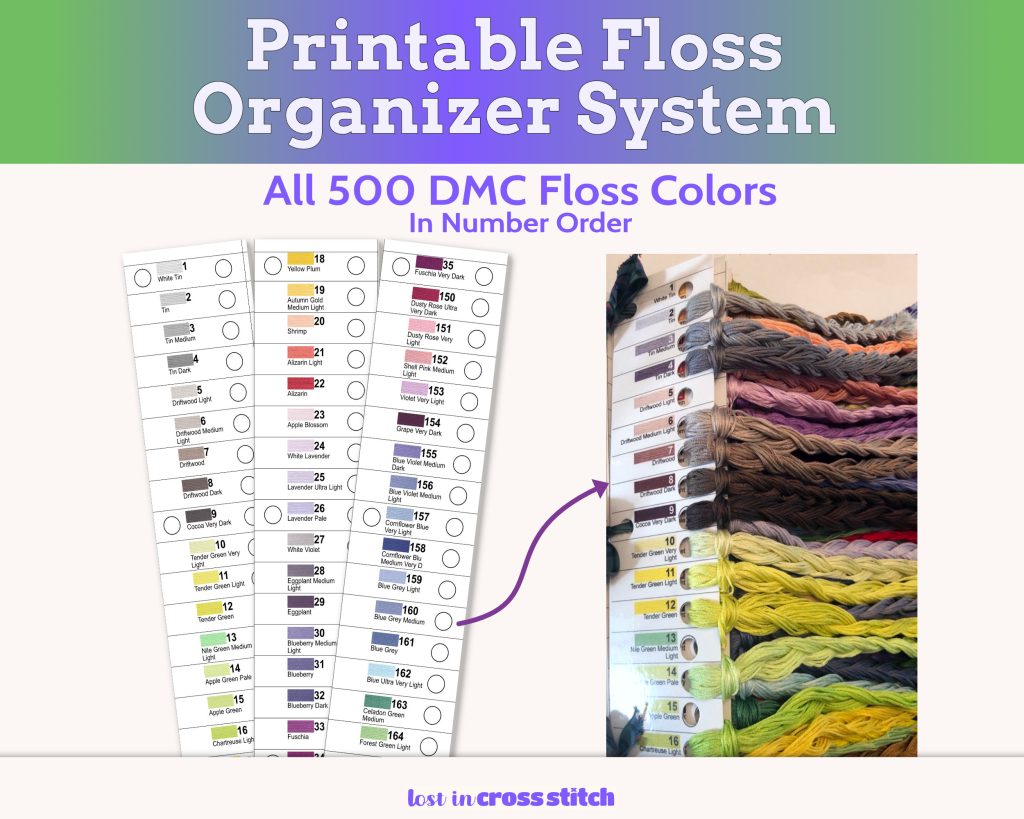
    Want to skip straight to the system we recommend? Our printable DMC floss organizer cards are the fastest way to go from chaos to colour-ordered.

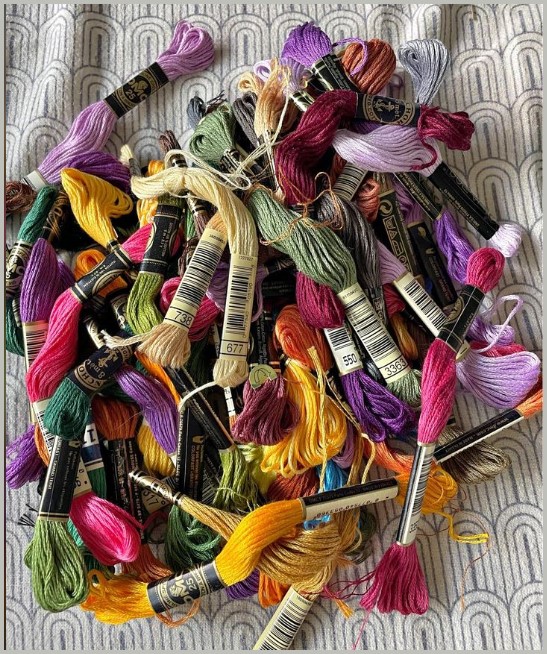
    Unsorted DMC embroidery floss skeins in a tangled pile, representing a stash before embroidery floss organization.

    1. Getting Started with Embroidery Floss Organization

    Start here to get your floss under control.

    2. My DMC Floss Organizer System

    Back when I couldn’t afford store-bought thread cards, I cut my own from cereal boxes. Over the years, that homemade idea evolved into my current printed with color swatches and laminated card system.

    Read how it started (and what still works perfectly 30 years later):
    My DMC Floss Organizer – Keeping My Cross Stitch Thread Stash Under Control

    It’s the story behind the flossbook-style system I still use today.

    3. Making Your Own Floss Organizer Cards

    Once you’re ready to upgrade from bobbins or bags, printable floss cards are the easiest and most flexible option.

    Many stitchers search for a “flossbook” system. This is the printable version: easy to flip through, easy to extract floss for project sets, easy to keep sorted, just cool to look at, and simple to update as your stash grows.

    Floss Organizer Cards: Step-by-Step Guide

    4. Comparing Storage Systems

    Every stitcher has their favourite way to store floss. Some love the neatness of bobbins, others prefer the freedom of ring systems.

    Quick guide: which system usually fits best?

    • If you want cheap and simple: bags, rings, or a small box
    • If you want compact and tidy: bobbins + a labelled box
    • If you want easy to maintain, use and to flip through: printable organizer cards (flossbook-style)
    • If you want full stash control: a tracking list for what you own and what you still need

    If you’re still deciding what works best for you, here’s a detailed look at six popular systems, from boxes and bags to cards and binders:

    6 Embroidery Floss Storage Ideas (and Which One Actually Works)

    You’ll see the pros and cons of each, along with practical notes about double handling, floss kinks, and space requirements.

    embroidery floss organization storage system using a floss box

    5. What It Really Costs to Build a Full DMC Floss Set

    A full set of DMC colours is a beautiful thing, and surprisingly affordable over time. This article breaks down the real DMC floss set cost, including current prices, storage options, and the cost of printing and laminating your own organizer cards.

    Read: What It Really Costs to Build Your Own Full DMC Floss Set

    We also cover how to stretch your budget, from using craft store coupons in the U.S. to watching for DMC’s own bundle releases.

    6. Tracking and Inventorying Your Collection

    Once you’ve built your system, it helps to know exactly what you have:

    How to Track and Inventory Your DMC Embroidery Floss Collection

    This post walks through easy ways to record colours, note duplicates, and manage discontinued shades, all without adding more clutter.

    Building Your Perfect System

    Emrboidery floss organization isn’t about one “right” method; it’s about finding what suits your space, your habits, and your projects. You might prefer a mix of systems:

    • bobbins for travel stitching
    • cards for your master set
    • a drawer or box for specialty threads

    You can build a system you enjoy using so that you actually stay organised. And adapt it any time.

    If you’d like to try the same setup I use, you can download the printable DMC Floss Organizer Cards and start building your own thread book today.

    my embroidery floss organization system
    Our Lost In Cross Stitch Embroidery Floss Organization system

    FAQs About Embroidery Floss Organization

    What’s the best embroidery floss organization system?
    The one you’ll actually use. For large collections, card systems (like printable DMC Floss Organizer Cards, in number order or colour order) are easy to maintain and prevent tangles.

    Is it worth buying the full DMC set?
    Yes, if you stitch regularly. A full set means you’ll always have the right colour and won’t double-buy.

    How long does embroidery floss last?
    Decades, if stored properly. Keep it away from humidity, dust, and sunlight.

    Can I mix storage systems?
    Absolutely. Many stitchers keep a main set on cards and use bobbins or rings for active projects. We use Project Organizer Cards alongside our master set.

    Quick Takeaway

    Floss organization is about what works for you, and gives you more time to stitch. The best system is the one that keeps your threads visible, protected, and ready to use.

  • How to Create a DMC Floss Inventory ( Printable Thread Tracker)

    How to Create a DMC Floss Inventory ( Printable Thread Tracker)

    Somewhere between finishing that first kit and starting the next project, most stitchers start building a DMC floss inventory, even if they don’t call it that yet. A skein here, a sale there, a handful of coupons, and suddenly you’ve taken up a second hobby.

    The first is stitching. The second is collecting the stuff we stitch with. That’s when the DMC chart starts looking suspiciously like a treasure map, and buying thread “just in case” starts to feel entirely reasonable.

    A thread tracker or floss inventory list keeps your collection from growing into a dozen boxes and baskets, helps you fill in missing colours, and make the most of your cross stitch dollars.

    Why Keep a DMC Floss Inventory

    Is this how you organise your floss? a floss inventory tracker will make your hobby a joy

    A DMC floss inventory list is about sanity and cost effectiveness:

    • You’ll stop buying duplicates (no more coming home with another 796 when you meant to buy 967).
    • You’ll know which shades you still need to complete your collection.
    • You can make the most of sales and coupons without guessing what’s missing.
    • You’ll have a place to record discontinued or special colours before they vanish from memory.

    And let’s be honest, there’s something genuinely fun about watching those gaps fill in. It’s the collector’s version of finishing a row of neat cross stitches.

    The Mini Thread Tracker Book

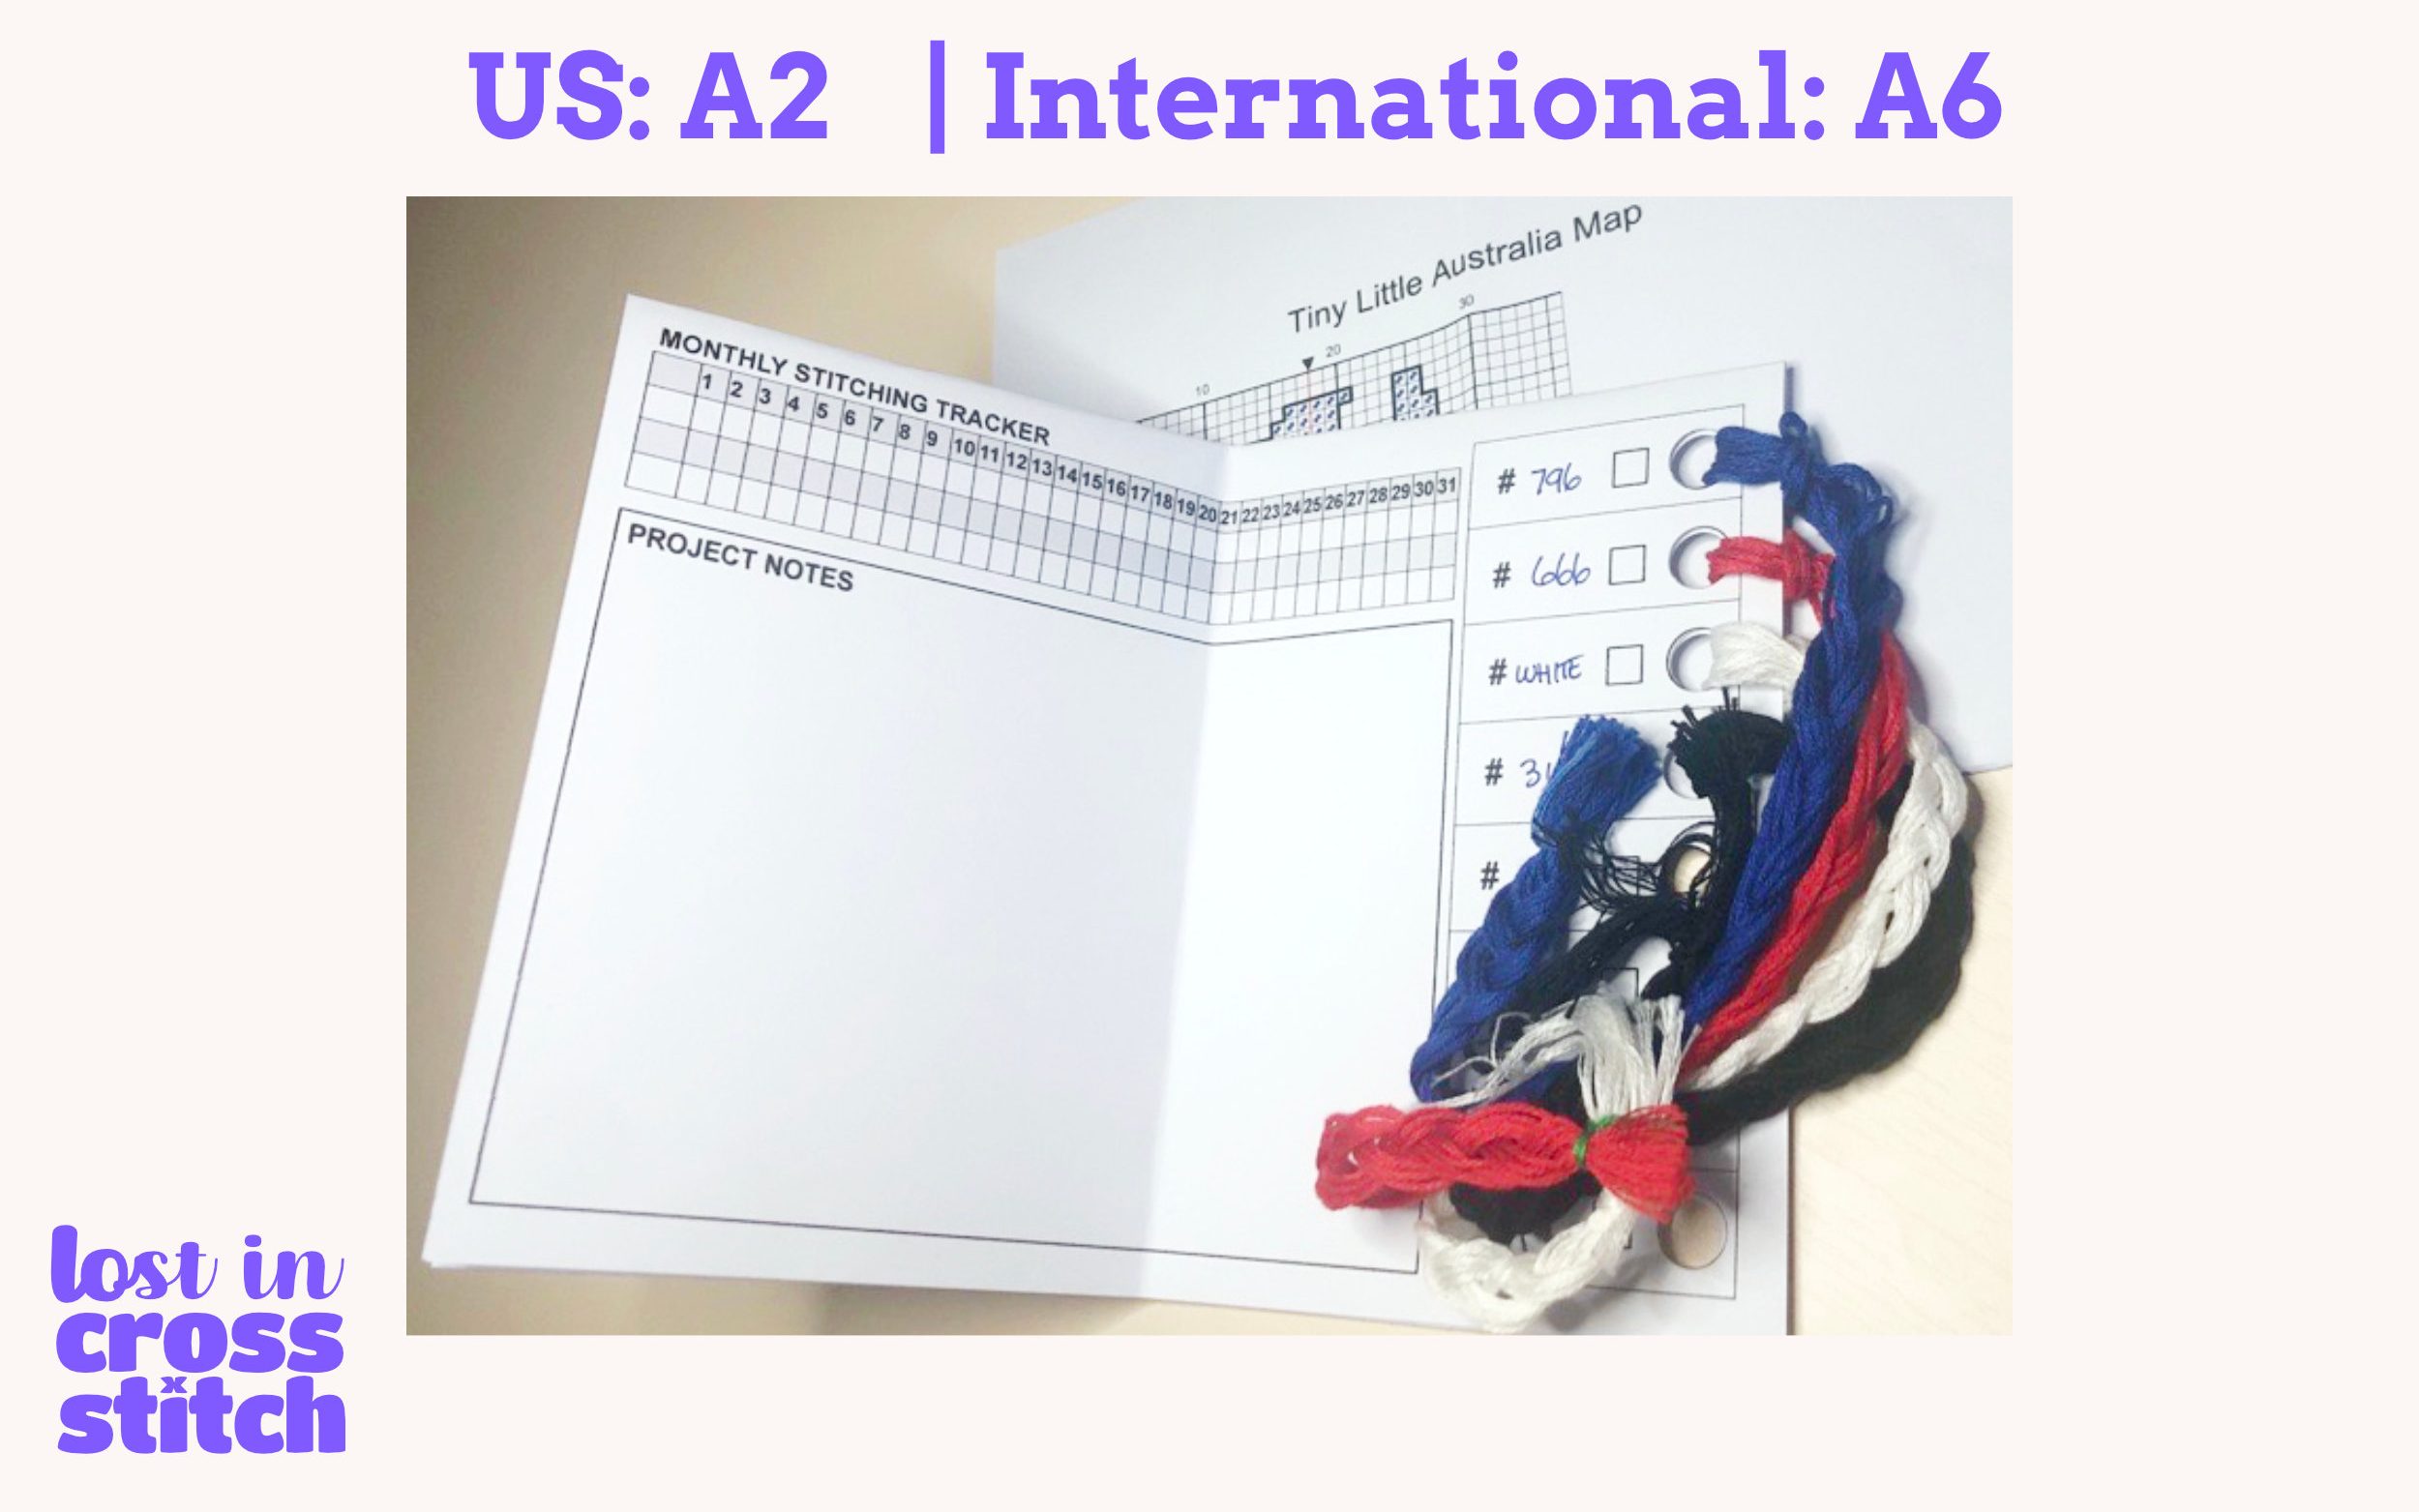
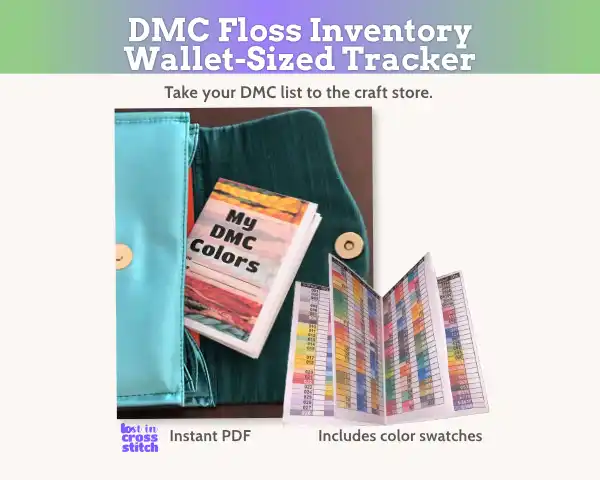
    Our Mini Thread Book is designed for exactly this: keeping track of your DMC stash without turning it into homework. Print it, fold it, stash it where you’ll use it.

    It folds neatly into a small booklet you can slip into your project bag, planner purse. Inside, each page lists colour numbers with blank spaces beside them so you can jot down how many skeins you own.

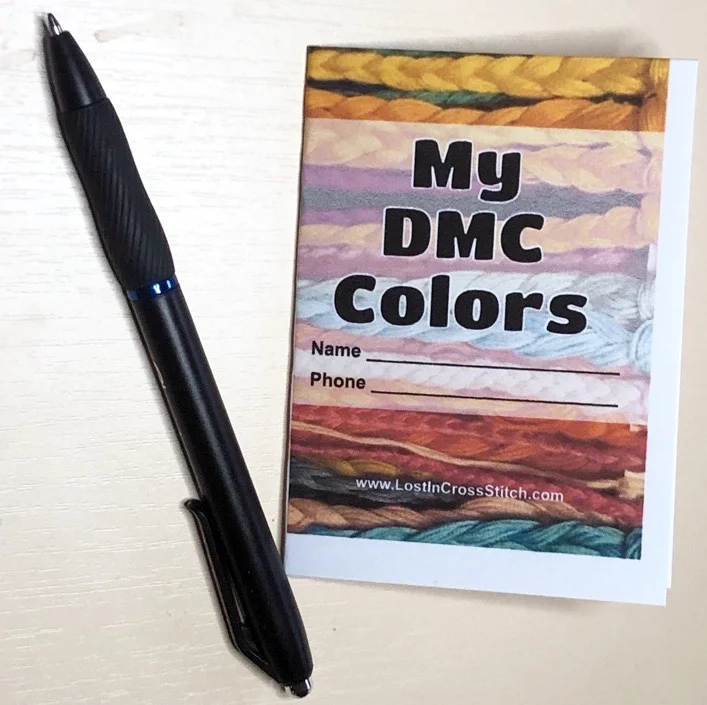
    DMC Thread tracker printable inventory makes a very handy folded booklet and prints on a single page

    It’s organised in number order (or grab the colour-order version if that’s how you think about your floss) so it’s easy to mark up and look up. There’s no scrolling down long digital lists, no fussing with apps, just a quick pencil mark, a glance, and you’re done.

    We also have the sticker version if you’d rather have your list in your planner or notebook.

    How to Set Up Your Thread Tracker

    First things first: your floss is all in once place, right? (If not, this post will help)

    1. Gather your stash. from all the places it’s spread out to. Check project bags, boxes, drawers, and that one basket you pretend isn’t a thread graveyard.
    2. Grab your Mini Thread Book. Start with the first skein in your pile.
    3. Write in your numbers. For each colour you find, note how many skeins you have in the blank space beside it.
    4. Add new shades as you buy them. You’ll easily see the gaps.

    That’s it, no spreadsheets, no decoding handwriting six months later. Just a small, tidy thread tracker that grows as your collection does.

    Using Your DMC Floss Inventory While You Build Your Collection

    Here’s where it gets fun. Once you’ve set up your floss inventory list, you can:

    • Flip through it when a sale pops up and see which numbers you’re missing.
    • Keep it handy so you can check your list when you’re at the craft store. It fits neatly into your purse, planner or notebook.
    • Update it as you go, one or two numbers at a time, no big catch-up days needed.

    It’s a small thing, but it turns the slow, steady process of collecting into something relaxing. You’ll start to enjoy adding new colours the same way you enjoy stitching a border, methodical, rhythmic, soothing. Quietly rewarding.

    Small folded printable DMC floss inventory booklet shown next to a pen for scale.

    Keeping Your Thread Tracker Current

    Updating your thread tracker is part of your stitching rhythm:

    • Add new colours as soon as you buy them.
    • Cross out used skeins when they’re gone.
    • Review your list every few months, preferably with a cup of tea and a bit of delight about how organised you’ve become.

    The pages will fill up slowly, and you’ll start to see your collection taking shape. You might even save some money!

    In the End

    Keeping a DMC floss inventory tracker is part of the fun. A mini book turns the collecting side of cross stitch into something you can carry with you, flip through, and actually enjoy.

    Pair your tracker with our printable DMC floss organizer cards for a complete system. Track what you own, and store it in number order or colour order.

    Quick Takeaway

    A small thread tracker in your project bag, planner or purse turns collecting DMC floss into something you can actually enjoy. You’ll stop guessing, stop double-buying, and get to watch your collection fill in like the world’s slowest, most colourful puzzle.

    FAQs About Keeping a DMC Floss Inventory

    How do I start a DMC floss inventory?
    Gather your threads (they’re all in one place, right?), open your mini thread book, and jot down how many skeins you have of each number. No fancy setup, just start.

    Where should I keep my floss inventory?
    In your project bag, planner or purse. Somewhere it’ll travel with you, so when you find a sale, you can check it on the spot.

    Do I really need to update it often?
    Not unless you’ve had a busy stitching month. Add new colours as you buy them and tidy it up whenever you’re reorganising your floss.

    Is it worth doing if I don’t have all 500 colours?
    Definitely. It’s just as useful before you have the full set because it keeps you from buying doubles, so it saves your dollars and helps you build your collection accurately. Very satisfying :)

  • What It Really Costs to Build Your Own Full DMC Floss Set

    What It Really Costs to Build Your Own Full DMC Floss Set

    How much a full DMC floss set costs is something every stitcher wonders about eventually. At first, embroidery floss feels inexpensive, just a dollar or so per skein, until you realise that a full set of 500 colours is an entire rainbow’s worth of thread.

    Standing in front of a wall of DMC skeins, it’s easy to imagine having them all, every shade in perfect order, ready whenever inspiration hits. Owning the full range feels like holding every colour of the world in your hands, a mix of order, inspiration, and quiet joy.

    Collecting them all, though, is a real investment, even in such an economical craft. I’ve still got floss I bought more than thirty years ago, and some shades don’t even exist anymore.

    So, what does it actually cost to build the full collection, and how far does that money really go?

    The Cost of a Full DMC Floss Set

    A single skein of DMC embroidery floss sells for around US $1.00–1.20 (AU $1.50–1.70) at full retail. With 500 or so standard colours, that means the complete DMC range costs:

    Type of PurchaseApprox. Cost (USD)Approx. Cost (AUD)Notes
    Full retail, single skeins$500–$600$750–$850Buying individually at craft stores
    Discounted multipacks$400–$450$600–$680From bulk sellers or online
    Pre-sorted full sets$475–$525$700–$800Sometimes includes bobbins or box

    Saving a Little Along the Way

    In the U.S., many stitchers stretch their budget further by using store coupons from large craft stores, where DMC often features in weekly sales. DMC itself sometimes releases themed bundles or seasonal sets at reduced prices.

    If you’re patient and pick up colours gradually, or are lucky enough to find partial collections at thrift stores, you can build your collection for far less than the full retail cost.

    The Hidden Costs of Storage Systems

    But buying the DMC floss set is only half the story. Once you’ve got those 500 skeins, you’ll need somewhere to keep them organised, visible, and safe from tangles. Here’s what each common system ends up costing once you include the extras.

    Storage TypeComponentsApprox. CostLongevity
    Plastic bobbins & boxes3 boxes + 500 bobbins + labelsUS $40–60 / AU $60–90Medium – bobbins bend, floss kinks
    Floss bags & binder500 zip bags + binder ringsUS $50–70 / AU $70–100Medium – prone to slipping, labels fade
    Drawers or cabinetStorage drawers + inserts to stop floss slidingUS $80–200 / AU $120–300Long-term – sturdy but bulky
    LoRan Master Cards35 packs (15 colours per card) + labelsUS $120+ / AU $180+Long-term – neat, limited capacity, can be hard to find
    Printable Organizer Cards12 printable pages + lamination + hole punch + ringsUS $10–15 at home / US $30–50 at copy shopDecades – reusable and repairable
    Flat lay showing different embroidery floss storage systems including bobbins, zip bags, a small drawer organizer, and laminated DMC floss organizer cards from Lost in Cross Stitch, arranged neatly on a light wood surface.
    final bw mini book

    Stop Buying Duplicate DMC Floss

    This printable mini-book is a pocket-sized DMC inventory you can carry in your project bag. Mark what you own and what you still need, then check it at a glance in the shop, no more scrolling through notes on your phone. Trusted by hundreds of stitchers (and counting!) Instant download, print as many copies as you like.

    Printing and Laminating Costs for the Printable Organizer

    If you don’t have a printer or laminator (though laminating is optional, we do recommend it), most copy shops can print and laminate your 12-page set affordably:

    CountryEstimated Print + Laminate (12 pages)Notes
    🇺🇸 United StatesUS $33–36Based on Staples pricing
    🇦🇺 AustraliaAU $45–50Based on average local pricing
    🇬🇧 United Kingdom£25–30Based on The Printing Works
    🇳🇿 New ZealandNZ $35–45Typical local pricing

    Other small tools:

    • 3/8″ (10mm) hole punch – about US $10
    • Rings or ribbon – US $5–10

    Even at full copy-shop prices, setting up a professional-looking, long-lasting organiser costs around US $50.

    At home, it’s closer to US $10–15.

    Laminate DMC Floss Cards

    The True Value of a Floss Collection

    At first glance, those totals look high for something as small as a skein of thread. Yet embroidery floss is unique: it doesn’t expire, and a single skein can last through multiple projects over many years.

    I’ve stitched samplers, ornaments, and gifts for decades using the same colours I started with. A few have even outlived their catalogue numbers (DMC does discontinue colours now and then).

    A full set makes it easier to follow ideas wherever they lead, no waiting for a missing colour to arrive. It saves time and some reasonably easy inventory tracking means I can stop duplicates sneaking in.

    DMC floss inventory wallet-sized tracker printable mini book

    How Organization Protects Your Investment

    A disorganised stash costs more than you realise because lost colours, duplicates, and time can be wasted when you have to hunt for one missing shade.

    An organised system pays for itself every time you don’t have to re-buy a colour you already own.

    That’s why we designed our printable DMC Floss Organizer Cards. They use the same concept as traditional thread cards but cover the full range, complete with colour names and swatches. Once laminated, they’ll last for decades. It’s a one-time setup that protects a lifetime of colour.

    So, What’s the Real Cost of a complete DMC Floss Set ?

    ItemTypical Cost (USD)Longevity
    500 skeins of DMC floss$500–600Decades
    Storage system$40–$300+ depending on typeLong-term
    Printable organiser setup$10–50Decades
    Misc. tools (punch, rings, labels)$15–25One-off

    A fully organised, complete DMC floss collection — properly stored and ready to use — sits around US $600–700+ (≈ AU $900–1,000+).

    For a creative toolkit that lasts a lifetime, and that you can build over time, that’s remarkably sustainable.

    FAQs About Building a Full DMC Floss Set

    How much is a full set of DMC floss?
    Around US $500–600 at retail, depending on local pricing. Bulk discounts can bring it closer to US $450. If those numbers feel out of reach, we’ve also looked at affordable alternatives to DMC floss that can save you a significant amount.

    Is collecting all the DMC colours worth it?
    Yes, if you stitch regularly. You’ll save time, avoid duplicates, and have every shade ready for any pattern.

    What’s the cheapest way to organise DMC floss?
    Printable DMC Floss Organizer Cards are the most affordable long-term solution — about US $10–15 if printed at home.

    Can I mix storage systems?
    Of course. Many stitchers keep their main collection on cards and use bobbins or rings for travel projects.

    Quick Takeaway

    The real value of a DMC floss set isn’t in the price tag, it’s in knowing you’ll still be using it decades from now.

    With a bit of time and a few hundred dollars, you can build a lifetime’s worth of stitching calm and colour.

    Next Up

    Once you’ve built your collection, it’s worth tracking what you own.
    👉 Read: How to Organise and Inventory Your DMC Floss Collection

  • 6 Embroidery Floss Storage Ideas for Cross Stitch and Beyond

    6 Embroidery Floss Storage Ideas for Cross Stitch and Beyond

    Cross stitch is joyful until your embroidery floss stash decides to rebel. Tangles, duplicates, half-used skeins, thread orphans can all creep up fast. You sit down to stitch, only to spend half of your precious stitching time managing your floss.

    A good floss storage system changes everything. It saves time, protects your thread, and makes your stitching space feel calm and ready.

    Over the years, I’ve tried them all, from winding bobbins to hanging bags, to full thread-book systems. Here’s what works, what doesn’t, and how you can make the most of your stitching time.

    1. Plastic Bobbins in Boxes

    Floss Organizer storage box with embroidery floss bobbins sorted by color. Each clear compartment holds multiple shades arranged in rainbow order, including reds, pinks, yellows, greens, blues, purples, and neutrals. The bobbins are neatly wound and labeled with DMC numbers inside a white plastic case.

    The classic. Each skein gets wound around a small bobbin and tucked into a divided box. It’s tidy, it’s satisfying — and it’s a commitment.

    Why people love them:

    What can go wrong:

    • Thread orphans: if you don’t wind leftovers straight away, they tangle or vanish.
    • Kinked floss: sharp corners flatten the thread and leave creases that can cause more knotting.
    • Double handling: you unwind, cut, separate, stitch, and rewind — again and again.
    • Time sink: you end up managing thread more than using it.

    It could be the perfectionist in me, but that much fiddling feels jarring. Less handling means more stitching time — and that’s what we’re really here for.

    2. Floss Drops and Rings

    Hands using a FlossOrganizer with clear acrylic thread cards. Several embroidery floss colors—white, light green, and dark green—are looped through the rectangular cards, each with a slot for color labels or barcodes, arranged neatly on a brown surface.

    Floss drops are lovely for color lovers. They’re available in acrylic, plastic and even laser-cut timber. Each tag holds a skein or pre-cut length and hangs from a ring — pretty, portable, and perfect for smaller collections.

    Why people love them:

    • Beautiful display of color.
    • Easy to grab one shade.
    • Works well for active projects or travel kits.

    What can go wrong:

    • Tangles: threads twist and knot when drops bunch together.
    • Lost singles: easy to drop or misplace a color.
    • Heavy rings: once you hit twenty shades, it’s like lifting a mini barbell.
    • Inconsistent labels: handwriting fades or smudges or if you have the type that has room for the floss band, you’ll need to glue or tape the band in place so it doesn’t fall off.

    A joy to look at, but less fun to manage when your stash grows beyond a handful of projects.

    Looking for more about floss organization?

    3. Binder Pockets and Zip Bags

    FlossOrganizer showing embroidery threads in resealable plastic sleeves labeled 'lovielf'. Each sleeve holds a single color of floss, arranged in soft pink, bright pink, yellow, and orange shades, neatly looped on a metal ring.

    Zip bags and binder sleeves are the “quick win” system — simple to start, endlessly adjustable.

    Why people love them:

    • Keeps floss safe from dust and moisture.
    • Easy to add, remove, or rearrange colors.
    • Ideal for stitchers who like flexibility.

    What can go wrong:

    • Add labels: usually you’d need to add a sticker or write on with a pen that won’t rub off over time. So more cost for stickers or a pen.
    • Slip and slide: unless you store them on a ring, the bags scatter everywhere.
    • Double handling: after you’ve labelled the bag and put the floss into it and sealed it, and added it to your rings, then every time you need a strand of floss, you have to take the skein out of the bag, unwind, cut, separate, and re-store the leftovers so you don’t get orphans.
    • Static cling: in the right weather, the blags can cling to one another and the floss can clings to the plastic instead of lying flat.
    • Fading labels: ink smears, stickers peel, and re-labelling never feels finished.

    Great short term, but over time it becomes a slow dance of plastic bags, labels, and sighs. (So many sighs).

    4. Drawers and Cabinets

    FlossOrganizer setup showing a wooden drawer cabinet filled with embroidery floss bobbins arranged by color. Drawers are partly open, revealing neatly sorted threads in gradients from red and orange to yellow, green, blue, and purple. The organizer sits on a wooden desk beside craft tools and papers.

    For those with a dedicated craft nook, drawers feel wonderfully professional. Everything has a home, and closing the drawer makes the clutter disappear. There are many drawer styles available now, and even custom made ones like this made by my friend’s hubby.

    Why people love them:

    • Looks elegant and stays dust-free.
    • Quick to tidy — just slide the drawer closed.
    • Doubles as storage for scissors and needles.

    What can go wrong:

    • Double handling again: pull the floss out, unwind, re-store, repeat.
    • Additional organizing items: many people use foam inserts to keep the bobbins upright, so they don’t slide around the drawers.
    • Space hungry: gorgeous if you have room, but not ideal for smaller setups.

    It could be the perfectionist in me, but all that opening, closing, winding, and rewinding feels like a loop. I’d rather spend that time stitching.

    5. Floss Organizer Card Systems

    Of all the methods here, this is the one we keep coming back to. Our printable DMC floss organizer cards turn a tangled stash into a tidy, flip-through thread book, sorted in number order or colour order, one smooth strand at a time.

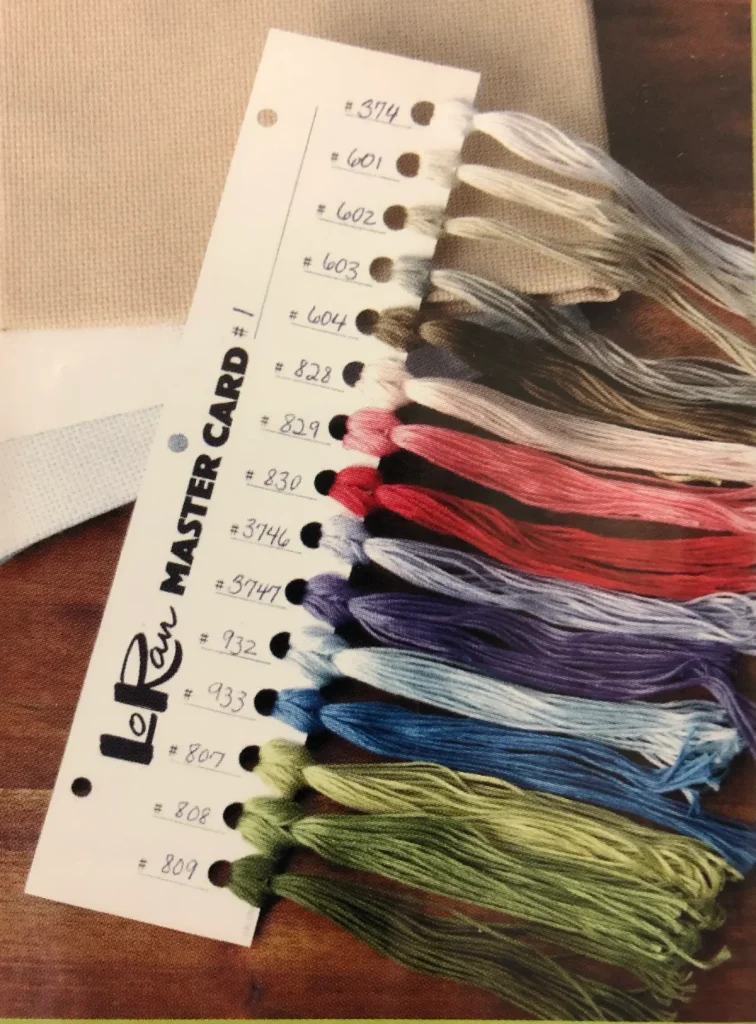
    A LoRan Master Card #1 with embroidery floss samples threaded through labelled holes. Each hole has a handwritten DMC color number beside it, ranging from 374 at the top to 809 at the bottom. The threads display a gradient of colors, including greys, pinks, purples, blues, and greens. The card is resting on a piece of beige fabric and a section of white cross-stitch fabric

    Floss cards are a classic idea that’s earned its reputation. Systems like the Loran Master Cards have kept stitchers organized for decades. Each card holds fifteen colors and keeps threads tidy and ready to pull.

    You can get our printable DMC Floss Organizer Cards that are based on the same concept, only you can print them at home, and they have the full DMC printable color swatches and names. It’s the same beloved system, just more affordable, easy to get, complete, and easy to replace if you ever spill tea on one (ask me how I know).

    my embroidery floss organization system
    Our Lost In Cross Stitch Embroidery Floss Organization system

    Why people love them:

    • Full visibility — see every color instantly.
    • Ready-to-pull strands — no rewinding needed.
    • Works as one neat “thread book” when bound with rings or ribbon.

    What can go wrong:

    • Cutting, laminating, and punching takes a bit of setup time. But do once, use for years.
    • Once loaded, your binder gets heavy (but oh so satisfying to flip through).

    For most long-time stitchers, this system strikes the right balance — compact, practical, and endlessly reusable.

    If you’d like to make your own, here’s the full guide to printing, laminating, and assembling the DMC Floss Organizer Cards.

    Tangled embroidery floss next to DMC floss neatly stored on printable organizer cards

    Want a card system without making your own?

    Our printable DMC floss organizer cards hold all 500+ shades. Wind each skein once, then pull a single strand whenever you need it, with no tangles and no rewinding bobbins. Print them at home, trim and punch.

    6. Project Cards and Travel Kits

    Printable project organiser card with floss threaded through it

    For anyone who stitches on the go, project cards are the unsung heroes. LoRan has project cards, and we have a few options.

    Add your floss numbers to your project card, move the colors you need from your main set, add pop them in a project bag. You’re ready for commuting, coffee shop stitching, or holiday projects. Or just for the multiple WIPs we all have :)

    Why people love them:

    • Keeps current projects separate and tidy.
    • Prevents carrying your whole stash.
    • Perfect for multi-project stitchers.

    What can go wrong:

    • Easy to forget which project a card belongs to.
    • Colors can drift out of your main set if not returned.

    A small system that works best alongside your main organizer.

    So… Which One Actually Works?

    It depends on how you stitch, but here’s what I’ve learned: the less often you organize your floss, the more time you spend stitching.

    If you’re only working on a few projects, bobbins or bags might do fine. But once your stash grows, or you’re aiming for a full DMC set, you’ll want an affordable embroidery floss storage system that scales easily and saves time. Whether that’s bobbins, bags or cards, it depends what you like.

    Some stitchers mix systems, keeping duplicates on bobbins and their everyday colors on cards. If that rhythm works for you, wonderful. For me, less handling means smoother stitching, so use whatever system makes that possible.

    That’s why I made my own DIY floss organizer cards. They bring together everything I love about the classic Loran system and add the freedom to print, replace, or expand anytime.

    No winding. No tangles. No orphan thread nest at the bottom of a box.

    Quick Takeaway

    The best embroidery floss storage system is the one that reduces handling and keeps threads visible, tidy, and ready to stitch. Printable DMC Floss Organizer Cards offer an affordable, flexible way to keep your collection in order so you can spend more time stitching (which is what we’re here for) than managing your floss.

    FAQs About Floss Storage

    What’s the best embroidery floss storage system?
    The one that minimizes handling and prevents tangles. Many stitchers use printable or card-based systems like the DMC Floss Organizer Cards because they’re compact and affordable.

    How can I make a DIY floss organizer?
    You can print DMC floss organizer cards at home on cardstock or sticker paper, laminate them, and bind them with rings or ribbon. It’s a simple DIY system that lasts for years.

    Are card systems better than bobbins?
    They’re gentler on the floss and save time, plus no winding, no kinks, and far less double handling.

    Can I combine different storage methods?
    Absolutely. Many stitchers keep a master set on cards and use bobbins or rings for project duplicates or travel kits.

    Next Up

    If you’re planning to complete your DMC collection, find out what it really costs — and where you can save.
    Read: What It Really Costs to Build Your Own Full DMC Floss Set

  • How to Organize Embroidery Floss in 3 Steps

    How to Organize Embroidery Floss in 3 Steps

    Learning how to organize embroidery floss is a must, so you have more time to stitch. This post shares 3 steps: sort, store, and maintain your stash using ready-to-use lengths.

    New to floss organization? This is the quick, three-step way in. If you want every storage option and tracking system compared, the Complete Guide to Floss Organization is your next step.

    Step 1: Sort Your Floss

    A little upfront sorting goes a long way. By organizing your floss, by color family or by DMC number, you’ll make every project start smoother. No more frantic searching for the right shade of blue or rummaging around for your favorite variegated skein.

    Instead, you’ll find your floss colour immediately and have more time to stitch.

    How to Sort Floss

    Unsorted DMC embroidery floss skeins in a tangled pile, representing a stash before embroidery floss organization.
    1. Gather Everything in One Spot
      Bring all your floss together—any brand, style, or leftover bits from past projects.
    2. Choose Color vs. Number
      • By Number: if your brain works this way, numbers are easy to find.
      • By Color Family: Great if you’re a visual person who prefers to see all your greens, blues, and reds grouped together.
      • Either way, a printable DMC chart (or a reliable digital reference) will help you match numbers and shades.
    3. Don’t Forget Specialty Threads
      Metallic, variegated, glow-in-the-dark—whatever special floss you have, handle them the same way. They can stay in the same organizational method so long as you label them clearly.
    4. Meet the DMC Printable Floss Organizer Cards. They’re already labelled with number, name and color swatch so you know exactly which shade you’re holding. Pick number order or colour order, depending on how you look for your floss.

      With ready-to-use lengths, you pull one thread at a time. No leftover bits to deal with, no half-used skeins getting lost at the bottom of your storage bin, just neat, stress-free stitching.

    Step 2: Store Your Floss

    When it comes to storing your collection, you have options:

    • Plastic Bins: Cheap, stackable, but you may need dividers or bobbins.
    • Bobbins or Floss Bags: Keep your floss contained, but can be time-consuming to wind.
    • Drawer Systems: Perfect if you have the space for a crafting desk or corner.
    • Cards and floss books: our DMC floss storage organization system is our preferred way to store floss, so yes, we’re biased.

    More details on each of these systems in the Complete Guide to Floss Organization.

    how to organize embroidery floss with a bobbin system

    Step 3: Maintain Your Stash

    Keep your floss safe from dust and moisture by storing your system in a cool, dry place. Avoid direct sunlight to prevent fading, especially if you display your floss in a see-through container.

    Make Regular Updates

    After finishing a cross stitch piece, take a moment to put everything back where it belongs. By returning each color to its labeled spot, you’ll prevent future chaos and keep your creative flow going for the next project.

    Track Your Inventory

    • Printable Planners: Jot down which shades are running low so you won’t accidentally run out mid-project.
    • Digital Spreadsheets or Apps: If you prefer tech-based solutions, track your numbers on your phone or computer.

    By sorting, storing, and maintaining your floss collection, you’ll have more time for stitching, and get more of that quiet satisfaction that arrives when you trim that final thread. No more rummaging through a jumbled floss box, no more tangled heaps of leftover strands because you’re the boss of your floss!

    Quick Takeaway

    A tidy floss stash makes every project faster and more fun. Sort, store, and maintain your collection so you can get lost in cross stitch more often.

    FAQs About How to Organize Embroidery Floss

    1. What’s the best way to start organizing embroidery floss?
      Gather every skein, sort by colour or number )here’s how to decide which order suits you), and label them. Starting small beats perfect planning.
    2. How do I avoid floss getting tangled or knotted in storage?
      Use ready-to-use lengths or wind threads onto cards or bobbins to keep them smooth and knot-free.
    3. Are the DMC Printable Floss Organizer Cards worth using?
      They’re clearly labeled with a colour swatch and the floss number, help prevent tangles, and save space.
    4. Should I organize my floss by color, project, or number?
      It depends on personal preference; color is more visual, while number-based organization makes matching chart references easy.
    5. How often should I reorganize my floss stash?
      A quick tidy after each project is enough, though if you’re like most of us, you’ll have multiple WIPs :)
    6. How do I handle partial or leftover floss if I’m not using ready-to-use lengths yet?
      These thread orphans can get into a mess really fast. The best way is to be disciplined – wind them back onto the bobbin or put back into their bag right away. Otherwise it’s difficult to keep track of the exact colours. The DMC Organizer cards mean you’re never dealing with orphans because you pull only the strand/s you need.
    7. What’s the best system for small spaces?
      Binder rings, plastic sleeves, or a compact thread book fit neatly in drawers or project bags..

    That’s it! With these three steps, you’ll transform your floss stash into a well-organized treasure trove that you’ll use for years. Spend less time untangling and more time getting lost in cross stitch.

Browse by topic