Category: Floss Organization

Embroidery floss organization that works: storage ideas, DMC trackers, floss cards and ways to kit up each project so nothing gets lost between sessions.

  • How to Assemble our DMC Floss Organizer Cards

    How to Assemble our DMC Floss Organizer Cards

    Thanks for purchasing our DMC Floss Organizer Cards! This guide walks you through how to print, laminate, and assemble your set for a sturdy, professional finish.

    Just looking, not bought yet? This page is the assembly guide for cards you already own.

    New to the idea? See what the floss cards are all about →.

    Already know you want them? Get them in our shop →.

    Our Floss Organizer Cards offer a fantastic way to keep your threads beautifully organized and make sure you have minimal ORTs!

    This guide will walk you through the process of creating these cards, whether you’re printing directly onto cardstock or using sticker paper, plus tips on laminating for durability.

    What You Need

    • Our DMC Cross Stitch Floss Organizer Cards
    • Printer – either for thick paper or one that can print on 220gsm (about 60 lb cover weight) cardstock – most home printers can handle this weight easily
    • Cardstock – 220gsm (60 pound) or whatever your printer can use. Thicker card is often expensive so follow our directions for a ‘sandwich’ to make your cards sturdy.
    • Sticker paper (optional but recommended if you’re printing on light weight card so you end up with a thicker card in the end)
    • Laminating sheets (optional but recommended)
    • Scissors/craft knife/paper trimmer
    • 10mm (approximately 3/8 inch) hole punch

    Step 1: Choose Your Printing Method

    Decide whether you want to print directly onto cardstock or print onto sticker paper. The choice might depend on your printer’s capabilities and the final look you prefer:

    • Directly on Cardstock: Provides a sturdy base for your cards.
    • Sticker Paper: Offers a smoother finish; print on sticker paper and fix it to cardstock for added sturdiness.

      Note that if you use glossy sticker paper and an ink printer, you’ll need to leave more drying time. We recommend non-glossy but if you already have glossy, just leave it to dry longer before the next step. This way you reduce the risk of any smudging and potential discolouring of your floss.

    Step 2: Print Your Floss Organizer Cards                         

    Print DMC floss organiser card
    Print DMC floss organiser card – on card or sticker paper

    Load your printer with your chosen paper or card and print the pages.

    Make sure the print settings are adjusted to the highest quality for clear, vibrant images of the floss colors.

    Step 2a: Make A Card ‘Sandwich’ (Optional)

    Sticker paper for DMC Thread Organizer cards
    Sticker paper for DMC Thread Organizer cards

    If you’ve printed on sticker paper, stick the paper to a sheet of card. Remember to leave it to dry so that you reduce the risk of ink smudging onto your floss. If you choose to laminate, this risk is eliminated (we’ve never had ink transfer to floss, because we laminate).

    If you use a colour laser printer, the toner can also transfer to your floss over time. We always laminate.

    Looking for more about floss organization?

    Step 3: Laminating for Longevity (Optional but Recommended)

    Laminate DMC Floss Cards

    Before cutting out your cards, consider laminating them. This step is especially useful because it:

    • shields your cards from dust and fraying edges
    • makes the cards sturdier and less likely to stick together or tear
    • reduces the risk of any ink transferring onto your floss
    • increases the lifespan of your cards significantly. My first set of homemade floss cards cards lasted 30 years without lamination but they were very ragged by the time I replaced them!

    We suggest laminating before cutting – the laminate-only edge can get raggy, much more so than a cut laminated edge, which is firmer.

    Step 4: Cut and Trim Your Floss Organizer Cards

    Trim DMC floss organizer cards
    Trim DMC floss organizer cards

    After printing (and optionally laminating), use scissors or another cutting tool to cut out your cards according to the guidelines provided on the prints.

    Step 5: Punch Holes

    Punch holes in your laminated DMC floss organizer cards
    Punch holes in your laminated DMC floss organizer cards

    Using a 10mm (3/8″) hole punch, punch holes where marked on the card:

    • first, next to the color number, name, and color swatch.
    • second, along the opposite edge – 3 holes so you can thread rings or ribbon through to bind all the cards together.

    Step 6: Organize Floss Cards and Bind Them

    MY DMC Floss Book Floss Organiser Cards is bound with ribbon
    MY DMC Floss Book is bound with ribbon though shower curtain rings or keyrings work very well.

    Arrange your cards from page 1 to 12 (the number-order and colour-order sets both have 12 pages), and bind them together using a ribbon, elastic, key rings, shower curtain rings, a ring binder – the choice is yours!

    Having the cards bound together this way means you can flip through your floss collection easily, like turning the pages of a gorgeous book. It also keeps your threads neatly organized.

    With these easy-to-follow steps, you’ll have a professional-looking set of floss organizer cards that make it easier to manage your floss, find any colour when you need it, and get lost in cross stitch faster!

    Show off your finished organizer!

    Tag us on Instagram @lostincrossstitch so we can see your setup — we love seeing how you make it your own.

    If you’re looking for a handy way to keep track of your floss stash, our pocket-size DMC Floss Inventory Mini Book could be just what you need.

  • Floss Organizer Cards for DMC (a tangle-free floss organizer system)

    Floss Organizer Cards for DMC (a tangle-free floss organizer system)

    If you’re overwhelmed by your floss collection, these printable floss organizer cards make it easier to find colours fast and spend more time stitching.

    • Pull one strand at a time (without the skein turning into a mess)
    • No bobbin kinks, keeps floss smoother
    • Easy to keep sorted by DMC number
    • Stores neatly as a compact “thread book” on rings or in a binder
    • Great for full collections and project sets (WIPs)

    Get the flossbook style DMC Floss Organizer Cards, it’s kept my threads in line for over 30 years!

    New here and just want to know what a floss organizer card actually is? It’s a card printed with the DMC colour, number and a swatch. You attach your floss to the numbered slot on the card so your whole collection sits in number order (or in shade order, if you go for the colour-order set). Bound together on a ring or ribbon, the set becomes a “flossbook” you can flip through like the pages of a book.

    That’s the short version. The longer version (how I worked it out from a cereal box thirty years ago and never looked back) is below.

    The Beginning

    It all started when I spotted commercial thread cards at Lincraft about 30 years ago! I’d go there every payday to pick up just a few more skeins of floss, so you can imagine that the cards were out of my budget!

    I was working on stitching up my little girl’s name, and the threads were getting out of control!

    Tiny perfect little cross stitches on linen
    Tiny perfect little cross stitches on linen – part of my little girl’s name

    So I decided to make my own floss cards from a cereal box. It worked a treat!

    I loved being able to pull out a single strand of any colour, no more pulling floss out of the skein and cutting it, pulling two strands and tucking the other strands back into the skein somehow. I was pretty broke remember, so I didn’t want to waste a single strand!

    DMC floss organizer cards vs bobbins

    When visiting my mum in Brisbane (we were living in Rockhampton at the time), I saw her using bobbins. I considered them of course – but then I saw the knot of loose threads in her bobbin box and how the floss kinked. Any temptation I had to switch to bobbins quickly left me, and I’ve never considered them since.

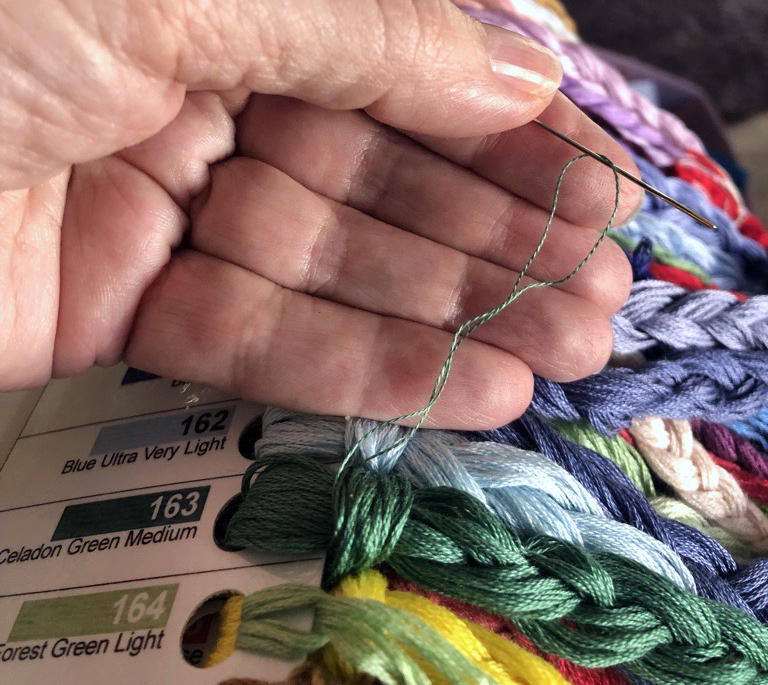
    (When I was making this new floss organizer card set, Mum decided to pass on on her bobbin boxes to me and I filled up some gaps in my set – I unbobbined and carded them! The floss cards make such kinks – see the pic below. Luckily they seemed to improve when I braided the floss.)

    DMC floss organizer cards floss
    Card or bobbin for your embroidery floss

    But of course by this time I was hooked on (dare I say Lost In) cross stitch, so my thread collection kept building. I bought a huge sheet of card from the stationers – probably about 250gsm weight – measured out cards, cut them out with a craft knife, punched holes with a standard hole punch. I got as many cards as I could from that sheet and they were long! So I sewed up a bag to keep them – that was my first floss book!

    For a project, I’d simply make a small project card and transfer the colours to the card, then move them back into my floss book when the project was done.

    When I had more than one WIP (who doesn’t), if I needed to I’d split the braid – the work of a minute.

    You’ll see these card collections called all sorts of thingsm like floss cards, thread cards, floss organizer cards, a flossbook – but they’re all the same idea: your threads, wound and sorted, easy to see and easy to use.

    if you’re looking for more on floss organisation, this post might help.

    Why It’s Called a Flossbook

    Once the cards are bound together, the whole thing flips open like a little book: a flossbook. Every colour on its own page, in order, a printed swatch to check against, and the working length ready to pull.

    It’s the difference between hunting through a tangled box and just… turning to the page you need.

    Why make printable floss organizer cards?

    When DMC released 35 new colours in 2017, starting at colour #1, I thought – I’ll just make a new card.

    That made me take an honest look at my old faithful set. It was frankly, tatty. I’d redone the set a few times as my stash grew (see the stickers?), and it was very well worn, despite being protected in its calico case all those years.

    Old Floss Cards
    Sandy’s first floss cards

    I thought about cutting up a new sheet of card but the idea just didn’t appeal – I wanted something more, something that would make it less likely I’d mix up colours when moving from a project card back into the main floss book, something a bit easier to manage. Those long cards were a bit unwieldy!

    Ideally it would be a colour card and storage card in one! No such thing existed – believe me, I looked!

    But I’d worked in communications for over 30 years so have reasonable design skills. Why not make cards that I could print? I designed them to fit on standard paper, and did a few trial runs. Kirsty was fully on board so she scanned the DMC thread card and added the colour swatches to the cards.

    Printable DMC floss organizer cards loaded with rainbow floss

    The cards from this post, ready to print

    These are the same cards we use for our own stash: a printable set covering every DMC shade, ready to print, trim and punch at home. They come in number order, or grab the colour-order set if you’d rather sort by shade.

    Next: Make Them Last

    My first set of cards did pretty well for 30 years. But we could do better now – technology, right? My printer doesn’t cope well with more than about 220gsm (60 pound) paper, so I thought of making a kind of paper sandwich to make the final card thicker. I printed onto sticker paper, stuck that to the card, and then we laminated it.

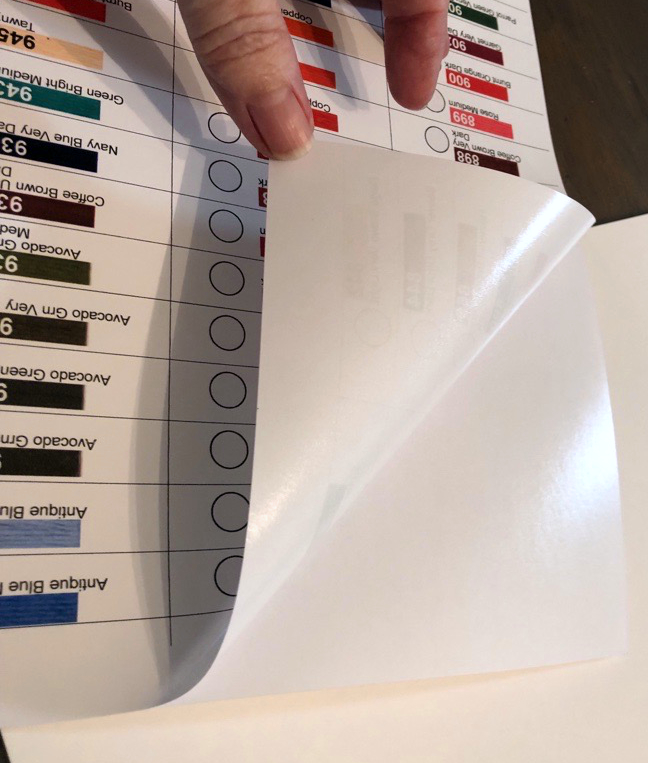
    Peeling the backing off sticker paper printed with floss cards

    It was perfect! Thin enough so it’s not bulky, firm enough so it holds its own weight when fully loaded, and bright!

    Thickness of a printed floss card held between fingers

    Then Into Trimming and Punching

    Yes, it takes some time, but so does bobbinating, and then cutting thread off the bobbins every time you use them, and dealing with the orphans if you don’t use all six strands.

    We sat and chatted while we laminated, trimmed and punched – several cups of tea were had!

    Punch holes in your laminated DMC floss organizer cards

     My DMC Thread Book

    Today, my floss organizer cards are neatly organized into what I like to call a ‘thread book,’ held together with 3 plastic  shower curtain rings so it’s easy to flip the cards, just like the pages of a book.

    What I mostly love about it is that there’s just so much less waste with floss organizer cards! Every time I pull that single thread off a card, I feel it’s like a gift from my past self!

    DMC floss organizer cards floss

    Get our floss organizer card system in our shop. It’s compact, even when full, and it’s received rave reviews for its efficiency.

    No more kinks in the floss like you get with bobbins, no more  floss orphans, and no more tangled messes.

    DMC floss organizer cards floss
    MY DMC Floss Book is bound with ribbon
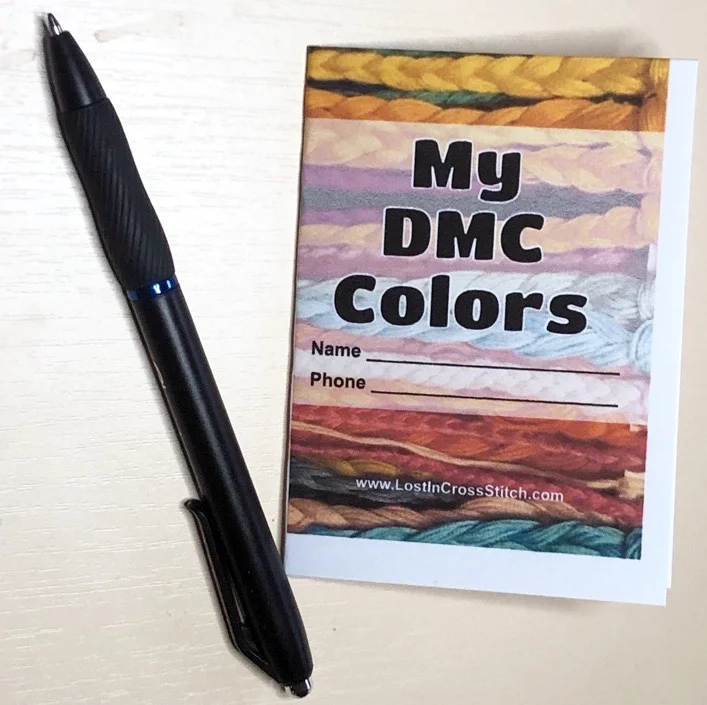
    final bw mini book

    Stop Buying Duplicate DMC Floss

    This printable mini-book is a pocket-sized DMC inventory you can carry in your project bag. Mark what you own and what you still need, then check it at a glance in the shop, no more scrolling through notes on your phone. Trusted by hundreds of stitchers (and counting!) Instant download, print as many copies as you like.

    The Future

    I’m pretty set with how our floss organizer cards work now, but I’m always thinking of little extras.

    Next up? A custom bag to store them stylishly, and maybe even a pattern for it (if others are interested).

    Creating your own DMC Floss Organizer Cards isn’t just about neat threads, it’s about making it faster to get stitching so that you have more time for stitching!

    I’d love to hear about your organizational hacks or see the creative ways you’ve kept your threads in order.

    What is a floss organizer?

    A floss organizer is any system that keeps your embroidery floss sorted and easy to use, for example cards, bobbins, boxes, binder pages, or thread drops. The best floss organizer is the one that helps you find colours quickly and stops your floss turning into a tangled mess.

    Are floss organizer cards better than bobbins?

    It depends on what bugs you most. Bobbins are great for compact storage, but they can kink floss and it’s easy for ends to loosen. Floss organizer cards keep the floss in longer lengths, which many stitchers find quicker to use and kinder on the thread, especially if you like pulling one strand at a time.

    Do floss organizer cards stop tangles?

    They help a lot. A floss organizer card keeps each colour wrapped neatly, with the end secured, so it doesn’t unwind and knot itself up in storage.

    Can I pull one strand at a time from floss organizer cards?

    Yes, and that’s one of the main reasons people love them. If the card is wrapped neatly and the end is easy to find, you can pull off a single strand without unraveling the whole lot.

    What’s a good floss organizer for a large DMC collection?

    Number order works best for many stitchers, though colour order has a strong camp too. Cards stored on rings or in a binder are popular because you can flip through and see colours quickly.

    What paper/card should I use for printable floss organizer cards?

    A thicker card stock holds up better. If you want them to last, laminating helps a lot (especially if you stitch in humid areas or your cards get handled constantly). Some stitchers also punch holes and reinforce them (or laminate before punching).

  • Printable DMC floss inventory tracker mini book (photo instructions)

    Printable DMC floss inventory tracker mini book (photo instructions)

    Ever stumbled on a fantastic floss sale but couldn’t remember which colors you already had? You grab a few skeins, head home, and – surprise! You already own them.

    Bought the mini-book? You’re in the right place. Follow the photo steps below.

    My mum passed on her wonderfully large collection of floss to me and had to combine two collections. I say that’s why I have five skeins of 310 (though you can never really have too much 310, right?) but with over 500 colours in the DMC vault, no one can remember where the gaps are in your own collection.

    That’s why we created the DMC Floss Inventory Mini Book. It’s a one-page printable that folds into a pocket-sized booklet, so you can check your stash at home or in-store without guessing.

    The mini book now comes in number order or colour order, depending on how your brain sorts.

    Why You Need Our Floss Inventory Mini Book

    DMC Thread Inventory tracker printable single page
    • Take it shopping: slips into a purse, project bag, or pocket.
    • Stop duplicate buys: tick what you have, or write how many skeins you own.
    • Plan projects faster: quick check before you start a new pattern.
    • Easy to maintain: it’s printable, so you can reprint any time.

    DMC Floss Inventory – our Mini Book is available to download and print now.

    Creating Your Own Floss Inventory Mini Book

    What You’ll Need

    • DMC Floss Inventory Mini Book Printable: Get it in A4 or US Letter size.
    • A printer – or print at your local copy shop
    • Scissors or a craft knife
    • Optional: glue or double-sided tape for a sturdier cover.

    Step-by-Step Assembly

    Step 1: Print Your Mini Book

    Print on a standard US Letter (8.5″ x 11″) or A4 (210mm x 297mm) sheet of paper.

    Choose lighter paper rather than cardstock to it’s easier to fold.

    DIY DMC Floss Inventory Mini Book

    Begin by printing the DMC floss color chart on high-quality paper. This ensures the colors are vibrant and the book lasts longer.

    Step 2: First Fold

    Fold the page in half lengthwise (long edge to long edge).

    Crease firmly, then unfold.

    Printed DMC mini book sheet folded in half

    Step 3: Second Fold

    Fold the paper in half widthwise (short edge to short edge).

    Crease thoroughly and then unfold.

    Step 4: Cutting Time

    While the page is still folded widthwise, make one cut along the dotted line.

    Start at the folded edge. Cut to the midpoint, then stop.

    Cutting along the centre fold of the mini book sheet with scissors

    Step 5: Open it flat

    Fully open the paper, which now has a slit in the middle from your cut.

    Mini book sheet folded into panels

    Step 6: Final folds

    Fold the page in half lengthwise again (long edge to long edge).

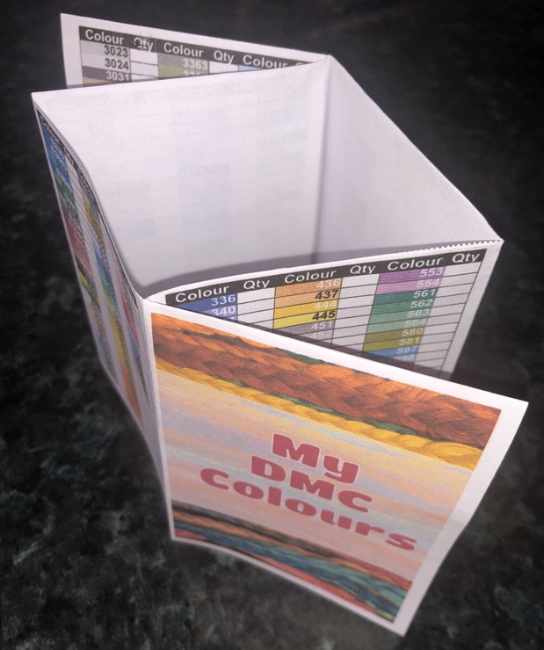
    Hold both ends and push the ends toward each other so the slit opens and the pages pop into a booklet shape.

    Mini book sheet pushed into a cross shape while folding

    Flatten it into pages.

    Step 7: Finish Your Mini Book

    Press the folds firmly, especially the spine edge, so it stays book-shaped and flips easily.

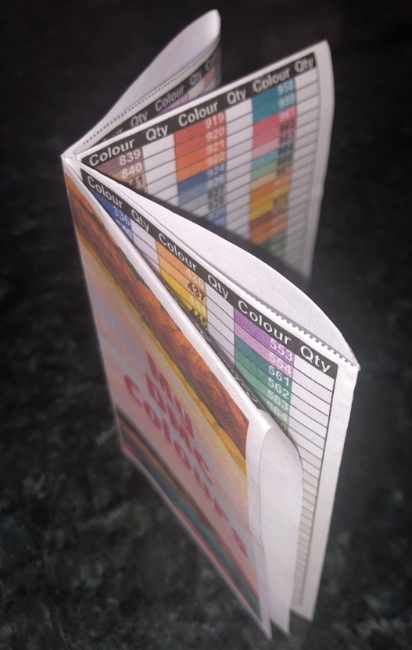
    Finished DMC mini book folded and standing upright

    Optional

    For a sturdier feel, you can glue the two cover pages together (and also the centre spread if you want).

    Let it dry under a book so it stays flat. (I have only thought about doing this, haven’t actually done it!)

    Step 8: Use Your Mini Book

    Mark the number of each color you own next to each color number (or just tick those you have). Writing the number of each is a great way to make sure you don’t over-buy, and that you buy enough for every project.

    Quick note: the printed colour blocks are a handy visual guide, but printers vary. The DMC numbers are what matters.

    If you want a simple at-home way to store and organise your floss too, take a look at the floss organising system I’ve been using for 30+ years.

    We hope this helps you get lost in cross stitch a lot more often!


    FAQ

    Can I print this on A4 and US Letter?

    Yes. Print on A4 (210mm x 297mm) or US Letter (8.5″ x 11″).

    What print settings should I use?

    Use Actual size / 100% (not “Fit to page”). Print single-sided in portrait.

    Should I use paper or cardstock?

    Use paper for the easiest folding. Cardstock can be harder to fold cleanly and may crack on the creases.

    If you want it sturdier, keep paper and glue the cover pages together after folding.

    The colours look different to my floss, is that normal?

    Yes. Printer ink and paper vary a lot. Use the DMC numbers as the accurate reference, and treat the colour blocks as a quick visual guide.

    It won’t pop into a booklet, what did I do wrong?

    Usually the cut did not reach the midpoint. Refold widthwise and extend the cut slightly, stopping at the centre.

    My pages look uneven. How do I fix it?

    Sharpen the creases, then flatten the booklet and press the spine firmly again. A ruler or bone folder helps, but your fingernail works too.

    Can I reprint it later?

    Yes. Reprint any time you want a fresh copy or you want to start again.

Browse by topic