

Learning how to organize embroidery floss is a must, so you have more time to stitch. This post shares 3 steps: sort, store, and maintain your stash using ready-to-use lengths.
New to floss organization? This is the quick, three-step way in. If you want every storage option and tracking system compared, the Complete Guide to Floss Organization is your next step.
Step 1: Sort Your Floss
A little upfront sorting goes a long way. By organizing your floss, by color family or by DMC number, you’ll make every project start smoother. No more frantic searching for the right shade of blue or rummaging around for your favorite variegated skein.
Instead, you’ll find your floss colour immediately and have more time to stitch.
How to Sort Floss
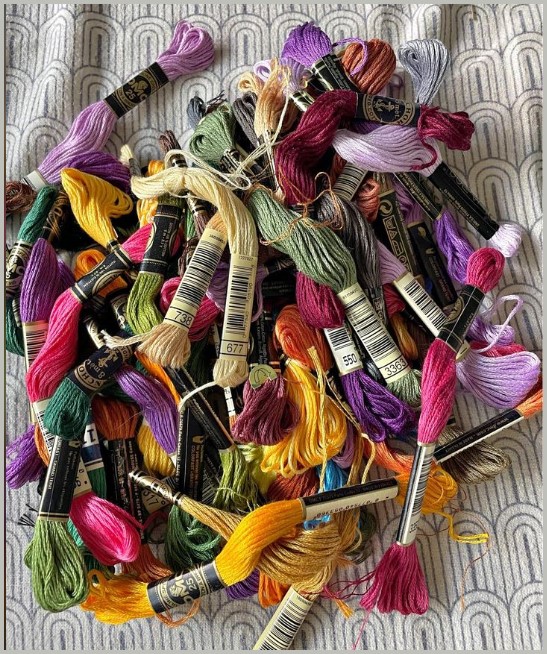
- Gather Everything in One Spot
Bring all your floss together—any brand, style, or leftover bits from past projects. - Choose Color vs. Number
- By Number: if your brain works this way, numbers are easy to find.
- By Color Family: Great if you’re a visual person who prefers to see all your greens, blues, and reds grouped together.
- Either way, a printable DMC chart (or a reliable digital reference) will help you match numbers and shades.
- Don’t Forget Specialty Threads
Metallic, variegated, glow-in-the-dark—whatever special floss you have, handle them the same way. They can stay in the same organizational method so long as you label them clearly. - Meet the DMC Printable Floss Organizer Cards. They’re already labelled with number, name and color swatch so you know exactly which shade you’re holding. Pick number order or colour order, depending on how you look for your floss.
With ready-to-use lengths, you pull one thread at a time. No leftover bits to deal with, no half-used skeins getting lost at the bottom of your storage bin, just neat, stress-free stitching.
Step 2: Store Your Floss
When it comes to storing your collection, you have options:
- Plastic Bins: Cheap, stackable, but you may need dividers or bobbins.
- Bobbins or Floss Bags: Keep your floss contained, but can be time-consuming to wind.
- Drawer Systems: Perfect if you have the space for a crafting desk or corner.
- Cards and floss books: our DMC floss storage organization system is our preferred way to store floss, so yes, we’re biased.
More details on each of these systems in the Complete Guide to Floss Organization.

Step 3: Maintain Your Stash
Keep your floss safe from dust and moisture by storing your system in a cool, dry place. Avoid direct sunlight to prevent fading, especially if you display your floss in a see-through container.
Make Regular Updates
After finishing a cross stitch piece, take a moment to put everything back where it belongs. By returning each color to its labeled spot, you’ll prevent future chaos and keep your creative flow going for the next project.
Track Your Inventory
- Printable Planners: Jot down which shades are running low so you won’t accidentally run out mid-project.
- Digital Spreadsheets or Apps: If you prefer tech-based solutions, track your numbers on your phone or computer.
By sorting, storing, and maintaining your floss collection, you’ll have more time for stitching, and get more of that quiet satisfaction that arrives when you trim that final thread. No more rummaging through a jumbled floss box, no more tangled heaps of leftover strands because you’re the boss of your floss!
Quick Takeaway
A tidy floss stash makes every project faster and more fun. Sort, store, and maintain your collection so you can get lost in cross stitch more often.
FAQs About How to Organize Embroidery Floss
- What’s the best way to start organizing embroidery floss?
Gather every skein, sort by colour or number )here’s how to decide which order suits you), and label them. Starting small beats perfect planning. - How do I avoid floss getting tangled or knotted in storage?
Use ready-to-use lengths or wind threads onto cards or bobbins to keep them smooth and knot-free. - Are the DMC Printable Floss Organizer Cards worth using?
They’re clearly labeled with a colour swatch and the floss number, help prevent tangles, and save space. - Should I organize my floss by color, project, or number?
It depends on personal preference; color is more visual, while number-based organization makes matching chart references easy. - How often should I reorganize my floss stash?
A quick tidy after each project is enough, though if you’re like most of us, you’ll have multiple WIPs :) - How do I handle partial or leftover floss if I’m not using ready-to-use lengths yet?
These thread orphans can get into a mess really fast. The best way is to be disciplined – wind them back onto the bobbin or put back into their bag right away. Otherwise it’s difficult to keep track of the exact colours. The DMC Organizer cards mean you’re never dealing with orphans because you pull only the strand/s you need. - What’s the best system for small spaces?
Binder rings, plastic sleeves, or a compact thread book fit neatly in drawers or project bags..
That’s it! With these three steps, you’ll transform your floss stash into a well-organized treasure trove that you’ll use for years. Spend less time untangling and more time getting lost in cross stitch.



Leave a Reply