

Ever stumbled on a fantastic floss sale but couldn’t remember which colors you already had? You grab a few skeins, head home, and – surprise! You already own them.
Bought the mini-book? You’re in the right place. Follow the photo steps below.
My mum passed on her wonderfully large collection of floss to me and had to combine two collections. I say that’s why I have five skeins of 310 (though you can never really have too much 310, right?) but with over 500 colours in the DMC vault, no one can remember where the gaps are in your own collection.
That’s why we created the DMC Floss Inventory Mini Book. It’s a one-page printable that folds into a pocket-sized booklet, so you can check your stash at home or in-store without guessing.
The mini book now comes in number order or colour order, depending on how your brain sorts.
Table of Contents
Why You Need Our Floss Inventory Mini Book

- Take it shopping: slips into a purse, project bag, or pocket.
- Stop duplicate buys: tick what you have, or write how many skeins you own.
- Plan projects faster: quick check before you start a new pattern.
- Easy to maintain: it’s printable, so you can reprint any time.
DMC Floss Inventory – our Mini Book is available to download and print now.
Creating Your Own Floss Inventory Mini Book
What You’ll Need
- DMC Floss Inventory Mini Book Printable: Get it in A4 or US Letter size.
- A printer – or print at your local copy shop
- Scissors or a craft knife
- Optional: glue or double-sided tape for a sturdier cover.
Step-by-Step Assembly
Step 1: Print Your Mini Book
Print on a standard US Letter (8.5″ x 11″) or A4 (210mm x 297mm) sheet of paper.
Choose lighter paper rather than cardstock to it’s easier to fold.

Begin by printing the DMC floss color chart on high-quality paper. This ensures the colors are vibrant and the book lasts longer.
Step 2: First Fold
Fold the page in half lengthwise (long edge to long edge).
Crease firmly, then unfold.

Step 3: Second Fold
Fold the paper in half widthwise (short edge to short edge).
Crease thoroughly and then unfold.
Step 4: Cutting Time
While the page is still folded widthwise, make one cut along the dotted line.
Start at the folded edge. Cut to the midpoint, then stop.

Step 5: Open it flat
Fully open the paper, which now has a slit in the middle from your cut.

Step 6: Final folds
Fold the page in half lengthwise again (long edge to long edge).
Hold both ends and push the ends toward each other so the slit opens and the pages pop into a booklet shape.
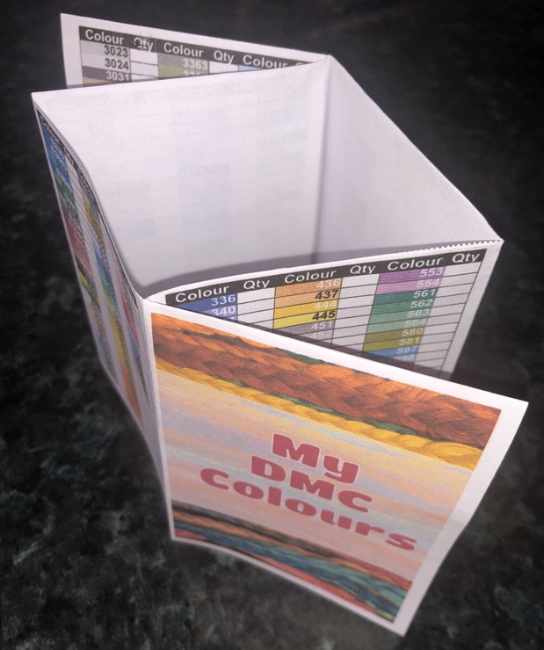
Flatten it into pages.
Step 7: Finish Your Mini Book
Press the folds firmly, especially the spine edge, so it stays book-shaped and flips easily.
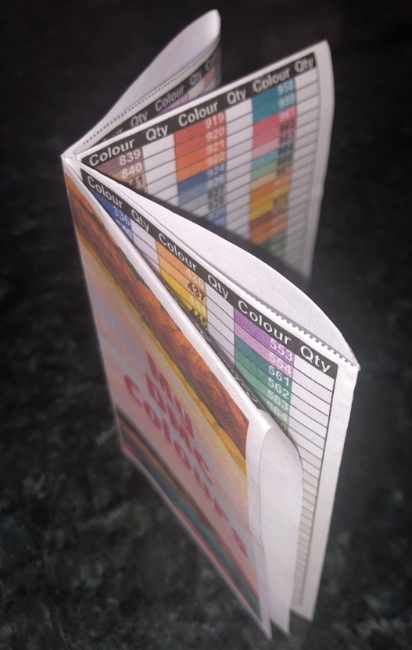
Optional
For a sturdier feel, you can glue the two cover pages together (and also the centre spread if you want).
Let it dry under a book so it stays flat. (I have only thought about doing this, haven’t actually done it!)
Step 8: Use Your Mini Book
Mark the number of each color you own next to each color number (or just tick those you have). Writing the number of each is a great way to make sure you don’t over-buy, and that you buy enough for every project.
Quick note: the printed colour blocks are a handy visual guide, but printers vary. The DMC numbers are what matters.
If you want a simple at-home way to store and organise your floss too, take a look at the floss organising system I’ve been using for 30+ years.
We hope this helps you get lost in cross stitch a lot more often!
FAQ
Can I print this on A4 and US Letter?
Yes. Print on A4 (210mm x 297mm) or US Letter (8.5″ x 11″).
What print settings should I use?
Use Actual size / 100% (not “Fit to page”). Print single-sided in portrait.
Should I use paper or cardstock?
Use paper for the easiest folding. Cardstock can be harder to fold cleanly and may crack on the creases.
If you want it sturdier, keep paper and glue the cover pages together after folding.
The colours look different to my floss, is that normal?
Yes. Printer ink and paper vary a lot. Use the DMC numbers as the accurate reference, and treat the colour blocks as a quick visual guide.
It won’t pop into a booklet, what did I do wrong?
Usually the cut did not reach the midpoint. Refold widthwise and extend the cut slightly, stopping at the centre.
My pages look uneven. How do I fix it?
Sharpen the creases, then flatten the booklet and press the spine firmly again. A ruler or bone folder helps, but your fingernail works too.
Can I reprint it later?
Yes. Reprint any time you want a fresh copy or you want to start again.



Leave a Reply