

Gridding cross stitch fabric has been around for a couple of decades at least, and once you try it, it’s hard to go back. This guide covers what gridding is, how to do it with thread or marker, our best tips for getting it right, the pros and cons, and the pre-gridded fabric options. All to make it easier to get lost in cross stitch ;)
What Is Gridding?
Gridding cross stitch fabric means stitching or drawing a grid onto your fabric that matches the 10×10 grid on your pattern, so you always know where you are.
That 10×10 grid is the same as the grid your chart already uses: the heavier lines. Those lines divide the pattern into smaller areas, so you can see quickly if you’re a couple of stitches out, and frog just those stitches instead of a whole section.
It’s like having a map while hiking in the woods; you know exactly where you are, so you can work out where to go next.
How I Started Gridding (I Thought I Was Cheating)
I started gridding one night about 25 years ago, working on a unicorn design stitched on linen I’d dyed black. (What was I thinking?) It was almost full-coverage before that was really a thing.
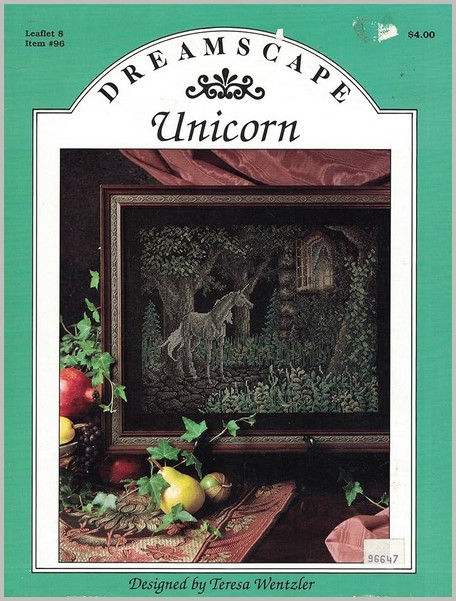
I kept getting lost. I’d frogged for the umpteenth time, and I’d even managed to stagger my crosses, half a stitch of overlap between rows. Good grief. It is easy to do on evenweaves like linen, I told myself :)
But I loved the design too much to give up on it. So, in those pre-YouTube days, I puzzled out that if I stitched the black lines from the pattern onto the fabric with bright pink thread, I could see where I was up to.
It worked. But honestly, it somehow felt like cheating. And, it made it possible to stitch in the actual correct spot! So I kept doing it, judging myself every time I did it.
Then about 15 years ago I discovered other stitchers were doing exactly the same thing. It was a thing! It had a name! That meant I stopped thinking of it as cheating and just kept gridding. The unicorn IS still in my WIP pile because it’s a beast, full of tweeding which is part of its subtle beauty, and makes me squint a lot. But, I pick away at it when I feel like I’ve got the brain space (maybe get it finished when I retire 😁).
Your Turn: Grid or No Grid?
Join our poll, it’s completely anonymous so no judgment! You’ll see how everyone else voted the moment you have.
Pros of Gridding Cross Stitch Fabric
Fewer counting errors
Which means less frogging and more actual stitching.
You always know where you are
The grid keeps track of your position more easily. A big pattern becomes a set of small squares, and small squares are less overwhelming. Plus, “just a few more stitches to finish this square” means the old ‘completed it’ dopamine hit, more often! (Not more late nights, honest!)
It saves time in the long run
Gridding IS time-consuming up front. But you spend far less time finding and fixing mistakes afterwards.
Cons of Gridding Cross Stitch Fabric
The time it takes to set up the grid
Especially on large projects. You need patience and precision before the fun part starts.
Marker and thread mishaps
The wrong marker can leave you with lines that won’t come out. And with thread, be careful not to split the gridding thread as you stitch, or it’ll be a pain to remove (but still removable – ask me how I know :)).
It can look busy
Some stitchers find a gridded fabric too cluttered to enjoy. If that’s you, pull out the grid threads as you complete each area.
How to Grid Cross Stitch Fabric
What You’ll Need
For marker gridding:
- A water-soluble fabric marker or a fine-tipped pen designed for fabrics
- A ruler or straight edge, plus the light and magnifier you prefer for stitching
For thread gridding:
- For light coloured fabric, a contrasting thread or fine fishing line, OR light-coloured thread for dark fabric
- Needle
- Snips
Choose Your Gridding Tool
There’s a few options here:
- Fabric marking pens (air, water, or heat soluble)
- Thread/floss
- Pencil
- Easy Count Guideline
- Metallic blending filament
- Water-soluble basting thread
- Pre- gridded fabric
Fabric marking pens – I’m also a sewist who has had bad experiences with water and heat soluble markers and pens, either not coming out completely or showing up again when the temp changes. It’s possible these markers have improved a lot since I last tried them, but for me, thread is the safer way to go.
Thread/floss – We thread grid, always. Sometimes it’s sewing thread, sometimes it’s floss, depends what’s closest.
Pencil – just don’t. You think you’ll be able to erase it but I’ve seen too many sad stories of work messed up by being unable to easily remove pencil. I’ve seen people scrub at the pencil marks with a toothbrush when normal washing failed. Just – don’t.
Easy Count Guideline red – a specialty thread made exactly for gridding: fine, red, slightly slippery so it pulls out easily, basically red fishing line for stitchers. Many stitchers use fishing line instead, much cheaper! I’ve never used the guideline red, but am keen to give fishing line a go.
Metallic blending filament – again, I’ve never used this but people who love it swear that it’s slippery to remove.
Water-soluble basting thread – this is a clever one! You grid with it, and when you wash the finished piece the grid dissolves. No removal step at all. It’s sold for machine embroidery/quilting and one reel will probably last for years. Again, haven’t tried it, I don’t always wash my work so that would be annoying for me.
Pre-gridded fabric. More about this below.
Prepare Your Fabric
Iron your fabric before gridding. Wrinkles can make for wobbly grid lines.
Pick a fabric and tool combination you can actually see: markers on lighter fabrics, light-coloured threads on dark fabric, or a darker thread on lighter fabric.
Mark the Grid
Start from the centre of your fabric, the same place you’d start stitching. Fold the fabric in half both ways to find the centre point. This process is the same, regardless of which method of marking you prefer. We’re showing a stitched grid. There are some extra tips for pen marking, below.
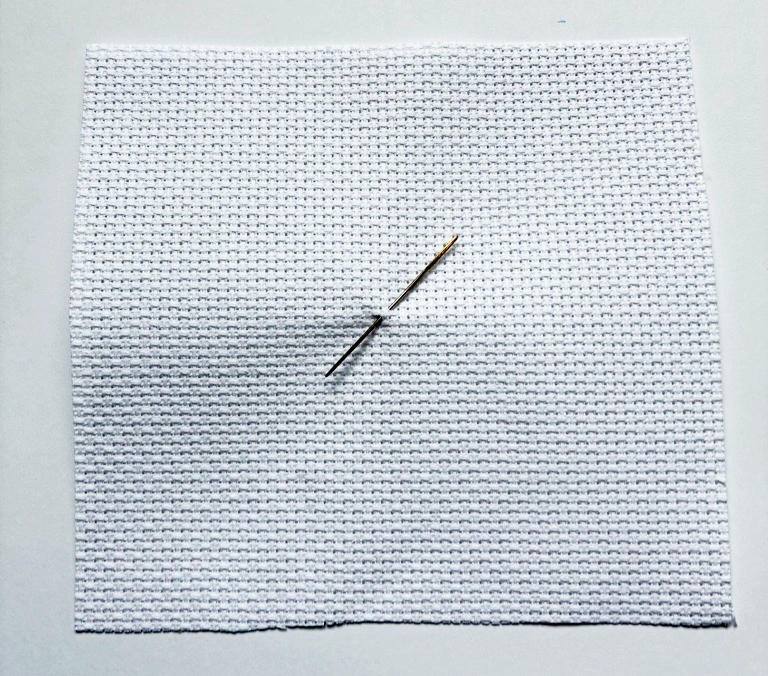
Thread your needle. Add a knot in the end, or secure in the way you prefer.
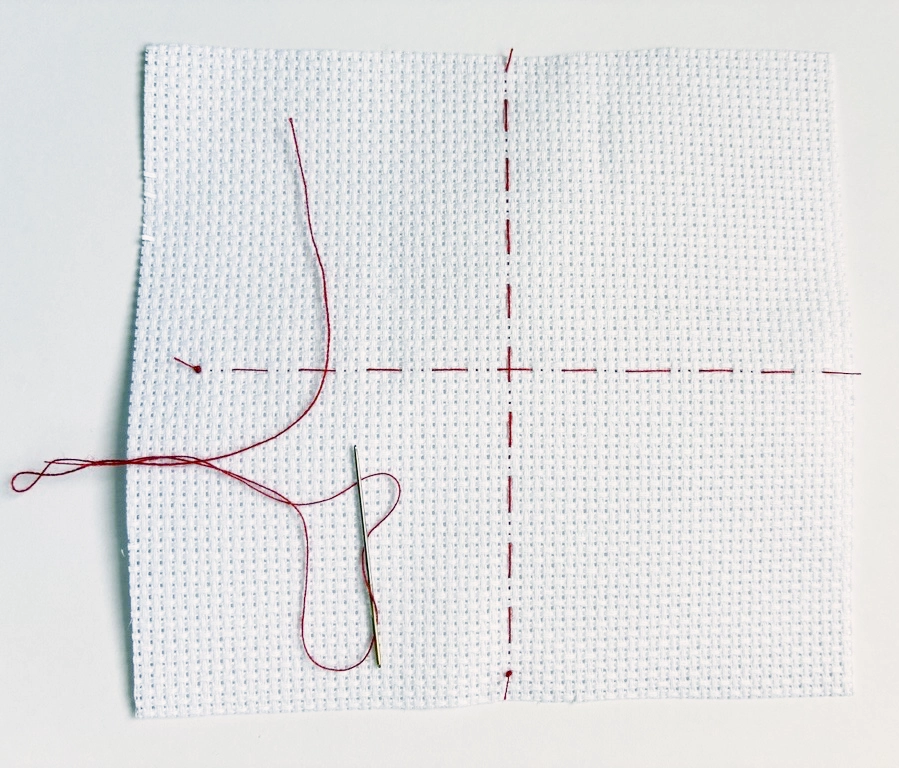
Stitch from one edge through the centre line. A useful stitch length is 2 to 3 squares, as you prefer. The stitch length needs to be long enough to be secure but not so short that it’s hard to remove. We’ve seen people do all kind of variations. You can experiment to what you prefer, or just do the 3-3 or 2-2 that we suggest.
When you have one vertical and one horizontal line of stitching (matching the centre lines of your chart) crossing at the centre, then count over 10 stitches, and run another line.
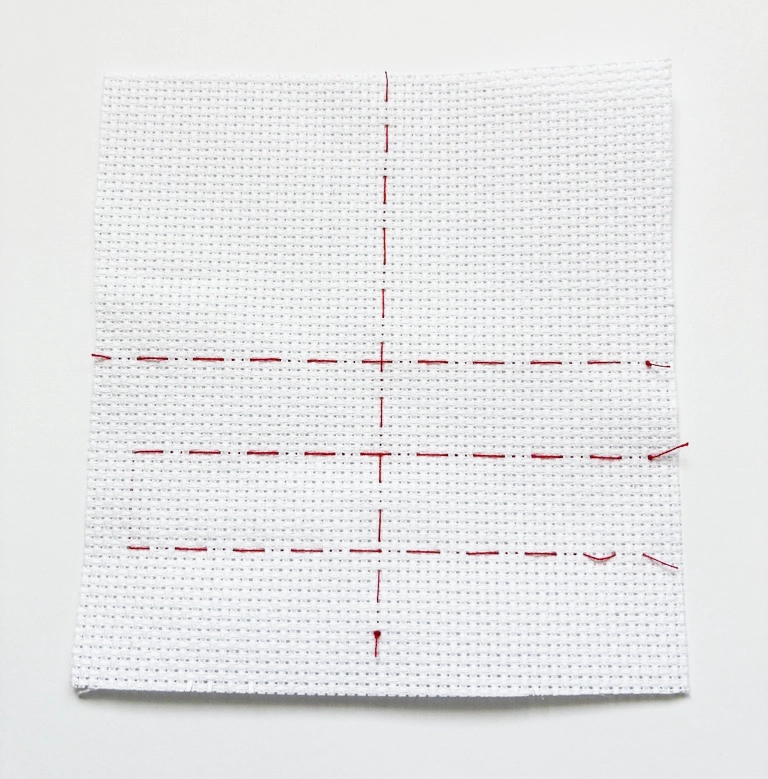
Keep going until your fabric is gridded the same size as your chart. Do check that you’re not gridding more than your design needs!
And, it’s helpful to check your count. Sometimes I doubt I can count to ten.
In summary, every heavy line on the pattern gets a matching line on the fabric. Your fabric becomes a life-size copy of the chart’s grid.
Some stitchers prefer to start from the top left corner instead. It works, but starting gridding from the centre is helpful. Your chart’s centre arrows give you a guaranteed reference point to build from.
Gridding with a marker
Always use a ruler. Measure twice before marking. Keep the pressure gentle so the lines are clear without soaking deep into the fabric.
You’re marking in the ‘ditch’ between the threads, the same as the lines on the pattern.
Do you have to grid the whole fabric before you start?
No. Some stitchers grid everything up front and get the tedious part over in one sitting; others grid a section ahead of where they’re stitching. Both work.
Removing the Grid When You’re Done
For markers and solubles, follow the manufacturer’s removal instructions.
For thread, snip at one end and gently pull the threads out, without pulling on your stitches. You might need to cut into some threads; do it from the back and the edges, and don’t cut anything in your design. Sometimes I need a needle to coax a thread out. If you didn’t split your gridding threads while stitching, they pull out easily.
I usually remove the grid as I go, pulling threads out as I finish each area.
Pre-Gridded Fabric: Skip the Work
Pre-gridded fabrics come with a faint grid already printed or woven in. Convenient, though a bit more spendy than standard fabric, and there’s less choice in colours and types.

It’s a good option for anyone who’d rather spend the prep time stitching.
Brands like Zweigart offer pre-gridded options in various counts and sizes. The printed gridlines are designed to wash out when you’re finished, and they do! Yes I’ve used it. The limit is the colour range – it’s limited to mostly white and ecru, and not everyone carries it. But it IS super convenient, if a bit spendy.
So, To Grid or Not to Grid?
Gridding makes it easier to work through a pattern, particularly a complex one. It costs a little time to thread grid, a bit of risk to pen grid, or more money for pre-gridded fabric. For us, the saved frogging wins every time.
We thread grid. Always.
And we’re not alone. As Sheri told us in the comments: “I grid fabric with thread. And I check my grid lines, vertical and horizontal. Many of my stitching friends used to tease me… now they are gridding too.”
FAQs
Does gridding affect the final appearance of the stitched piece?
No, if done correctly. Whether you use a washable marker or thread, it shouldn’t show in the finished piece after cleaning. We don’t use markers; we always thread grid.
Can I grid any type of fabric?
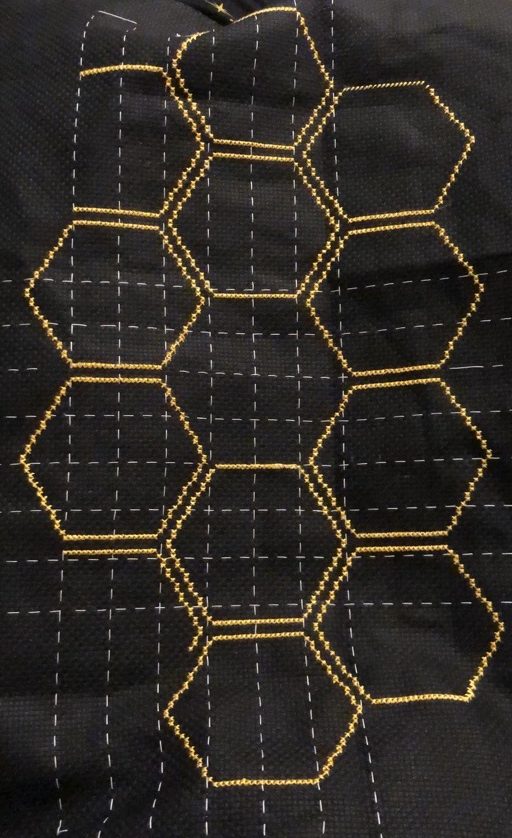
Yes, if it’s an evenweave fabric. For lighter coloured fabric, use a thread or fishing line darker than the fabric colour. For dark fabric, like my gridded black Aida above, I used white sewing thread.
What’s the best thread for gridding cross stitch?
A fine sewing thread in a colour that contrasts with your fabric works well and costs almost nothing. Fishing line is the other favourite, and it has one real advantage: your needle can’t pierce it the way it can split a thread, so it always pulls out cleanly at the end. But don’t delay gridding until you have fishing line, thread or floss is perfectly fine too.
How do I remove the grid lines after I’m done stitching?
For markers, follow the marker’s instructions. For thread, gently pull the threads out, snipping from the back and edges where needed. If you didn’t split the gridding threads while stitching, they pull out easily. If you did, you can still tease the thread out gently, really doesn’t take much time. If you disturb your crosses while you’re removing gridding thread, use your needle to gently poke the crosses back into place.
Where can I buy pre-gridded fabric?
Most craft stores and online retailers that specialise in cross stitch supplies.
If you’re reading the Beginner’s Guide, the next in the series is 9 Ways to Spot a Fake Pattern (AI Generated).
New to cross stitch? Our cross stitch for beginners guide brings all the basics together in one place.


Leave a Reply