

If you’ve made a cross stitch mistake, congratulations, you’re officially a cross-stitcher. Cross stitch has a special talent for making smart people say, “I swear I knew how to count before I started this.”
If you’re staring at your work thinking, What have I done? And what do I do now? know that most mistakes are fixable, plenty are hard to spot once you step back, and only a few are worth fixing because they affect the shape or the fabric.
This post will help you decide what to fix, what to leave, and what to do next, without turning your stitching session into a misery fest. Or deciding you’re not good at cross stitching and giving up!
What’s inside this post
The 10-Foot Rule
Before you reach for the seam ripper, try the 10-foot rule. Stand back from your work, about the distance someone would be if they were looking at it hanging on your wall.
Can you still see the mistake? If it disappears at a distance, it might not be worth the effort of frogging.
A lot of “disasters” disappear the moment you stop inspecting the stitches from six inches away under a bright light.
The fix-or-leave checklist
Ask yourself:
- Does it change the shape?
Think lettering, borders, faces, symmetry, outlines, and anything geometric. - Does it affect the fabric?
Puckering, rippling, cupping, or a lumpy surface that won’t lie flat. - Can you see it from arm’s length or 10 feet away rather than 6″ from your nose under bright light?
- Will it bother you every time you see the finished piece?
If you know it’ll bug you forever, fixing it can be worth it.
In general:
- If it changes the shape or the fabric, it’s usually worth fixing.
- If it’s small, hard to spot, and the project still looks right, it’s often fine to keep going.
- If you’re deep into the piece and ripping back would break your heart, it’s okay to decide it’s actually good enough, when the mistake isn’t doing real harm.

Fabric issues vs coverage worries (they’re different)
Sometimes people say “my stitching looks wrong” but they’re talking about two totally different things.
Fabric issues (tension problems)
These show up as:
- puckering or rippling
- a stitched area that “cups”
- fabric that won’t lie flat once it’s out of the hoop
Coverage worries (holes look bigger than expected)
This looks like:
- more fabric showing through than you expected
- the holes feeling obvious
- the stitching looking a bit thin when you’re very close
They have different fixes, so it helps to know which one you’re dealing with.
Common cross stitch mistakes (and why they’re easy to make)
If you’ve made one of these mistakes, it’s not because you’re careless. Cross stitch is a lot of tiny stitches and tiny decisions, and your brain will happily guess if you give it the chance.
When I was a young mum, cross stitch was a beautiful quiet hour after the kidlets were in bed, where I could relax and let my brain get quiet. But it also meant I was tired and mistakes are much more likely to happen when you’re tired. So if that’s you, it’s really okay to give yourself some grace, and remember that it’s only a mistake.
Most stitchers make one or more mistakes at some point, and plenty of us make a slightly different version of the same mistake on the next project too.
Being one stitch off
What it looks like: the motif shifts, a border doesn’t line up, lettering looks slightly wonky, a shape feels “off.”
Why it’s easy to make and miss: one skipped square can hide for ages, especially early in a project.
Quick fix: Stop and check whether it changes the shape or symmetry of the design. If it does, frog back to the last point you trust and correct it. If it’s in a busy area and you can’t spot it from arm’s-length distance, you may choose to keep going.
Misreading a symbol
What it looks like: the wrong stitch goes in the right place.
Why it’s easy: similar symbols, small charts, tired eyes, switching between screen and paper.
Quick fix: If it’s one small spot, do a local unpick and replace it. If you’ve repeated it across a larger area, step back and check whether it actually changes the finished look before you frog hours of work.
Using the wrong colour
What it looks like: an area is darker, brighter, warmer, or cooler than expected. (This is definitely a heart-stopping stomach-knotting moment!)
Why it’s easy: two floss shades look identical at night, bobbins get mixed, or you pick up the wrong needle (if you’re parking your needles).
Quick fix: Look at it in daylight from normal viewing distance. If it blends and you like it, you can keep it. If it jumps out, swap it now rather than spreading the color mistake further.
Go deeper: see Fixing mistakes → Local unpicking.
Stitching in the wrong place after moving your hoop (or working in sections)
What it looks like: you start a section one row too high, too low, or shifted sideways.
Why it’s easy: blank fabric gives you no landmarks.
Quick fix:
Sadly there’s not really a quick fix for this. I’ve done this more often than I’d like to admit. The solution is frogging, usually after a few (or many) moments to come to terms with it! Frog it while it’s still small.
Missing a stitch
What it looks like: a tiny gap, a slightly odd spot, one little stitch that should be there but isn’t.
Why it’s easy: confetti, distractions, losing your place, or stitching late at night.
Quick fix: If you can still clearly see the hole, add the stitch. If it’s buried in a busy area and you can’t see it from normal viewing distance, it might not matter.
I have a framed piece where I missed a stitch and didn’t notice until after it was finished and on the wall. For years, every time I looked at it, all I could see was that missing stitch. But – nobody else ever noticed. Or if they did, they never said a word. Over time it became genuinely funny to me that I’d been so anxious about it, because in the scheme of things it was one tiny stitch and it made no difference to the overall design.
If you’re staring at a missed stitch right now, it’s worth asking: will this matter a month from now, or is it loud because you’ve been staring at it up close?
Twisted stitches or inconsistent stitch direction
What it looks like: an area catches the light differently or looks slightly messier.
Why it’s easy: you stitch when you’re tired, you switch methods mid-piece, or the floss twists as you work (almost everyone does this).
Quick fix: Let the needle dangle now and then to untwist your floss. If a small patch looks noticeably messy in a solid block, you can redo just that patch. If it’s scattered through a mixed area, it often disappears once the piece is finished.
Tension issues (too tight, too loose, or inconsistent)
What it looks like: rippling, puckering, a lumpy texture, or fabric that won’t lie flat.
Why it’s easy: hoop tension plus stitch tension can team up, and many people stitch tighter when they’re focused or rushing.
Quick fix: Take the fabric out of the hoop and see if it lies flat. Washing a finished piece can help fabric relax, but if it’s not laying mostly flat at this stage, it’s worth fixing sooner rather than later. If it does lay mostly flat, you may decide to keep going.
Bulky starts and ends
What it looks like: little bumps under the stitches, or shadows under light colours.
Why it’s easy: knots feel like the simplest option, and many patterns don’t teach neat starts.
Quick fix: If it’s not visible from the front, you can usually leave it. If it’s clearly showing through light stitching, unpick that small area and restart that thread with a flatter start.
Backstitch surprises
What it looks like: the piece looks strange until the outline goes in, then it suddenly works.
Why it’s easy: backstitch changes the whole look, and it’s hard to judge mid-way.
If you’re unsure about a section, test the backstitch on a small part first. It’s often enough to show you whether the stitching needs changing.
My stitches aren’t covering the fabric (the holes look big)
What it looks like: you can see more fabric than expected, holes feel obvious, coverage looks thin up close.
Why it’s easy: coverage changes with fabric count, strand count, lighting, and how your stitches sit.
Quick fix: First, step back. A little fabric showing through is part of the look, and it can add texture and dimension, especially in lighter areas. If it still looks thin from normal viewing distance, try one of these adjustments:
- loosen your tension a touch
- let the needle hang to untwist the floss
- in areas that really show, railroading can help the strands sit neatly side-by-side
If you’re early in a project and you know you want fuller coverage, test one more strand on a scrap for the next piece, or in a tiny corner if you like.
Fixing cross stitch mistakes
Use this section when you want the “how” rather than the quick answer.
Option 1: Leave it and keep stitching
If it passes the checklist, keep going.
Option 2: Local unpicking (a small, targeted fix)
Best for one wrong stitch, a small wrong-color patch, one symbol mistake, or a messy patch.
- Turn your work over and find the stitches to remove (it’s often easier from the back).
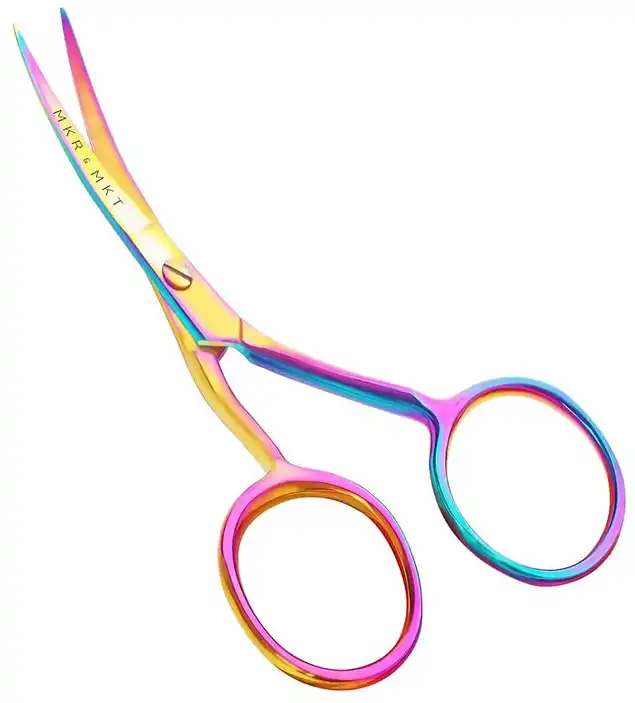
- Unpick a few stitches at a time. You may need to very carefully cut your stitch – just the top of the cross, not the whole stitch! – to be able to pull it out. Very sharp embroidery scissors are the go for this.
- Pull out short lengths, not long yanks. Keep trimming the floss as you pull it out so that you get fewer knots.
- Use fresh floss when you move on.
Option 3: Frog back to a safe point
Best for a miscount that affects the surrounding design, when you used the wrong color, or when you’re no longer sure where the mistake started
- Find the last spot you’re completely confident is correct.
- Mark it on the pattern (or take a quick photo if you’re working from a screen).
- Frog back to that point.
- Place a few “check stitches” before you continue, then confirm you’re aligned.
Option 4: Restart (rare, but sometimes worth it)
This is usually only worth it for borders and symmetry errors, or when you’ve accidentally rotated your fabric so you’re stitching in the wrong place (3 times on the same piece for me….)
Restarting doesn’t mean you failed. It means you’re choosing the result you want.
How to frog without wrecking your thread or fabric
- Use good light.
- Pull short lengths.
- Cut and replace if the thread is getting fuzzy.
- Go slowly
- Only use scissors if you can’t avoid it. Rather unpick stitched with your needle, and keep trimming the floss so you’re pulling a short piece.
- If you’re getting tired or irritated, stop and come back later.
Frogging is called frogging because you’ll say “rip it, rip it.” You’re welcome. There’s a lot more jargon to cross stitch – we unravel some of it here.
How to make fewer mistakes next time

Grid. Just do it.
Gridding can make counting and placement much easier, especially on larger pieces or designs with lots of blank space. Though even on a small piece, it really helps you find your way. Really.
And it’s a real strain-saver when you’re jumping between projects.
Use an organization setup that lowers mix-ups
Wrong colors happen when floss starts looking the same, especially at night. A floss organization system makes a big difference.
Use project cards so you’re not juggling symbols in your head
One small thing that helps is copying the key symbols and floss colors onto a project card before you start. It cuts down the mental back-and-forth while you stitch.
Add quick check moments
A quick check at the end of each thread catches mistakes before they spread. Good light helps too, especially with similar colors.
Mark the top of your fabric (so you always know which way is up)
This one got me recently.
I was stitching a tiny kit someone gifted me. The Aida was too small for a hoop, so I was just holding it in my hand.
It took a while to figure out which way was actually up! I put a couple of stitches in a high-contrast thread near the top edge of the fabric so I wouldn’t turn it again. Then I frogged everything that wasn’t ‘up’. A whole night’s stitching gone. Sheesh.
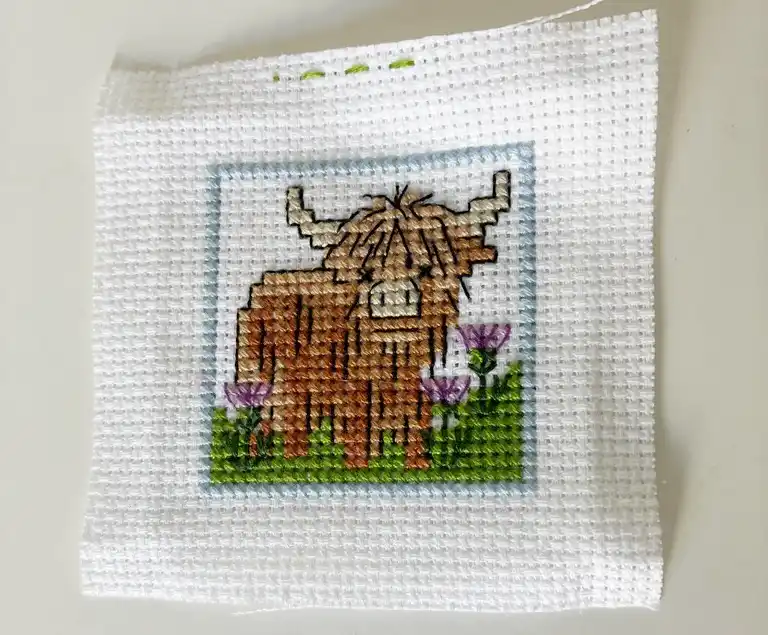
I put it down a couple of times to re-thread the needle, picked it back up, and somehow gave it a quarter turn. I stitched away happily for a while, then realized nothing made sense because I’d been stitching in the wrong direction. And I wasn’t even sure which way was up anymore. (Cue eye roll and mega sighs. Might’ve been some language…)
About perfection
One of the reasons I love cross stitch is because the crosses are so neat and regular. It soothes my brain! But perfect really is optional, despite what we’ve learned our whole lives.
There’s an old idea that shows up across time and cultures, and I think it’s worth remembering when cross stitch starts feeling like an IQ test: humans make things by hand, so they come out hand made! That usually means: not perfect!
Sometimes people frame that as a spiritual belief (only the divine is perfect). Sometimes it’s framed as a craft belief (handmade work is meant to have a bit of life in it). Sometimes it’s told as a story about leaving a small irregularity on purpose (a piece that’s too perfect can trap your soul, the imperfection is a way for your soul to come back to you).
If a small mistake isn’t changing the shape, pulling the fabric, or failing the 10-foot rule, you’re allowed to leave it (and the only permission you need to do that is your own!).
Finish the piece. Enjoy it. Let it look like it was stitched by a person.
Cross stitch is meant to feel good. Sometimes the satisfaction of finishing the project and enjoying it, outweighs that endless chase for a stitch-perfect result.
Quick FAQ
Can I add missing stitches later?
Usually, yes. If you can still clearly see the holes and you can get the needle in neatly, you can add them.
Do I have to frog if I’m one stitch off?
Not always. If it changes the shape or symmetry, it’s often worth fixing. If it’s in a busy area and you can’t see it from normal viewing distance, you may choose to leave it.
Why does my fabric look wavy after stitching?
Most often it’s tension. Tight hoop tension plus tight stitching can cause puckering or rippling. If it won’t lie flat out of the hoop, it’s worth addressing.
Why do the holes look big in my cross stitch?
Fabric count, strand count, and tension all affect coverage. Up close, holes often look bigger than they do when the piece is viewed normally. But chances are, it’s because your stitches are too tight. They should just sit neatly above the fabric, not floppy, not tight.
How many strands should I use on Aida?
It depends on the fabric count and the look you want. Many stitchers use 2 strands on 14 ct Aida, and adjust from there based on coverage and personal preference.
Mistakes are part of cross stitch
Use the checklist, fix what must be fixed, let the tiny stuff go, and keep getting lost in cross stitch.
And if you do end up with one missing stitch that only you know about, there’s a decent chance you’ll laugh about it later.
New to cross stitch? Our cross stitch for beginners guide brings all the basics together in one place.


Leave a Reply